EASY APPLE TART W/ MAPLE WHIPPED CREAM

IMG_1864.jpg

It’s the final countdown! We are just a couple of days away from Thanksgiving and I am so ready for it. Since I went to a Friendsgiving party this past weekend, where I brought two desserts (including my pumpkin cheesecake), Brussels sprouts, and my sangria, I feel like it was a warm-up for the actual day. The Friendsgiving party was a lot of fun and had 16 people in total which is double the amount of people that I’ll be with on Thanksgiving. So even though there will be less mouths to feed on Thursday, I’ll be contributing much more food and helping out in all departments. It will definitely be more work but I'm excited to do it all while being with my family.

I wanted to give you one last Thanksgiving dessert, and even though this recipe is being posted just a couple of days before the big day, it requires less time and effort than most desserts made for the holiday (cough pumpkin cheesecake cough). We’re talking about an apple tart today, and this recipe in particular is one of the simplest apple tart recipes out there. If you want an apple dessert on your dinner table Thursday night, but the idea of baking a deep dish apple pie is daunting to you, then this recipe is perfect for you.

IMG_1746.jpg

This apple tart is baked in a fluted tart pan, which makes it almost fool-proof in the sense that you can’t mess up the shape. Unlike apple pies where you have to worry about making the top crust look all neat and pretty, this apple tart has the apples exposed on the top for a beautiful, rustic look. The only crust on top will be any excess dough that is folded over before baking: a step that doesn't require much skill.

If you want to make this tart galette-style, feel free to ditch the pan and mold the dough freeform on parchment paper on a baking sheet. I recommend using the tart pan if you’re planning on traveling to someone’s house for Thanksgiving. That way, you can keep the tart in its cute little pan and not worry about having your galette flying around in the backseat. But if you’re hosting it at your house and don’t have a tart pan, then by all means, go with the galette. Do what works for you!

IMG_1813.jpg

Since this apple tart is so simple when it comes to the flavor, with only sugar and butter being the added ingredients, you have the option to spice it up if you want to. I would recommend adding your favorite apple pie spices: cinnamon, nutmeg, cloves, cardamom, etc and/or a splash of vanilla extract or lemon juice. But honestly, the way I have the recipe written is fantastic and allows you to really enjoy the perfect crust and in-season apples.

I wanted to add a lil something something to finish the tart with, and decided that maple whipped cream was the best bet. Making it is equally as simple as the tart, but having the cream sweetened by pure maple syrup instead of granulated sugar makes it a bit more interesting and autumn-like. If you plan on serving with the whipped cream, I suggest sprinkling only 2 tablespoons of granulated sugar on the tart before popping it in the oven (that’s why I have 2-4 tbsp. of granulated sugar listed in the filling ingredients). But if you don’t plan on eating the tart with whipped cream or ice cream, add a bit more sugar. Again, it’s up to you, so you can make it as sweet as you want!

I hope all of you have a great Thanksgiving and that you get to spend it with the ones you love!

IMG_1850.jpg

Apple Tart and Maple Whipped Cream

Makes (1) 9-inch tart

Recipe adapted from Smitten Kitchen

Ingredients

For the dough:

  • 1 cup all-purpose flour

  • 1/2 tsp. granulated sugar

  • 1/8 tsp. salt

  • 6 tbsp. unsalted butter, softened to the touch, cut into small pieces

  • 4 tbsp. ice cold water

For the filling:

  • 2 lbs. apples (Granny Smith, Golden Delicious, or any other firm/tart apple variety), peeled, cored, and sliced

  • 2 tbsp. unsalted butter, melted

  • 2-4 tbsp. granulated sugar (make it as sweet as you want! I do 2 tbsp.)

To Finish (optional):

  • Apricot preserves/jam

  • Confectioners’ sugar

  • Maple whipped cream (recipe below)

Directions

  1. In a large bowl, whisk together the flour, sugar, and salt. Add 2 tbsp. of the butter to the mixture by working with your hands or a pastry cutter, and rub the mixture together until it resembles course crumbs. Then add the remaining 4 tbsp. of butter and continue to mix until the butter bits are about the size of a pea.

  2. Add about 2 tbsp. of the water to the mixture and stir it in with a wooden spoon. Add the remaining 2 tbsp. of water and stir again. Using your hands, feel if the dough is too dry and if it is, continue to dribble in more water, 1 tbsp. at a time. Do this until the dough comes together and isn’t predominately full of dry sections. Roll the dough into a ball and flatten it into a 4-inch disc. Wrap the disc in plastic wrap and transfer to the refrigerator for at least 30 minutes.

  3. When ready to roll out, allow the dough to sit at room temperature for about 5-10 minutes so it will be more malleable. Preheat the oven to 400°F. On a lightly floured surface, roll the dough thinly out to about a 14-inch circle. Transfer the dough to a lightly greased 9-inch tart pan, and carefully press the dough into the mold, making sure there is an overhang of dough. Fill the pan with as many apple slices as you can, and arrange them in any pattern you like. Fold over the excess dough over the apples, and tuck/crimp it together. With a pastry brush, brush the melted butter over the folded dough and apples. Sprinkle the granulated sugar on. If you’re making the whipped cream, do 2 tbsp. of sugar, if not, go with 3 or 4 tbsp.

  4. Place in the oven and bake for 45 minutes, making sure to rotate the pan every 15 minutes so it gets evenly baked. It will be done when the dough is golden brown and the apples are soft.

  5. (Optional) Heat up 2 tbsp. of apricot preserves and 1 tbsp. of water in the microwave until it becomes a bit liquefied. Brush the mixture on the crust and apples when the tart is slightly cooled.

  6. Serve with a big dollop of maple whipped cream and a sprinkle of confectioners’ sugar.

Maple Whipped Cream

Ingredients

  • 1 cup heavy cream

  • 2 1/2 tbsp. pure maple syrup

Directions

  1. Place the mixing bowl and whisk in the freezer for about 15 minutes.

  2. Add the heavy cream and pure maple syrup to the bowl and whisk until stiff peaks are formed. Whipped cream can be stored in an airtight container for about a day in the fridge. When ready to use, whisk the mixture again for about 15 seconds.

PÂTE BRISÉE + BLUEBERRY GALETTE

IMG_6917.jpg

With Mother's Day coming up this weekend, I figured I would share a few recipes this week that would be excellent for all the mamas out there. Typically, Mother's Day for my family entails some sort of mimosa-filled brunch followed by either shopping and/or going to the beach. Brunch seems to be a tradition that many other families partake in for the holiday, so today I'm providing a brunch "dessert", but let's face it, you can eat it at any time of the day you wish (hello breakfast). 

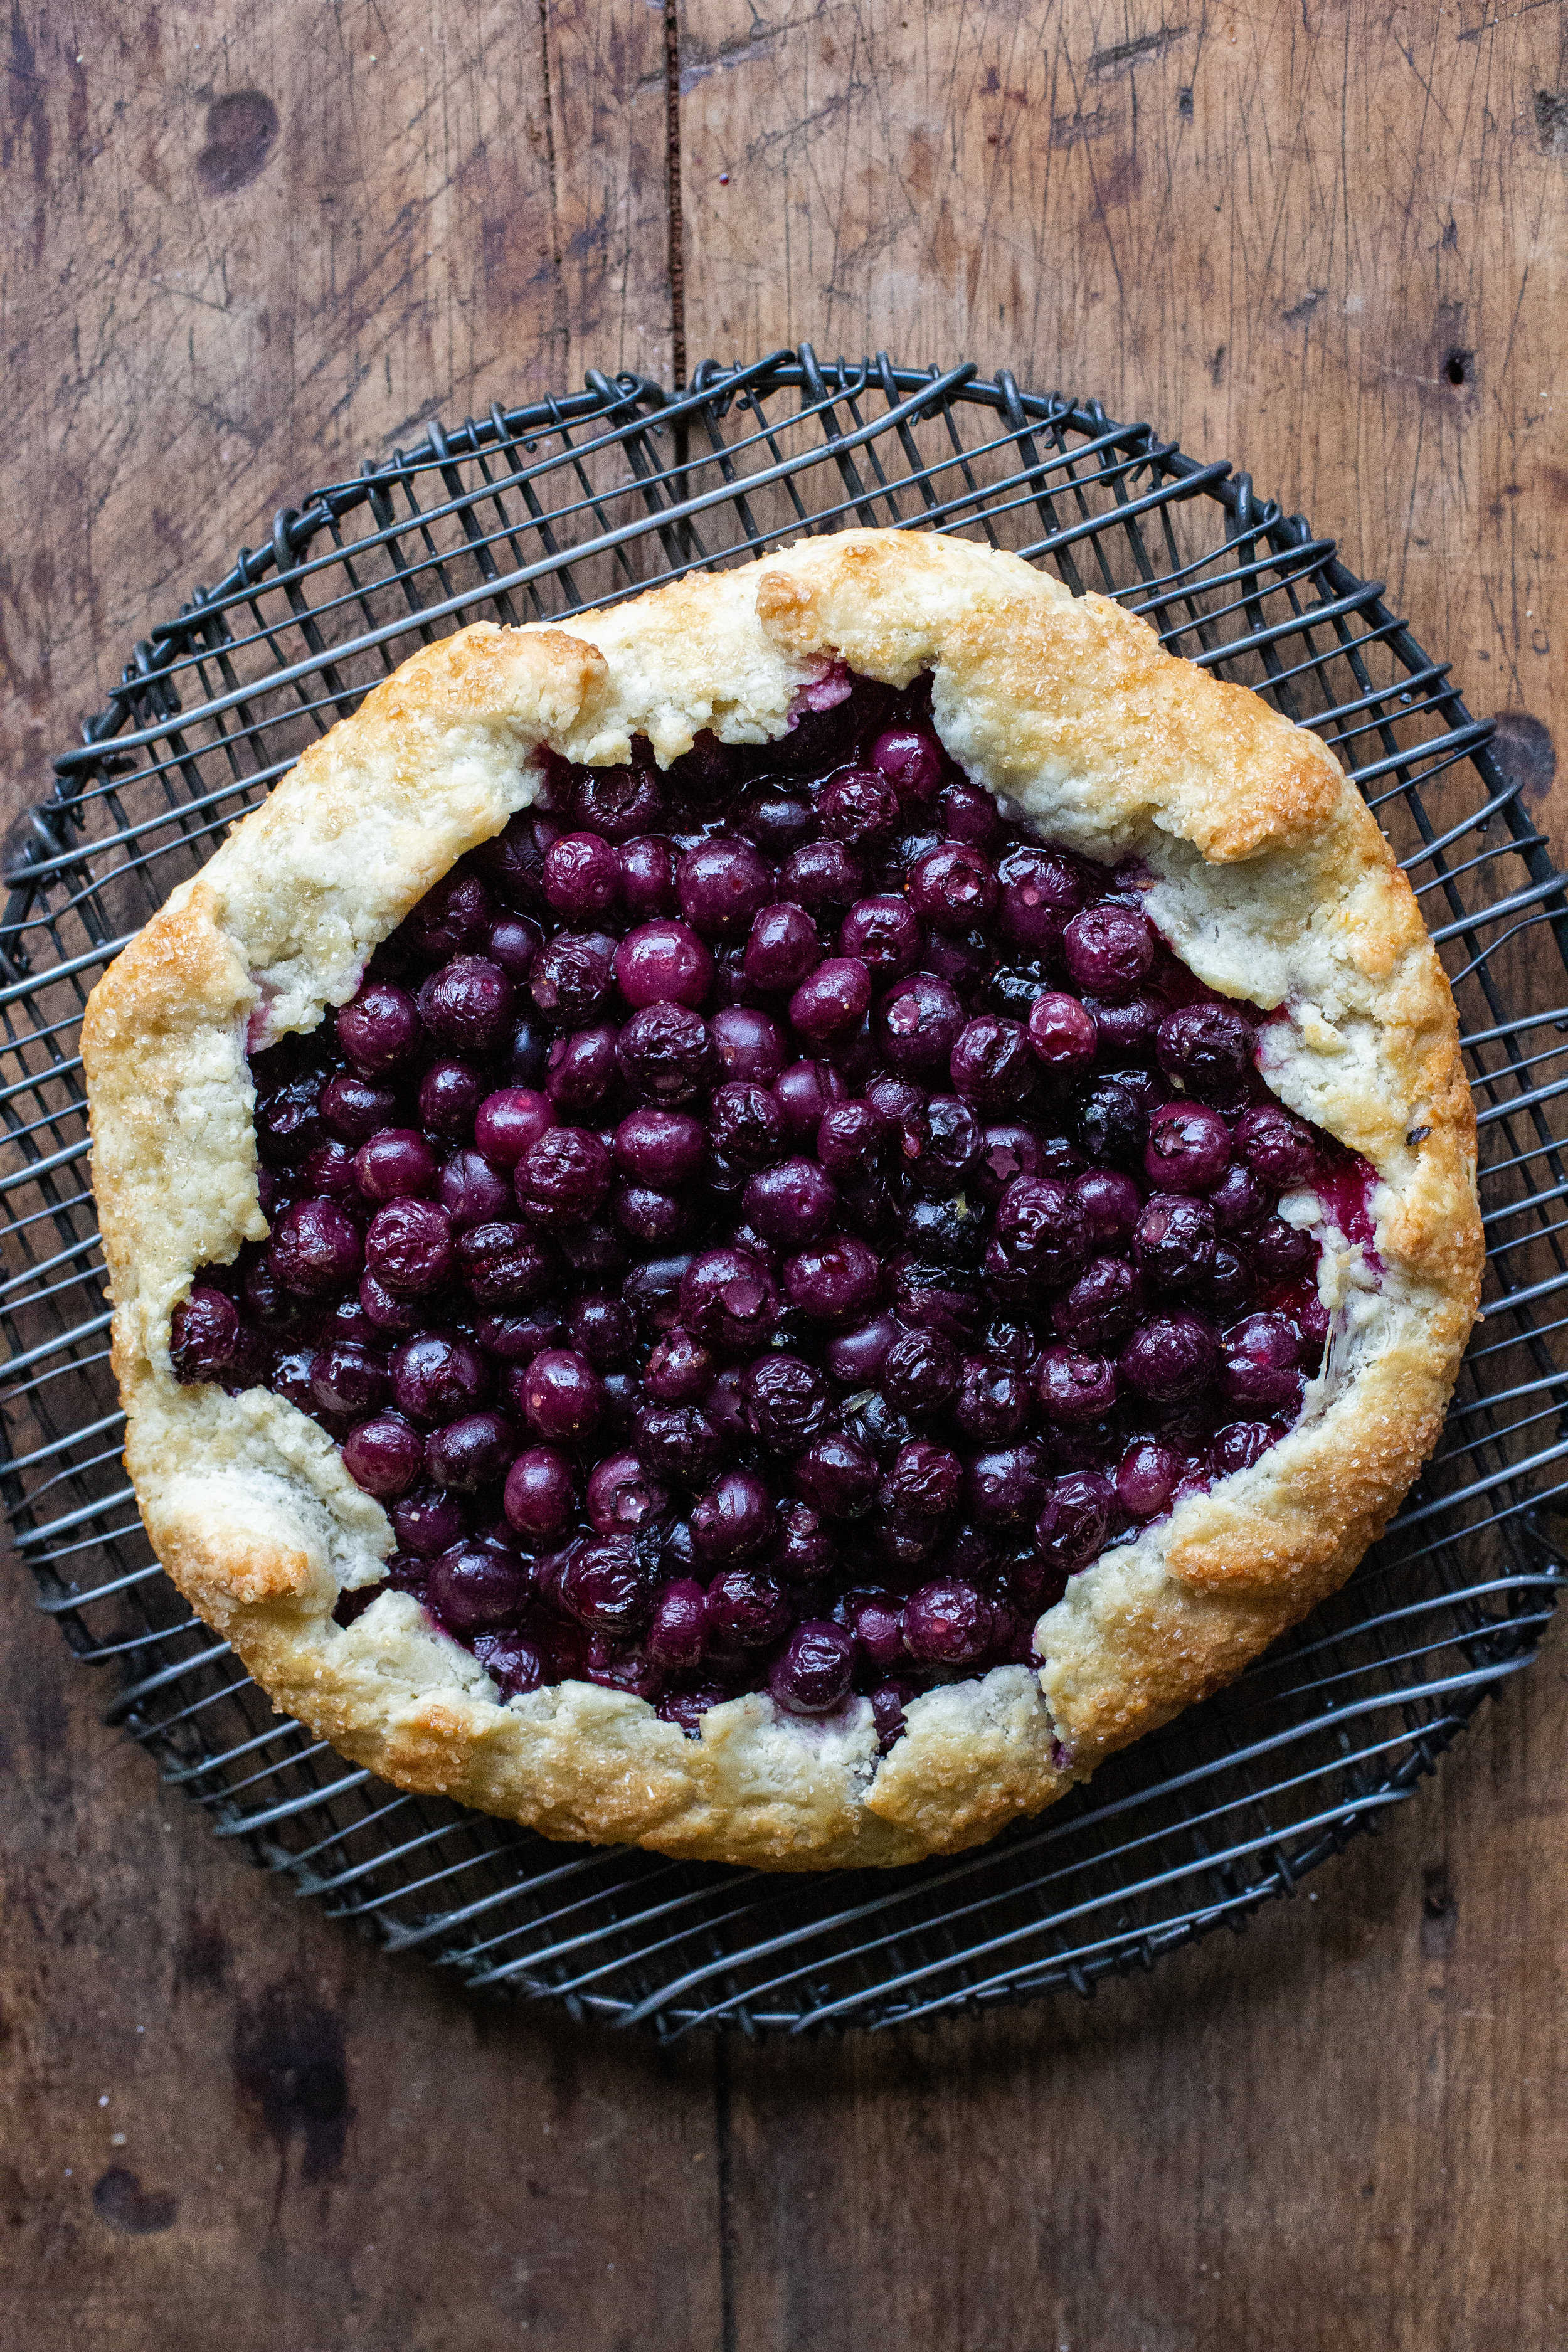
The dessert that I'm referring to is a galette. Galettes are my secret weapon in the baking world that I pull out when I want to impress people but most importantly, they are insanely easy to make. If you aren't aware of what a galette is, it is basically a freeform version of a pie: you do not bake it in a dish of any kind and form the shape of it yourself. With that said, a galette is rustic in nature and that's what makes it so cool; every one is unique in and of itself and there's no right way to do it necessarily. 

IMG_6478.jpg

But in order to have an amazing galette, we must back track a bit and learn how to make the foundation of it - the pie crust, or what we will refer to as the pâte brisée ("pie crust pastry" in French). To me, the pie crust is the single most important aspect of any pie or galette. The filling could be mediocre at best, but as long as the crust is flaky and buttery, I am happy as can be. 

For today's galette, I decided to keep it simple and provide you with a blueberry and lemon filling. But honestly, you can do whatever filling you want to! In the past I've taken the pâte brisée recipe and made a strawberry galette, a nectarine and blackberry galette, and even a lemon cheesecake (for this I used a pie dish). The recipe provided gives you two 8-10 inch pie crusts depending on how thin you roll it out, but you can make about a dozen hand pies with it or one gigantic galette. The sky is truly the limit with this recipe.

IMG_6653.jpg

With that said, the pie crust recipe that I am giving you today has been adapted to be on the sweeter side (1 tablespoon of sugar as opposed to 1 teaspoon) so feel free to scale back. I personally think the crust is perfect, but just know that there is room for adjustment. Also, if you want to use the pie crust for a savory pie, I would omit the sugar fully and leave everything else the same. 

IMG_6723.jpg

Lastly, I want to stress how easy it is to make both (pâte brisée and galette) of these recipes. I've made the pâte brisée countless times and just about every one of those times, I could have sworn that I did something wrong like adding too much ice water or over-mixing the dough, only to find that it still came out PERFECTLY. It really is a fool-proof recipe that I promise beginners can achieve. And once you get to forming the galette, that's honestly the fun part and shouldn't cause you any stress.

So for Mother's Day, make the pâte brisée and choose something to bake that your mother will love. Whether that be a berry galette, a rhubarb strawberry pie, or a dozen hand pies, make it for her and I promise you that you'll get more bonus points than your sister who only gave her a card. 

IMG_6892.jpg

Pâte Brisée

Makes 2 8-10 in. pie crusts

Recipe from Smitten Kitchen

Ingredients

  • 2 1/2 cups all-purpose flour

  • 1 tbsp. sugar

  • 1 tsp. course salt

  • 1 cup (2 sticks) unsalted butter, cold and cut into small pieces

  • 1/4 to 1/2 cup ice cold water

Directions

  1. In the bowl of a food processor fixed with the s-blade, mix together the flour, sugar and salt.

  2. Add in the butter, and pulse for about 10 seconds, or until the mixture resembles coarse crumbs with some larger chunks of butter.

  3. With the food processor on low, pour the water through the feed tube until the dough holds together, but is not sticky or too wet. You can test this by pinching the dough between your fingers - if it holds together, the dough is ready. If it's still too crumbly, add 1 tbsp. of water at a time until you've reached the right consistency. Do not over mix! This ensures a flaky crust.

  4. Turn out the dough onto a clean surface and divide in half. Shape each half into a disc and wrap individually in plastic wrap. Refrigerate the dough for at least one hour, if using soon. If not, the dough can be frozen for up to 1 month (allow the dough to defrost in the fridge overnight if frozen).

Blueberry Galette

Makes 1 galette

Ingredients

  • 1/2 recipe pâte brisée (one of the pie dough halves from the recipe above)

  • 2 1/2 cups fresh blueberries

  • 1 tbsp. cornstarch

  • 1 tbsp. lemon zest

  • 1 tbsp. fresh lemon juice

  • 1/4 cup granulated sugar

  • 1/4 tsp. salt

  • 1 large egg, beaten plus 1 tsp. water (for crust)

  • Raw/turbinado sugar, to sprinkle on crust

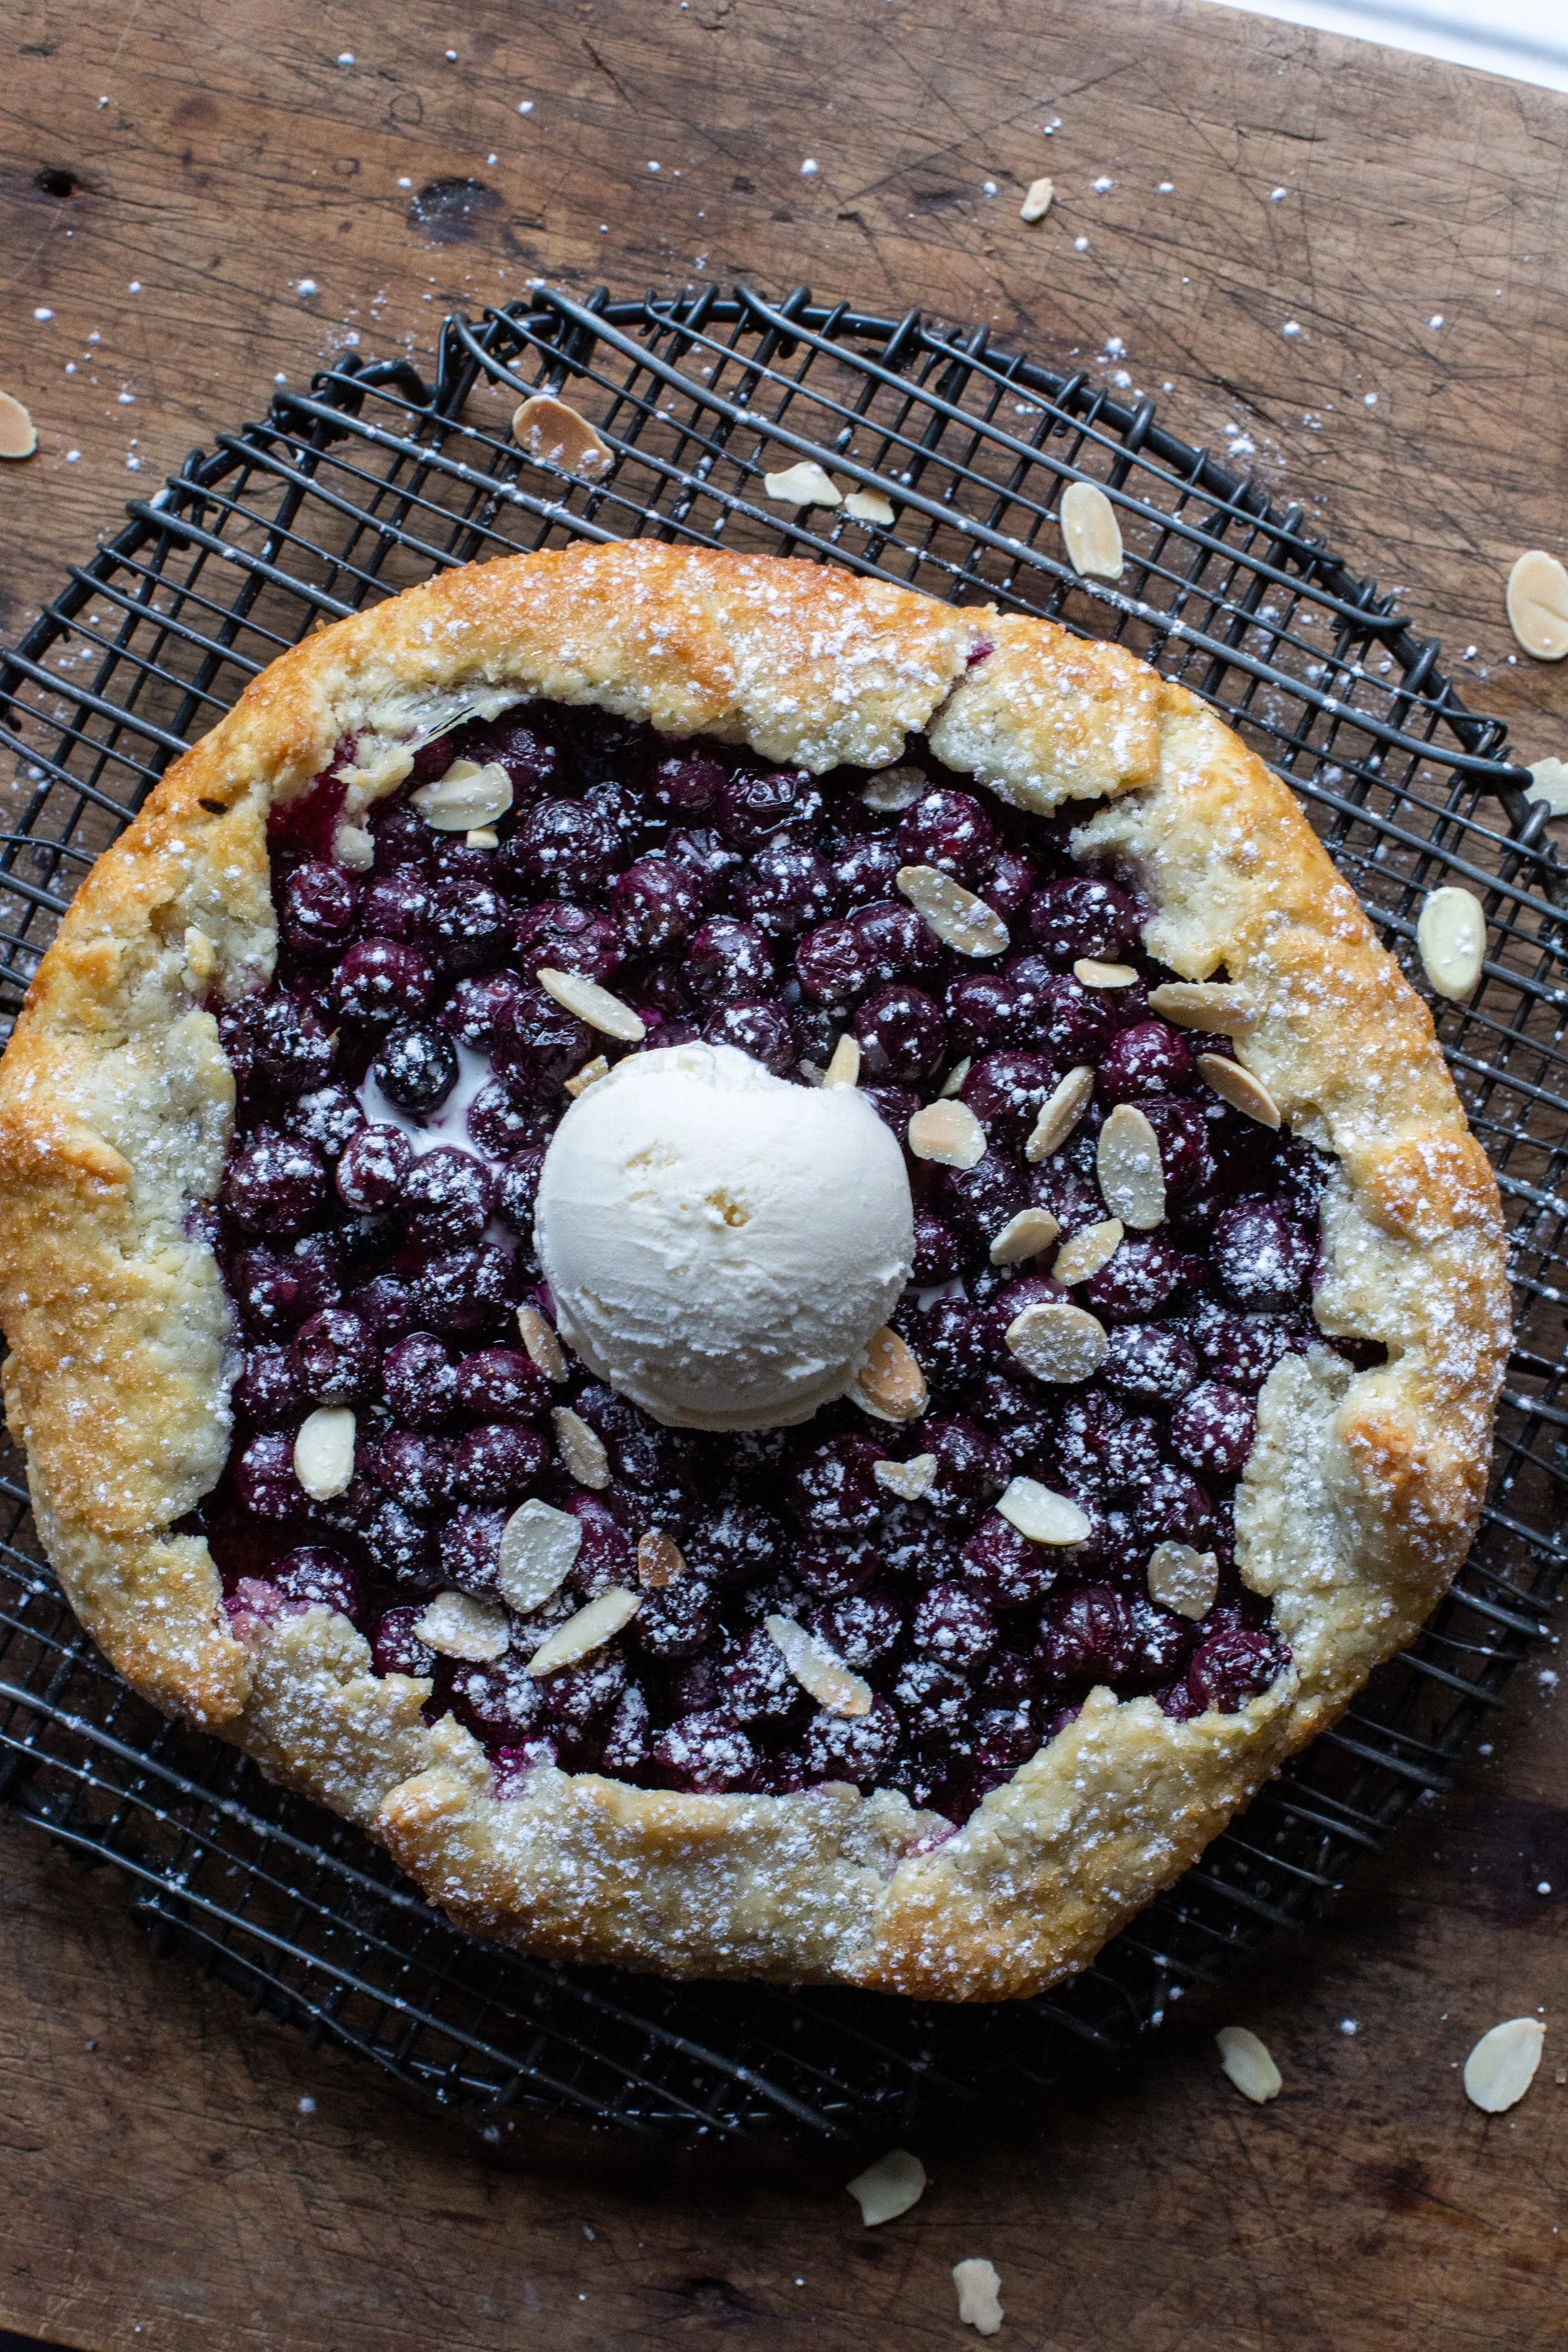
  • Confectioners' sugar, toasted sliced almonds, vanilla ice cream, to finish (optional)

Directions

  1. Line a baking sheet with parchment paper and set aside. Lightly flour a clean work surface and roll out the dough into about 12 inches round, flipping the dough over every once in a while as to prevent it from sticking. Transfer the dough onto parchment-lined baking sheet and refrigerate for about 15-20 minutes.

  2. While the dough is refrigerating, work on making the filling. In a bowl, gently mix the blueberries, cornstarch, lemon zest and juice, sugar, and salt.

  3. Preheat the oven to 400°F. Remove the dough from the fridge and let it sit for about 5 minutes or until it is workable. Spoon the filling into the center of the dough, being careful to leave about 2 inches of a border. If you're worried that not all of the filling will fit, take some out.

  4. Brush the 2 inch edges with the egg wash, and begin to push and tuck the dough inward over the filling, so that it provides a border. Once again, brush the border with the beaten egg and sprinkle with raw sugar.

  5. Bake in the oven for about 35-45 minutes, or until the blueberries are bubbling and the crust is golden brown.

  6. Transfer to a cooling rack, and if desired, sprinkle with confectioners' sugar, sliced almonds, and/or vanilla ice cream.