DEEP DISH APPLE PIE

IMG_7363.jpg

The time has finally come: today I am giving you my FIRST pie recipe after having my blog for over 1.5 years!!! I’ve mentioned numerous times before that pies are just simply not my strong suit and therefore why I’ve been putting it off for so long. My initial goal was to have this recipe up before Thanksgiving, mostly because I promised you all that I would, but of course, with my luck, this didn’t happen. I had made a pie to shoot for this post and although it tasted incredible, crust included, the pie pretty much fell apart while baking. In the end, I simply couldn’t use it to photograph for the blog. To say that I was bummed out is a serious understatement because I had zero time to redo it before the holiday, but mostly because I knew that the recipe was great but I just had trouble executing it. So this last Friday, my very generous and skilled pie-maker aunt, Katia, came over and showed me the way to reach pie success and I couldn’t be happier with the final result. Moral of the story: when all else fails, hopefully you have an aunt that will help you.

Despite my mishap with my prior bake, I actually know a lot (re: TOO MUCH) about pie dough, pie filling, etc. After much research and comparing various recipes across the internet and in my personal cookbook collection, I’ve pulled together tips that I think will give you the most successful pie. If I could conquer cheesecakes and all the nuances that comes with baking those monsters, I knew that pies had to be my next mountain to conquer. I believe, after multiple failed attempts, I have tackled pies.

IMG_7182.jpg

Apple pie à la mode has been in my top 5 favorite desserts for as long as I can remember. Strawberry pie’s great and chocolate silk pie is delicious and decadent but apple pie? Apple pie is perfection. With beautifully baked apples, hints of warm spices, and a flaky, buttery double-crust, no other pie beats apple pie. Therefore, it was an obvious choice for which pie recipe to introduce you all to first on The Vivid Kitchen.

Much like my cheesecake recipes where I gave you multiple tips to executing a perfect cheesecake, I also have a laundry list of tips when it comes to the pie dough, as well as actually baking the pie. Here they are:

  1. When making the dough, you can either use your hands, a pastry cutter, or a food processor when it comes to cutting in the butter. I personally use a combo of a pastry cutter and my hands, which I think is your safest bet to avoiding overworking the dough. And when I add the ice water, I only use my hands so I could get a feel for whether I needed more water or not. It’s also vital that your ingredients, namely the butter and water, are very cold! I actually use frozen butter but straight from the fridge is fine.

  2. After making your pie dough, you need to refrigerate it for at least two hours before rolling it out. Once properly chilled, allow the dough to sit at room temperature for 10 minutes so it won’t be brittle when rolling out. You can refrigerate the dough for up to 5 days or freeze them for up to 3 months. Just make sure they are properly wrapped in plastic.

  3. When rolling out the dough, roll the pin only away from you, not back and forth. This ensures that the dough will be rolled out evenly. Also, after every couple of rolls, rotate the dough (pick it up off the floured-surface and rotate it) as to prevent it from sticking.

  4. When it comes to which kind of apple to use, I would suggest apples that are on the tart side, like Granny Smith or Pink Lady. Other options that are a bit sweeter are Honeycrisp or Braeburn. And when it comes to slicing your apples, which you want to be very thin, like 1/4” thick, I highly recommend using a mandolin. Equally thin apple slices will prevent under cooked apples.

  5. Thicken the apple pie filling with flour. I know some people add cornstarch instead but I actually read that adding flour is best for apple pies in particular, because apples are a less juicier fruit. And in order to prevent the pie from being too sweet as well as keeping the apples from browning, add a bit of apple cider vinegar. You could use lemon juice instead if you don’t have it.

  6. Once your pie is filled and the top crust is added (with whichever topping design you choose to do), freeze the entire pie for at least 30 minutes before popping it in the oven. This locks in the design that you’ve chosen as well as keeps the butter from leaking while baking.

  7. Place a rimmed baking sheet in the oven while it preheats, and place the pie on it while it bakes. This helps not only if there is any juice spills from the pie but most importantly, it combats the dreaded “soggy bottom” that all pie bakers try to avoid.

  8. Bake the pie at a higher temperature at first (425°F) in order to set the dough, and then bring it down to 375°F for the remainder.

  9. Use a pie shield or a makeshift foil ring if the edges of the pie brown faster than the center.

  10. When the pie is baked, allow the pie to cool COMPLETELY before cutting into it. This is very hard to do because I know we all want a piece of warm apple pie with melted vanilla ice cream on top, but you can always warm up each slice after cutting.

Not too bad, right?

IMG_7248.jpg

If you have no desire to do a double-crust apple pie or it all seems like too much work, then simply half the pie dough recipe below and do a streusel/crumb topping. I have no complaints when it comes to an apple crumb pie.

I know we’re well past Thanksgiving but apple pie is definitely Christmas dinner appropriate, so hopefully this recipe and my tips will come in handy for you!

IMG_7377-2.jpg

All-Butter Pie Crust

Makes enough for a double-crust pie

Recipe adapted from NY Times Cooking

Ingredients

  • 2 1/2 cups all-purpose flour

  • 1/2 tsp. fine salt

  • 1 cup (2 sticks) unsalted butter, cold (preferably frozen) and cut into small pieces

  • 1/2 cup ice water, may use more or less

Directions

IMG_7297.jpg
  1. In the largest bowl you have, mix the flour and salt together. Add the butter pieces and gently toss them so they get coated with the flour.

  2. Using a pastry cutter and/or your hands, cut the butter into the flour until the mixture is crumbly and the butter pieces resemble the size of a pea.

  3. Make a well in the center, and begin to add the water in 1 tablespoon at a time. After each addition, gently stir the water in with either your hands or a wooden spoon. Depending on the climate in which you are making the dough, you may use all of the 1/2 cup of water or even more (if it’s dry, the flour will need more water versus a humid climate that wouldn’t need as much). You’ll know when the dough is ready when a handful holds together and doesn’t crumble. The dough will not be wet or sticky, but still a bit dry.

  4. Transfer the dough to a lightly floured surface and knead it a couple of times until it comes together. Form the dough into a ball and cut it in half, and then form those halves into discs. Tightly wrap each disc in plastic wrap and refrigerate for at least a couple of hours. The dough can refrigerate for up to 5 days and can be frozen for up to 3 months (thaw overnight if you choose to freeze them).

Deep Dish Apple Pie

Yields (1) 9-inch deep dish, double-crust pie

Recipe adapted from Bon Appétit Magazine

Ingredients

  • All-Butter Pie Crust (recipe above)

  • 3.5 lbs. apples, peeled and sliced very thinly (Pink Lady, Honeycrisp, Braeburn, Granny Smith are good options) - *best way to get even, thin slices is by using a mandolin

  • 3/4 cup granulated sugar

  • 1/4 cup brown sugar, packed (light or dark works)

  • 1/4 cup all-purpose flour

  • 3/4 tsp. cinnamon

  • 1/2 tsp. nutmeg

  • 1/8 tsp. allspice

  • 1/4 tsp. kosher salt

  • 2 tbsp. apple cider vinegar or fresh lemon juice (I strongly recommend the former)

  • 2 tbsp. unsalted butter, cut into small pieces

  • 1 large egg

  • Turbinado sugar

  • Vanilla ice cream and caramel sauce, to finish

Directions

  1. Take out one of the pie dough discs from the refrigerator and let it sit out at room temperature for 10 minutes. On a lightly floured surface, roll out the dough to about a 13 inch diameter. Make sure to rotate the dough every couple of turns and to roll the rolling pin away from you, not back and forth.

  2. Gently pick up the rolled out dough (best way to do this is by rolling it onto the rolling pin itself) and place it in a 9-inch deep dish pie dish (glass, ceramic, or aluminum work fine). Press the dough into the corners of the dish and leave the excess dough hanging over. Refrigerate while working on the apple filling.

  3. Combine the apple slices, both sugars, flour, spices, salt and apple cider vinegar (or lemon juice) in a large bowl. Transfer the filling into the chilled pie dish - I would avoid just dumping the apples in and rather suggest using your hands to mindfully stack the apples into even layers as to prevent empty pockets. Do not flatten the apple slices but form them into a dome instead. Scatter the 2 tbsp. of butter pieces over the apples.

  4. Take out the second pie dough disc, let it sit out for 10 minutes, and roll it out to about a 12 inch diameter. You have the choice to do whatever you want for the top crust… you can do a lattice like I did or leave it as is. If you’re not doing a lattice, make sure to cut about 4-5 slits around the center of the top crust to allow steam to escape. Place the pie in the freezer for 30 minutes. Meanwhile, preheat the oven to 425°F, move the rack to the bottom of your oven, and place a rimmed baking sheet on top.

  5. In a small bowl, whisk the egg and 1 tbsp. of water and brush this over the top crust. Sprinkle generously with turbinado sugar.

  6. Bake the pie on the preheated baking sheet at 425°F for 30 minutes, then rotate the pie, drop the temperature to 375°F and bake for another 30-40 more minutes. The pie will be done when the crust is a deep golden brown and the juices are bubbling. If any part of the top crust is browning too quickly, gently tent foil over the top or use a pie shield.

  7. Allow the pie to cool completely before cutting into it. Serve with vanilla ice cream and caramel sauce.

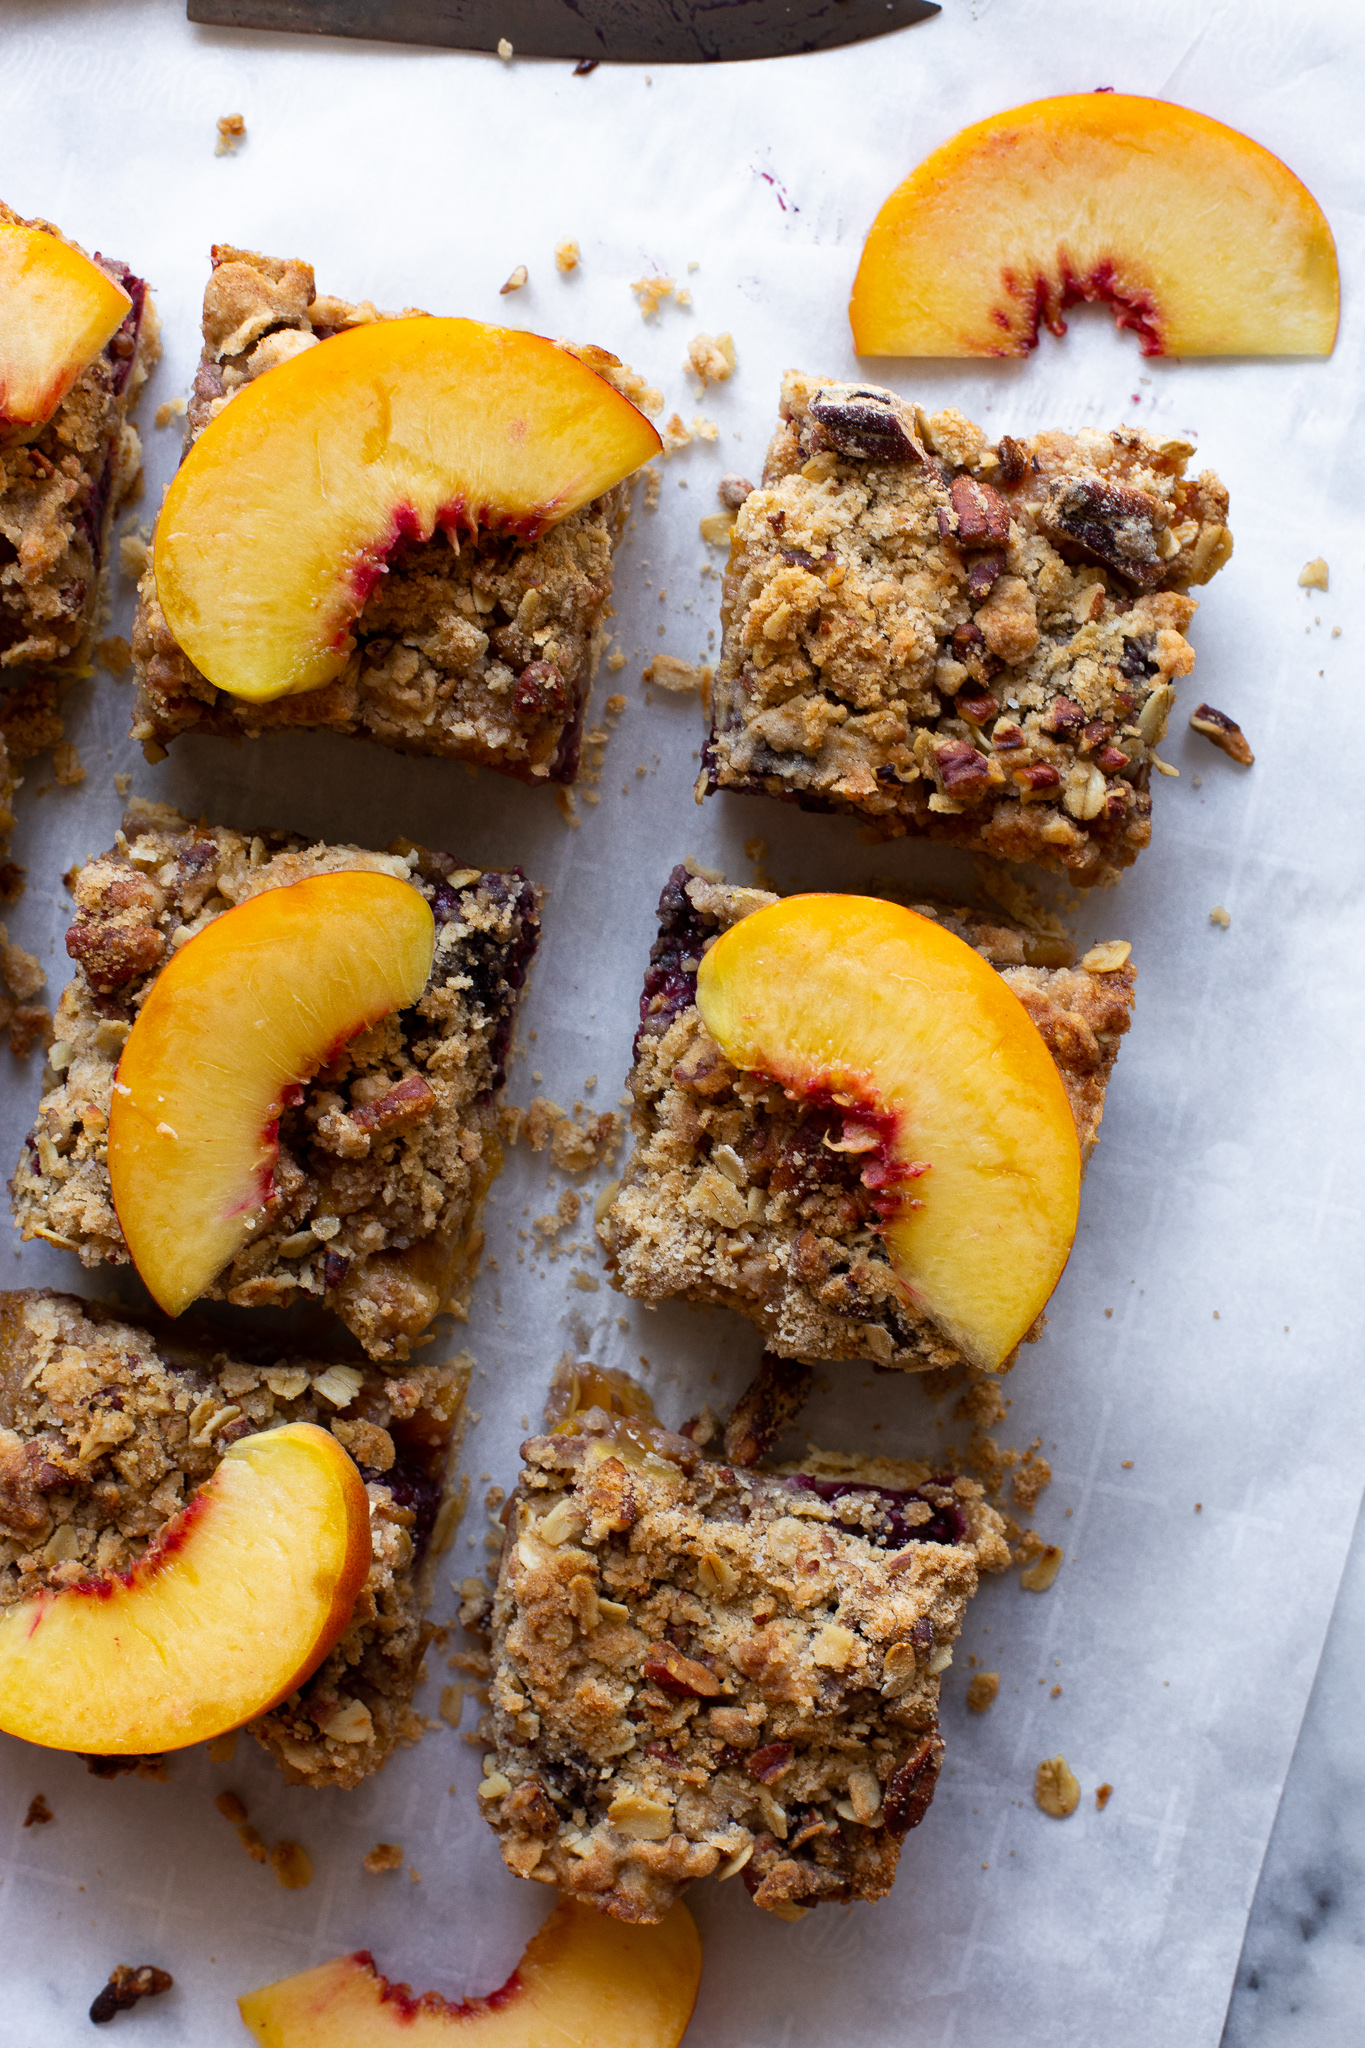
PEACH + BLACKBERRY PIE BARS

IMG_3731.jpg

Hi. It’s me. The food blogger who has been posting recipes for about a year and a half now and who still hasn’t shared ONE traditional pie recipe yet! I believe I’ve mentioned it before in a previous post, but pies aren’t my strong suit and if someone asked me to make them a pie, I would most likely have a panic attack and then pick one up from Marie Callendars and said I baked it.

When I tell other bakers that I’m nervous of making pies, they’re usually understanding… if you didn’t grow up baking them or at least practice the process over the years, pies can definitely be daunting. There’s the stress of making the dough, from having to worry about your warm hands melting the butter to allowing the dough to chill in the fridge. You have to be proactive when it comes to avoiding a “soggy bottom”, which means figuring out if you need to parbake the crust or not. And then (what I fear the most) is making your pie look beautiful whether it’s with a perfect lattice crust or the cutesy little dough flower or leaf cut-outs that you see bakers doing on Pinterest and Instagram. I am not an arts and crafts kind of person (I can barely cut in a straight line) and therefore the thought of decorating a pie is just not fun to think about. I’m not saying pie is the hardest thing to make! I’m just saying that there is a lot to consider when attempting to bake one.

public.jpeg

So, this is why I LOVE making galettes, tarts, and today’s recipe: pie bars. These three categories of desserts are all super forgiving in almost every step along the way and just seem to be much less fussy than when tackling a pie. Since I’ve given you a recipe for a galette and a tart, it’s time to work with the very straightforward and simple recipe of pie bars. Pie bars take everything you would normally find in a pie - a crust, a filling of your choice, and a topping in the form of a crisp or streusel. No difficult lattice work to be found here!

And mark my words, I promise that I will do an apple pie recipe around Thanksgiving time. Apple pie à la mode is up there when it comes to my favorite desserts, so I will definitely work on perfecting a recipe to share with you all.

public.jpeg

Since we’re in the midst of stone fruit and berry season, I thought we’d take a fruit from each category and marry them together for these pie bars. I choice to work with yellow peaches and blackberries, but feel free to switch it up to your liking and substitute the stone fruit with apricots, nectarines, plums or pluots, and the berry component with raspberries or blueberries.

Sidenote: I visited the Laguna Beach Farmers Market this past weekend and tried the most amazing stone fruit I’ve come across yet: cherums! It’s a hybrid of cherries and plums and they’re so crunchy and flavorful, and they were the perfect dessert for our beach picnic later that day. Try to get a hold of them at your local farmers market! Picture of them above (along with the pluots that I also bought).

IMG_3707.jpg

The crust for these pie bars isn’t exactly a typical pie crust recipe, but actually the shortbread crust that I used for my lemon bars. This crust is made with three ingredients (flour, powdered sugar, and melted butter) and comes together in less than 5 minutes. There’s no chilling, no rolling out; all you need is to mix the ingredients together and then press it into the bottom of the baking dish with your hands or a spatula.

As for the filling, you can play around a bit with a couple of things: 1) how much sugar you’ll be adding and 2) what kind of spices you wish to use. If your fruit isn’t exactly at the peak of ripeness, I would suggest adding an additional tablespoon or so of sugar to what I have suggested below in the directions, and if your fruit is perfectly sweet, follow the recipe as written. For the added spices, I stuck to those that are most commonly found in pies, but you can use your favorites whether than means adding only cinnamon, a combo of nutmeg and ginger, or a little bit of each.

Lastly, for the topping, we’ll be using a crisp mixture, which basically means a streusel topping but with old fashioned/rolled oats added. I kept it simple and added only a bit of cinnamon to my mixture but once again, you can add more spices to your liking, but I’d recommend sticking to adding no more than 1 teaspoon of spices combined. I also added chopped pecans for extra crunch and flavor, but adding nuts is totally optional.

public.jpeg

Peach and Blackberry Pie Bars

Makes about 9-12 bars, depending on size

Ingredients

For the crust:

public.jpeg
  • 1 cup all-purpose flour

  • 1/4 cup confectioners’ (powdered) sugar

  • 6 tbsp. unsalted butter, melted

For the filling:

  • 2 medium unpeeled peaches (about 1.5-2 cups), chopped

  • 1 (6 oz.) package of blackberries

  • 1/4 cup granulated sugar

  • 1 tbsp. all-purpose flour

  • 1/4 tsp. ground cinnamon

  • 1/4 tsp. ground ginger

  • 1/4 tsp. of ground nutmeg

  • Pinch of salt

  • 1/2 tsp. lemon zest

  • 1/2 tsp. vanilla extract

For the crisp topping:

  • 1/2 cup all-purpose flour

  • 1/4 cup old-fashioned/rolled oats

  • 1/4 cup brown sugar, packed

  • 1/2 cup chopped pecans (optional)

  • 1/2 tsp. cinnamon

  • 1/4 tsp. salt

  • 1/4 cup (half a stick) unsalted butter, chilled and cut into small pieces

Directions

  1. Preheat the oven to 350°F. In a bowl, mix together the melted butter, flour and sugar until well incorporated. The dough will be a bit crumbly. Transfer the dough to an ungreased 8x8 baking dish (alternatively, you can line the dish with a piece of parchment paper if you wish to pull the entire baked good out). Using your hands or the back of a spatula, press the dough evenly into the dish.

  2. Bake the shortbread crust for about 15-17 minutes, or until the dough has firmed up and is golden. Set aside to cool, but keep the oven on at 350°F.

  3. In a large bowl, toss all “filling” ingredients (everything from peaches to vanilla extract) together gently using a spatula. Set aside to allow the fruit to macerate a little.

  4. For the crisp topping, add all ingredients except for the chilled butter to a medium bowl. Mix together using a whisk. Add the butter and use your fingertips to work it into the mixture until crumbs form.

  5. Pour the fruit filling over the slightly chilled shortbread crust and then evenly sprinkle the crisp topping over the fruit (using a spoon or your hand). Bake in the oven for 35-45 minutes, or until the crisp topping is golden brown and the fruit is bubbling. Allow the pie bars to cool completely before cutting into them. Serve with ice cream or whipped cream.

PÂTE BRISÉE + BLUEBERRY GALETTE

IMG_6917.jpg

With Mother's Day coming up this weekend, I figured I would share a few recipes this week that would be excellent for all the mamas out there. Typically, Mother's Day for my family entails some sort of mimosa-filled brunch followed by either shopping and/or going to the beach. Brunch seems to be a tradition that many other families partake in for the holiday, so today I'm providing a brunch "dessert", but let's face it, you can eat it at any time of the day you wish (hello breakfast). 

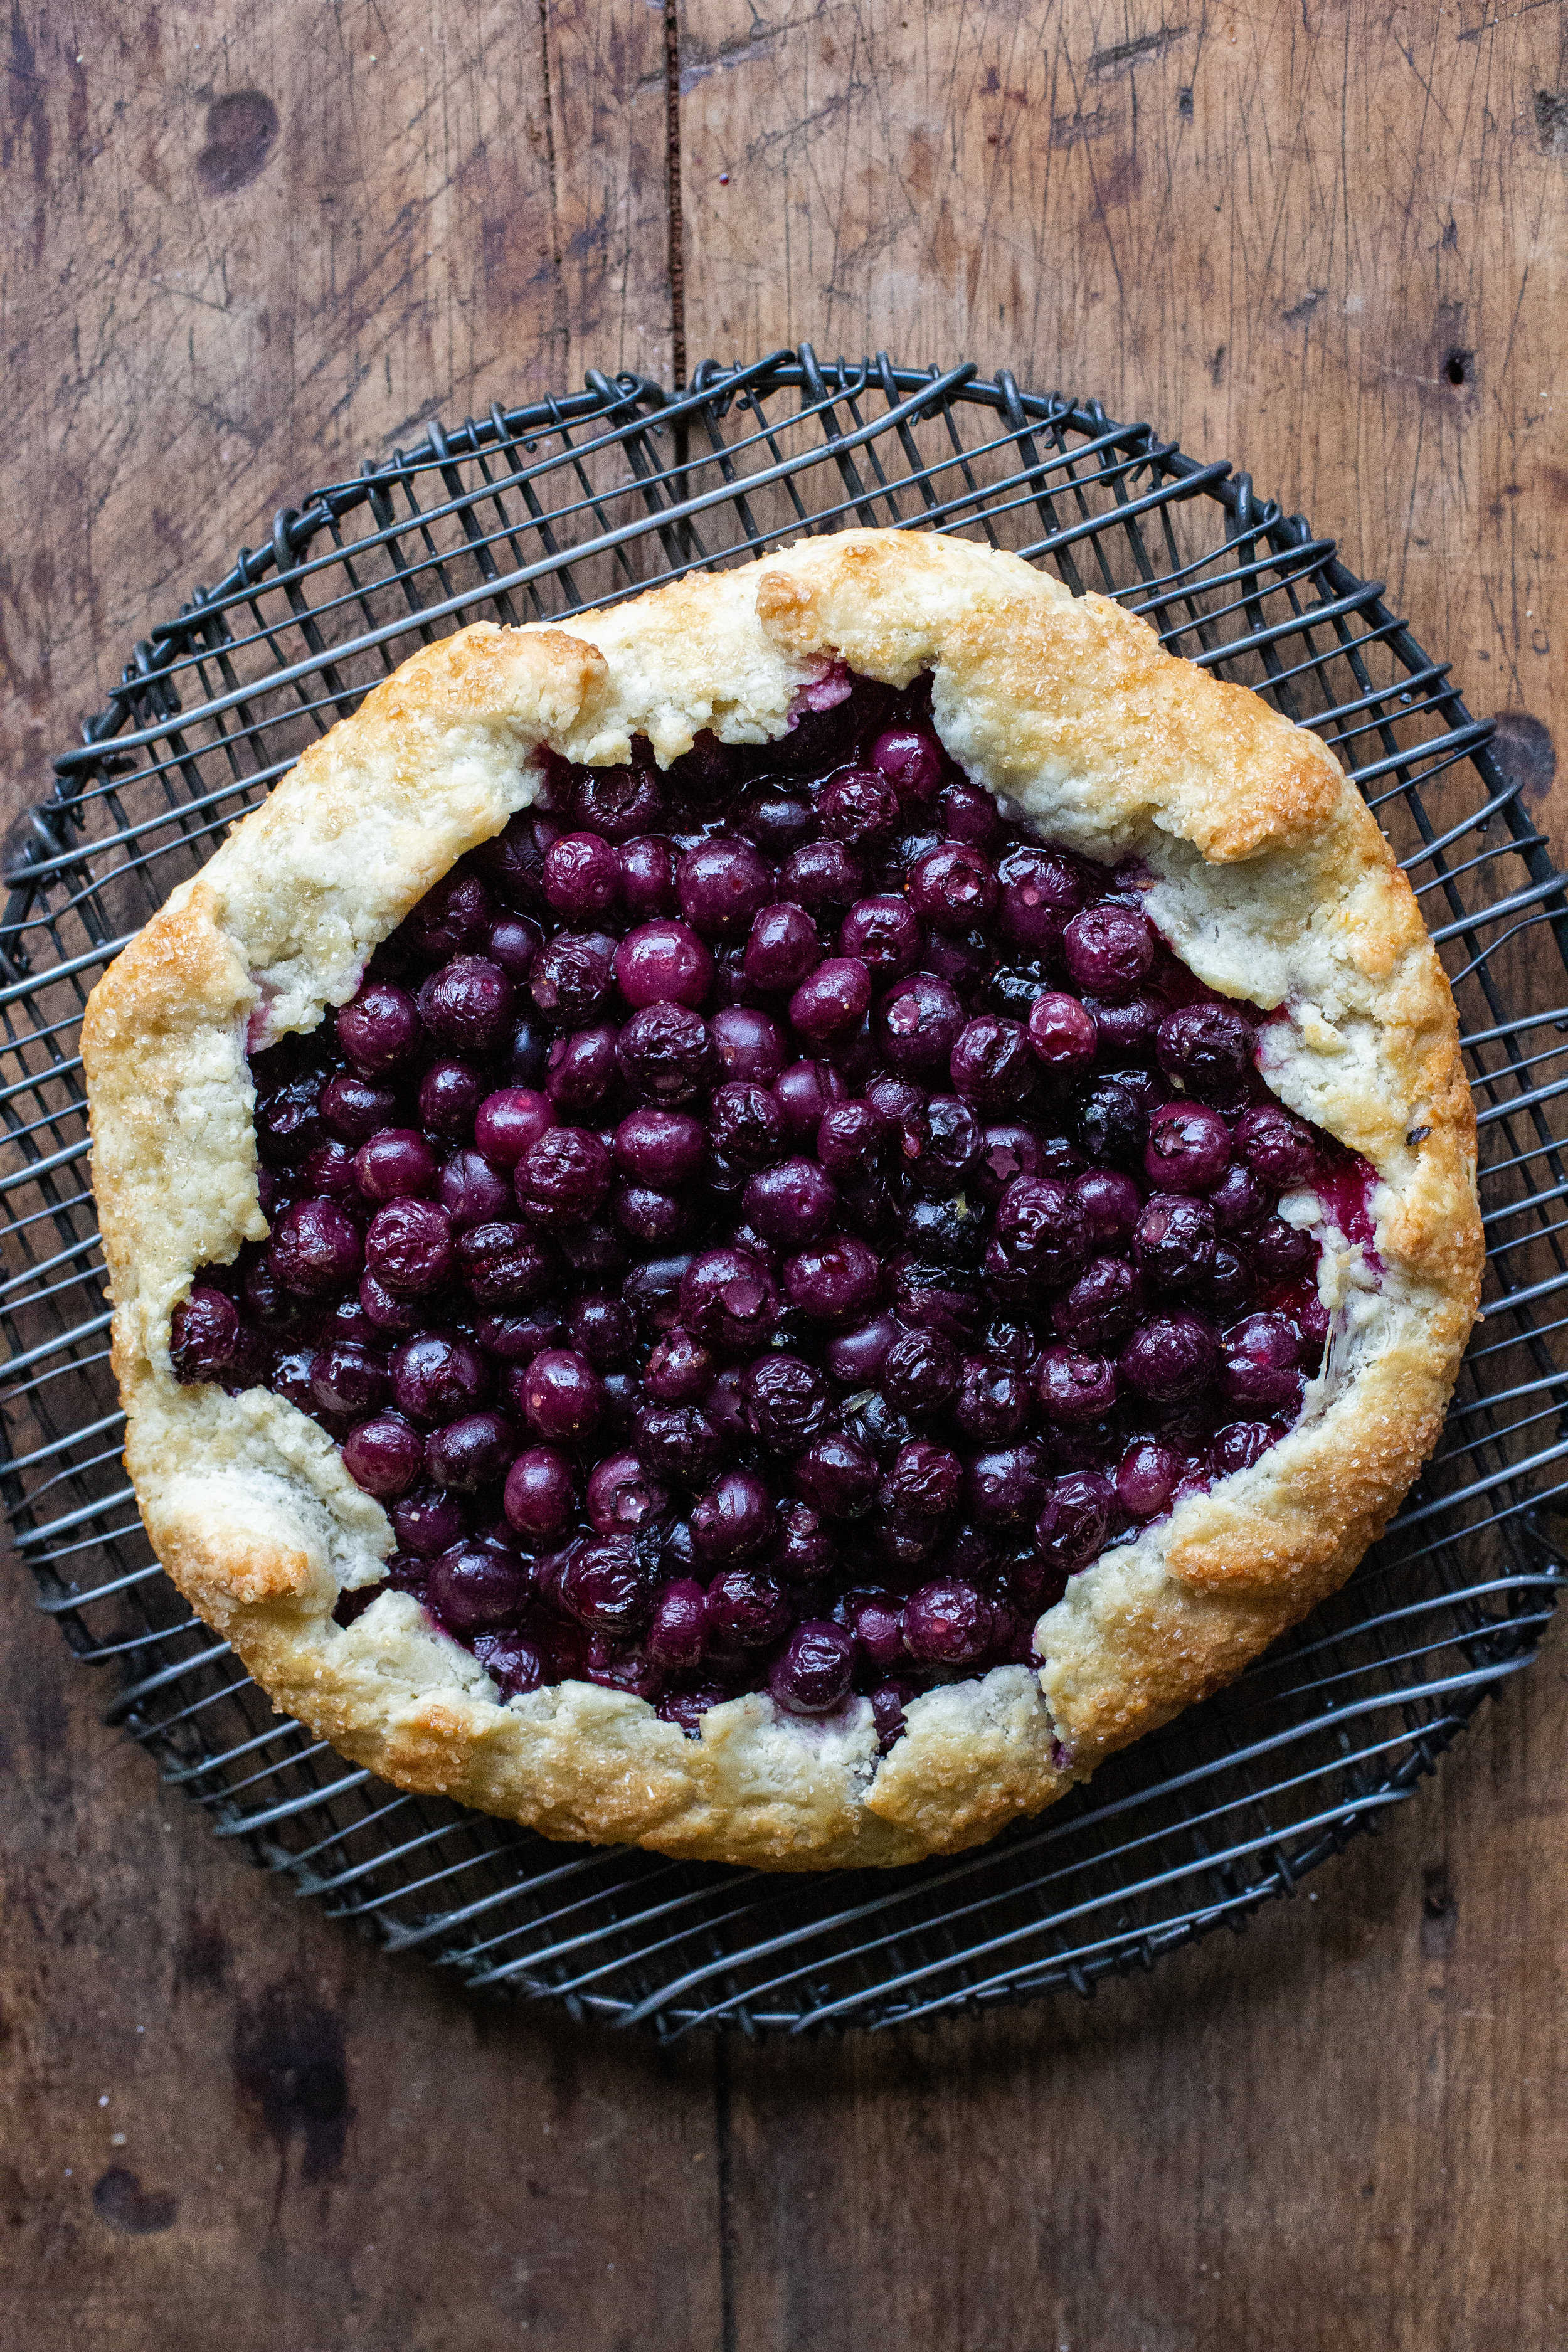
The dessert that I'm referring to is a galette. Galettes are my secret weapon in the baking world that I pull out when I want to impress people but most importantly, they are insanely easy to make. If you aren't aware of what a galette is, it is basically a freeform version of a pie: you do not bake it in a dish of any kind and form the shape of it yourself. With that said, a galette is rustic in nature and that's what makes it so cool; every one is unique in and of itself and there's no right way to do it necessarily. 

IMG_6478.jpg

But in order to have an amazing galette, we must back track a bit and learn how to make the foundation of it - the pie crust, or what we will refer to as the pâte brisée ("pie crust pastry" in French). To me, the pie crust is the single most important aspect of any pie or galette. The filling could be mediocre at best, but as long as the crust is flaky and buttery, I am happy as can be. 

For today's galette, I decided to keep it simple and provide you with a blueberry and lemon filling. But honestly, you can do whatever filling you want to! In the past I've taken the pâte brisée recipe and made a strawberry galette, a nectarine and blackberry galette, and even a lemon cheesecake (for this I used a pie dish). The recipe provided gives you two 8-10 inch pie crusts depending on how thin you roll it out, but you can make about a dozen hand pies with it or one gigantic galette. The sky is truly the limit with this recipe.

IMG_6653.jpg

With that said, the pie crust recipe that I am giving you today has been adapted to be on the sweeter side (1 tablespoon of sugar as opposed to 1 teaspoon) so feel free to scale back. I personally think the crust is perfect, but just know that there is room for adjustment. Also, if you want to use the pie crust for a savory pie, I would omit the sugar fully and leave everything else the same. 

IMG_6723.jpg

Lastly, I want to stress how easy it is to make both (pâte brisée and galette) of these recipes. I've made the pâte brisée countless times and just about every one of those times, I could have sworn that I did something wrong like adding too much ice water or over-mixing the dough, only to find that it still came out PERFECTLY. It really is a fool-proof recipe that I promise beginners can achieve. And once you get to forming the galette, that's honestly the fun part and shouldn't cause you any stress.

So for Mother's Day, make the pâte brisée and choose something to bake that your mother will love. Whether that be a berry galette, a rhubarb strawberry pie, or a dozen hand pies, make it for her and I promise you that you'll get more bonus points than your sister who only gave her a card. 

IMG_6892.jpg

Pâte Brisée

Makes 2 8-10 in. pie crusts

Recipe from Smitten Kitchen

Ingredients

  • 2 1/2 cups all-purpose flour

  • 1 tbsp. sugar

  • 1 tsp. course salt

  • 1 cup (2 sticks) unsalted butter, cold and cut into small pieces

  • 1/4 to 1/2 cup ice cold water

Directions

  1. In the bowl of a food processor fixed with the s-blade, mix together the flour, sugar and salt.

  2. Add in the butter, and pulse for about 10 seconds, or until the mixture resembles coarse crumbs with some larger chunks of butter.

  3. With the food processor on low, pour the water through the feed tube until the dough holds together, but is not sticky or too wet. You can test this by pinching the dough between your fingers - if it holds together, the dough is ready. If it's still too crumbly, add 1 tbsp. of water at a time until you've reached the right consistency. Do not over mix! This ensures a flaky crust.

  4. Turn out the dough onto a clean surface and divide in half. Shape each half into a disc and wrap individually in plastic wrap. Refrigerate the dough for at least one hour, if using soon. If not, the dough can be frozen for up to 1 month (allow the dough to defrost in the fridge overnight if frozen).

Blueberry Galette

Makes 1 galette

Ingredients

  • 1/2 recipe pâte brisée (one of the pie dough halves from the recipe above)

  • 2 1/2 cups fresh blueberries

  • 1 tbsp. cornstarch

  • 1 tbsp. lemon zest

  • 1 tbsp. fresh lemon juice

  • 1/4 cup granulated sugar

  • 1/4 tsp. salt

  • 1 large egg, beaten plus 1 tsp. water (for crust)

  • Raw/turbinado sugar, to sprinkle on crust

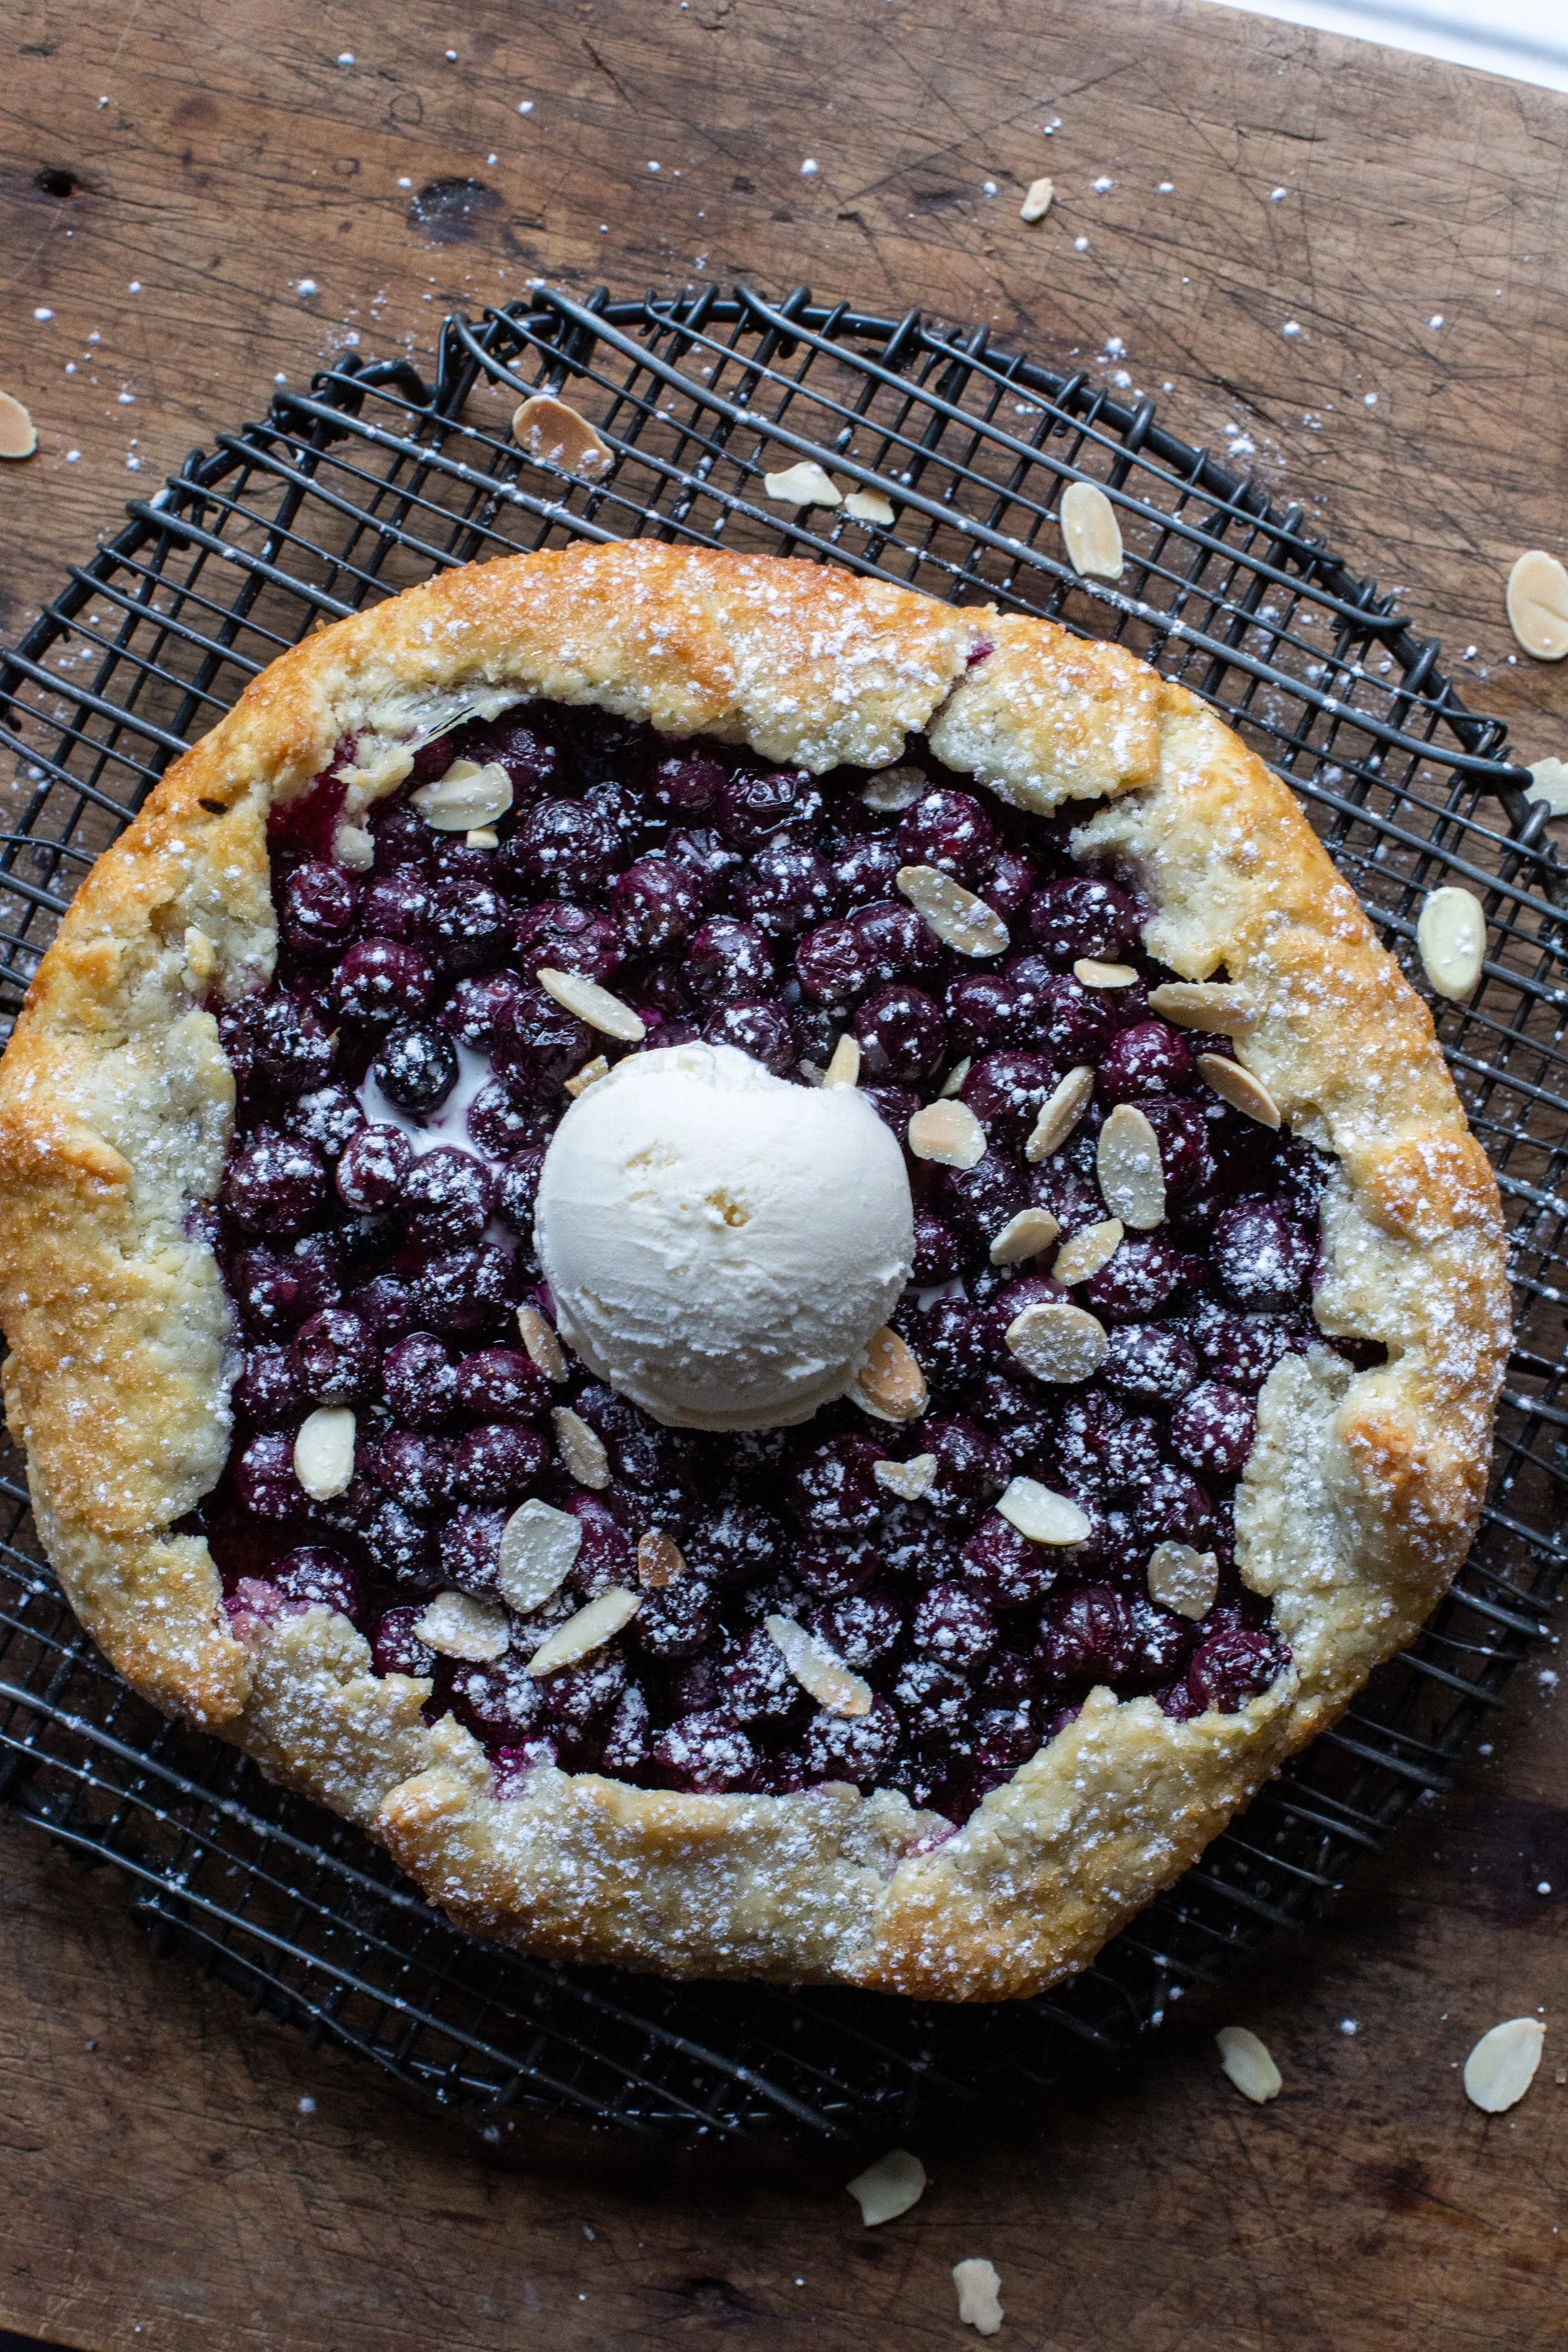
  • Confectioners' sugar, toasted sliced almonds, vanilla ice cream, to finish (optional)

Directions

  1. Line a baking sheet with parchment paper and set aside. Lightly flour a clean work surface and roll out the dough into about 12 inches round, flipping the dough over every once in a while as to prevent it from sticking. Transfer the dough onto parchment-lined baking sheet and refrigerate for about 15-20 minutes.

  2. While the dough is refrigerating, work on making the filling. In a bowl, gently mix the blueberries, cornstarch, lemon zest and juice, sugar, and salt.

  3. Preheat the oven to 400°F. Remove the dough from the fridge and let it sit for about 5 minutes or until it is workable. Spoon the filling into the center of the dough, being careful to leave about 2 inches of a border. If you're worried that not all of the filling will fit, take some out.

  4. Brush the 2 inch edges with the egg wash, and begin to push and tuck the dough inward over the filling, so that it provides a border. Once again, brush the border with the beaten egg and sprinkle with raw sugar.

  5. Bake in the oven for about 35-45 minutes, or until the blueberries are bubbling and the crust is golden brown.

  6. Transfer to a cooling rack, and if desired, sprinkle with confectioners' sugar, sliced almonds, and/or vanilla ice cream.