PUMPKIN TART

Adjustments.jpeg

With Thanksgiving being just over a week away, I wanted to squeeze in one more dessert recipe that would be perfect for the holiday, but also casual enough for any fall or winter meal. If you’ve been reading my blog for the past year or so, it’s no secret that making pies isn’t my strong suit, mostly because I don’t have the practice but also since I’m more of a cake person than a pie person. Because of my inexperience with this dessert, I decided to forgo giving you a pumpkin pie recipe and instead I’m offering a much easier and less stressful option: the pumpkin tart. Side note: if you want a pie recipe from me, here’s the recipe for my deep dish apple pie from last year, including 10 tips to achieving a “perfect” pie in the kitchen.

A pumpkin tart isn’t too different from a pumpkin pie when it comes to the filling, but one huge distinction is that the former doesn’t require making pie dough - something that a lot of people struggle with since it’s not only time consuming, but also difficult to get right (the pie dough can be too dry, too wet, hard to work with, etc.). With my pumpkin tart, it’s like you’re making a pumpkin pie but with a graham cracker (or gingersnap cookies) crust and simply pressing it into a fluted tart pan with a removable bottom. There’s no need to worry about chilling the dough, having the dreaded soggy bottom or blind-baking that comes with making a pie; you just need to partially bake the crust for about 8-10 minutes before adding the filling… and that’s it, It’s ridiculously simple.

I also decided to add toasted pecans to my crust to give it more flavor, but if you have nut allergies or just want a plain graham cracker crust, simply replace the nuts with more graham cracker crumbs, so the total in graham cracker crumbs would be 1 3/4 cups.

537B9AB1-4CB6-4018-B1C3-632E74164070-4C3A3D8E-0A6D-44E9-8A86-3E418ECA1033.jpeg

As for the filling, it’s as effortless as it gets. You’ll mix together the basic ingredients for a custard (milk, heavy cream, eggs, sugar), add an entire can of pumpkin purée, some vanilla extract and traditional pumpkin pie spices. The custard doesn’t need to be cooked before being added to the pan - you just pour it over the graham cracker crust and bake it in the oven until the tart is mostly set (we want a little jiggle in the middle, much like when baking a normal pumpkin pie or a cheesecake). The whole dish comes together in just about an hour, which is incredible when comparing the time it takes to make a pumpkin pie. You can essentially make this on Thanksgiving itself if you wanted, but I suggest making it the day beforehand and storing it in the fridge so you have one less thing to worry about. When it comes time to serving the tart, I definitely recommend topping it off with fresh whipped cream, a dusting of confectioners’ sugar or ground cinnamon, and/or a scoop of ice cream (my maple pecan ice cream would be SO GOOD with this).

For the first time in my 30 years on this planet, I am making an entire Thanksgiving meal by myself (with Alex being my sous chef) and I am equal parts excited and nervous. Please wish me luck and let’s hope I don’t ruin everything. But seriously, I hope everyone has a great Thanksgiving, whether you’re with friends, family or by yourself. 2020 has been a real bummer, so I hope we can all have a nice and relaxing day… without spreading Covid.

P.S. Here’s 10 other recipes of mine that would be perfect for Thanksgiving:

  1. Apple Butter Spice Cake w/ Mascarpone Frosting

  2. Pumpkin Spice Ice Cream w/ Candied Pumpkin Seeds

  3. Brown Butter, Pecan and Milk Chocolate Chip Cookies

  4. Pear Spice Cake

  5. Apple Ricotta Tarts w/ Homemade Caramel

  6. Pumpkin and Brown Butter Breakfast Puffs (for breakfast the next day!)

  7. Apple Tart w/ Maple Whipped Cream

  8. Pumpkin Cheesecake (my go-to dessert every Thanksgiving)

  9. Classic Sangria

  10. Union Square Cafe’s Bar Nuts (a perfect appetizer)
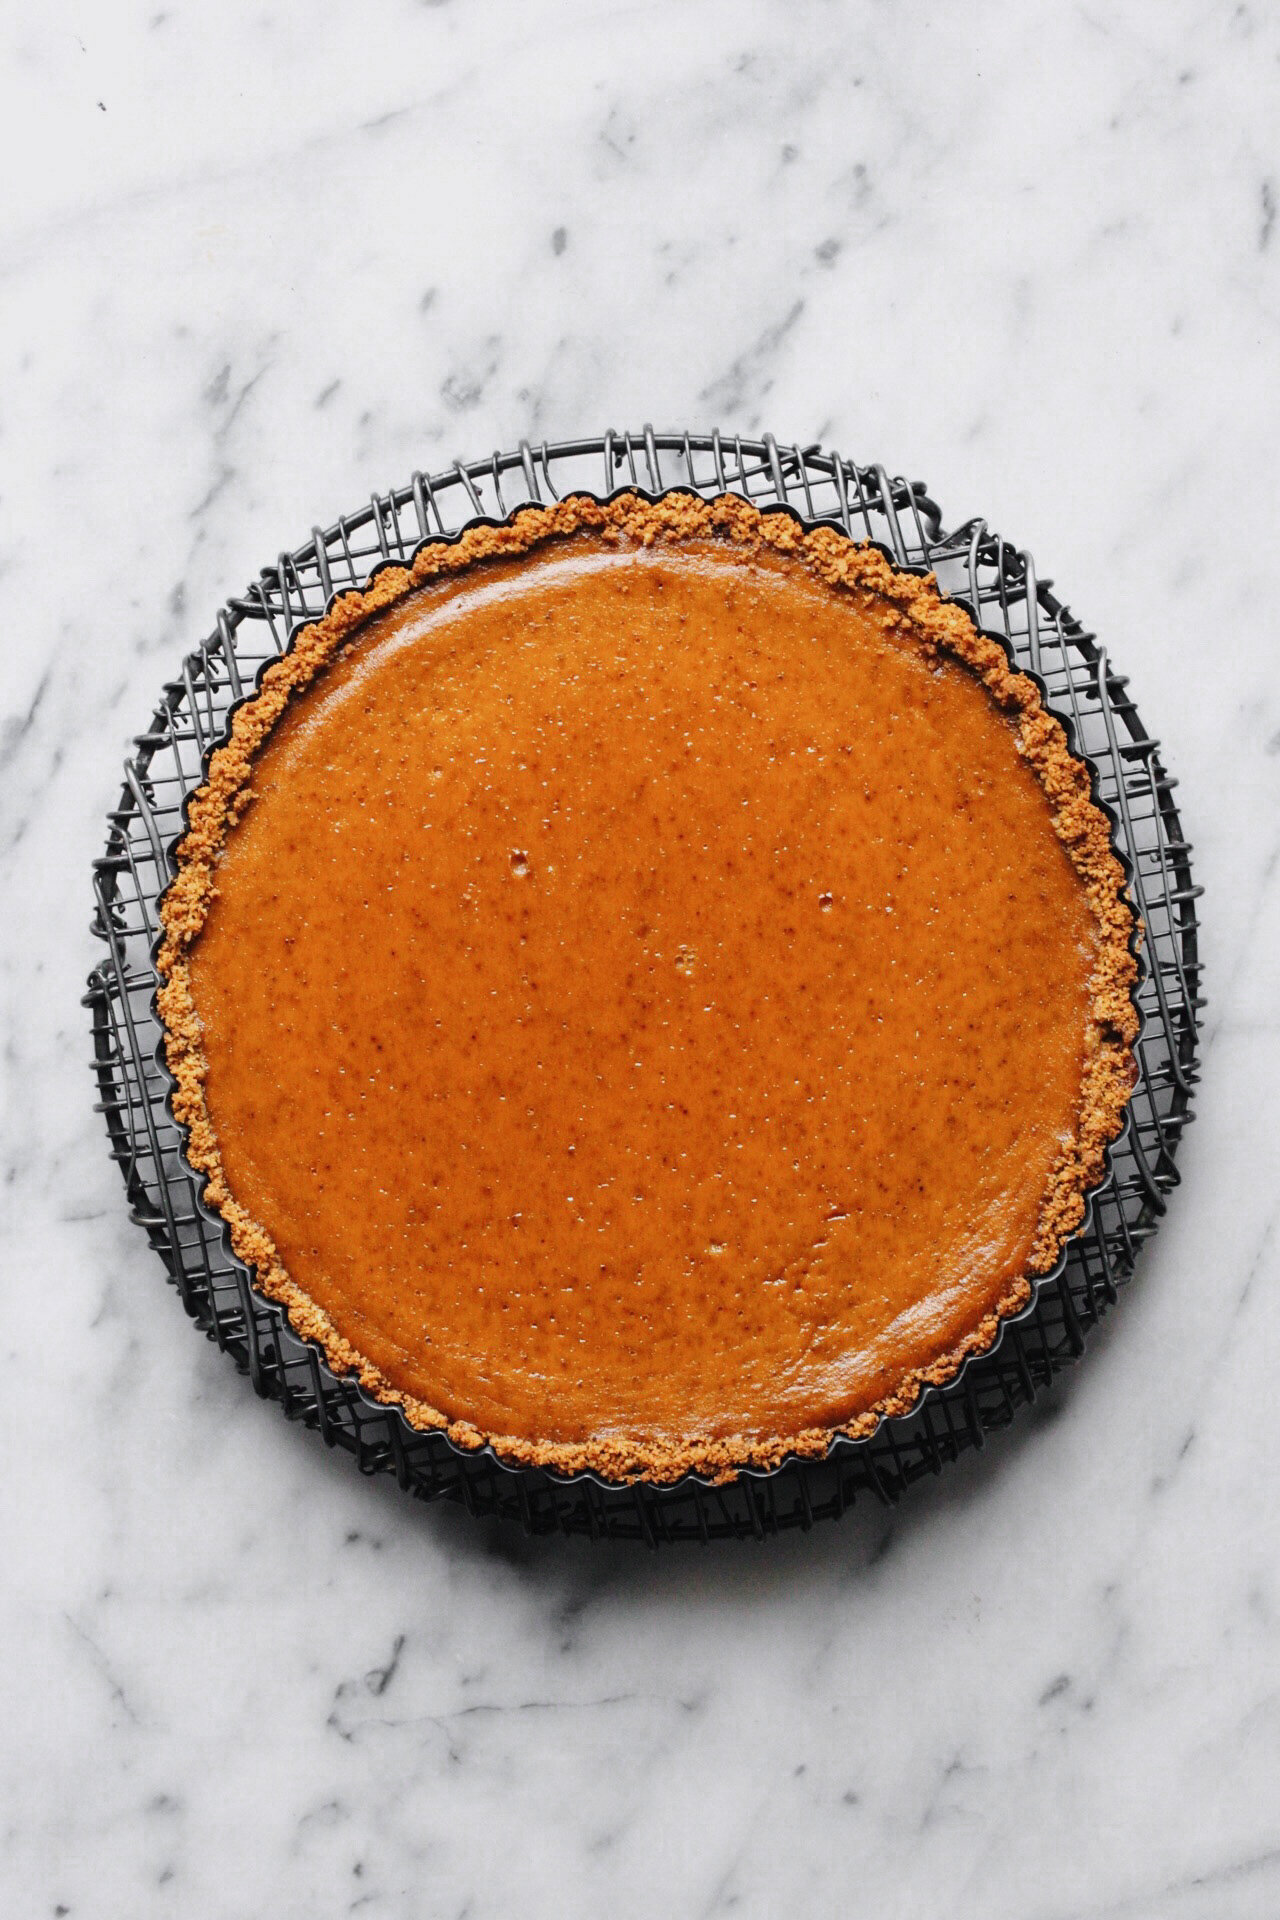
Adjustments.jpeg

Pumpkin Tart

Yields (1) 9-inch tart

Recipe adapted from Delish

Ingredients

For the crust:

  • 1 1/4 cups graham cracker crumbs (or gingersnap cookies)

  • 1/2 cup pecan halves

  • 2 tbsp. brown sugar

  • 5 tbsp. unsalted butter, melted

  • Pinch of kosher salt

For the filling:

  • 4 large eggs

  • 1 can (15oz.) pumpkin purée

  • 1/2 cup whole milk

  • 1/2 cup heavy cream

  • 3/4 cup brown sugar, packed (light or dark)

  • 1 tsp. vanilla extract

  • 2 tsp. ground cinnamon

  • 1/2 tsp. ground ginger

  • 1/2 tsp. ground cloves

  • 1/2 tsp. freshly grated or ground nutmeg

  • Pinch of kosher salt

  • Fresh whipped cream, ice cream, confectioners’ sugar or ground cinnamon, to finish

Directions

Make the crust:

  1. Preheat the oven to 350°F. Place the pecan halves on a rimmed baking sheet and toast them in the oven for about 8-10 minutes. Allow them to cool for a couple minutes.

  2. Transfer the pecans to a food processor fitted with the S-blade and pulse until finely chopped.

  3. In a medium bowl, stir together the pecans, graham cracker crumbs, brown sugar, melted butter and salt. Transfer the mixture to the tart pan and, using the back of a measuring cup, firmly press the crust mixture into the bottom of the pan as well as the sides.

  4. Bake in the oven (on a baking sheet, for easy transfer) for 9-10 minutes. Remove from the oven and let cool while preparing the filling. Raise the oven temperature to 375°F.

Make the filling;

  1. In a large bowl, whisk the eggs until thoroughly combined. Add in the rest of the filling ingredients - pumpkin purée, milk, heavy cream, brown sugar, vanilla extract, spices and salt - and stir together using a spatula or wooden spoon.

  2. Pour the filling into the tart pan (you may have more filling than needed, so only fill to just below the top of the crust line). Bake in the oven on a baking sheet for about 40 to 45 minutes - the center may be a bit jiggly but that’s exactly what you’re looking for.

  3. Allow the tart to cool completely before removing from the tart pan. Serve with fresh whipped cream, ice cream and/or a dusting of confectioners’ sugar or ground cinnamon,

APPLE RICOTTA TARTS W/ HOMEMADE CARAMEL

This Sunday is my boyfriend Alex’s 33rd birthday and I cannot wait to shower him with all the love that he deserves. We’ll be celebrating with family on Saturday with a boat ride in Newport Beach, as well as a trip to Big Bear next weekend with a group of friends, so on his actual day, he and I are going to take it easy. I plan on starting his day off with bagels and cold brew, then hitting up the beach or going on a hike, and finally ending with dinner at one of his favorite restaurants, Nick’s in Laguna Beach. He also requested that I make my cheesecake for dessert (it’s his favorite recipe on this blog) and of course I am happy to oblige.

IMG_5336-2.jpg

Like every year, Alex’s birthday also represents the beginning of autumn, which usually falls on his actual birthday, the 22nd, or the next day. Because of this, I believe it allows for the floodgates to open for apple recipes even though I’m fairly certain I could, and would, eat apple pie every day. So far on this blog, I’ve shared with you recipes for an apple brown butter buckle, apple muffins, apple cider doughnuts, and finally. a simple apple tart/galette. Today’s apple recipe may also be considered a ‘tart’ but differs in the fact that the base is not a pie dough, but actually puff pastry.

Puff pastry, also known as pâte feuilletée, is essentially a laminated dough, meaning the butter is incorporated into the dough by a series of folding and rolling, thus leading to multiple layers. When baked, the layers separate and puff up, leaving you with a very light and flaky texture. Making homemade puff pastry is a serious undertaking and something that I’m more than happy (at this point in time) to skip out on. What I’m trying to say is that today I am not giving you a recipe for puff pastry to go along with the tart - I am giving you instructions to go buy store bought puff pastry! I created this recipe for those who are 1) in a time crunch 2) don’t have the skills to make homemade puff pastry and/or 3) lazy! I don’t think anyone should feel bad for buying store bought components of a dish and I really believe that it’s the thought that counts.

IMG_5494.jpg

Store bought puff pastry. which you can get at any grocery store including Trader Joe’s, makes you look like you’re an amazing baker, yet the secret is that you didn’t do more than thawing it, topping it with some ingredients, and baking it in the oven. And if you want, you can totally lie and tell your guests or whomever you’re serving this to that YES, the puff pastry IS made from scratch! Just make sure that you’ve gotten rid of any evidence of the Pepperidge Farm puff pastry packaging - burn it if you have to.

IMG_5534.jpg

If you’re unfamiliar with buying puff pastry, you should know that it’ll be found in the freezer section of your grocery store and comes with 2 sheets of puff pastry (therefore you can easily double the recipe!), which will need to be thawed out for about 40 minutes before working with it. For my recipe, I ask of you to only use 1 sheet of pastry which you’ll cut into 6 equal rectangles. You could totally make it into one giant tart, but I really enjoy the look of baking them off as individuals and it also makes it much easier for serving purposes. Each puff pastry tart will get a spread of a ricotta cheese mixture that has cinnamon, nutmeg, and vanilla bean paste in it. If ricotta isn’t your thing, mascarpone or cream cheese could work as well; and if your grocery store doesn’t carry vanilla bean paste, vanilla extract is fine. I went with vanilla bean paste because Trader Joe’s just started carrying it and I thought this recipe would be perfect for it since it showcases the vanilla bean specks so well.

And once again, if you’re feeling guilty for using store bought puff pastry, all will be forgotten when you make your own caramel to top it off with. Homemade caramel is SO simple and requires only 4 ingredients and 10 minutes of your time, so you can make it while the apple tarts bake in the oven. Apples and caramel are a perfect pairing, and since the apple tarts themselves are barely sweetened, you can load up on as much caramel as you want.

Apple Ricotta Puff Pastry Tarts

Yields 6 individual tarts

Ingredients

  • 1 puff pastry sheet, thawed and cut into 6 rectangles (I prefer Pepperidge Farm

  • 1/2 cup ricotta cheese, homemade or store-bought

  • 1 tsp. vanilla bean paste (or vanilla extract)

  • 1/8 tsp. ground cinnamon

  • 1/8 tsp. ground or fresh nutmeg

  • 1 apple, cored and sliced thin (I used Granny Smith and Pink Lady, but Honeycrisp and Braeburn work as well)

  • Brown sugar (light or dark)

  • Caramel sauce, to finish (recipe provided below)

Directions

  1. Preheat the oven to 400°F and place the 6 puff pastry rectangles onto a parchment-lined baking sheet. Using a fork, poke holes in about 4-5 different places on each rectangle.

  2. In a small bowl, mix the ricotta cheese, vanilla bean paste (or extract), cinnamon and nutmeg together. Add about 1 heaping tablespoon of this spread onto the center of each pastry. Try not to spread it out too much.

  3. Place 2-4 slices of apple onto each pastry, right on top of the ricotta cheese mixture. Finish with a heavy sprinkling of brown sugar on top of the fruit.

  4. Bake in the oven for 18-20 minutes, or until the pastry has puffed up and is a golden brown color.

  5. Transfer to a baking sheet to cool for about 5 minutes before finishing them with a drizzle of caramel sauce.

Simple Homemade Caramel Sauce

Yields 1 cup

Recipe adapted from Sally’s Baking Addiction

Ingredients

  • 1 cup granulated sugar

  • 6 tbsp. unsalted butter, room temperature, cut into 6 pieces

  • 1/2 cup chilled heavy cream

  • 1/2 tsp. kosher salt

Directions

  1. Place the sugar in a medium saucepan and heat over medium heat. Using a wooden spoon, constantly stir the sugar until it completely melts and turns into a deep amber color. Before it melts, it will be very clumpy… this is good, just keep mixing!

  2. Add the butter and mix it in with the melted sugar using a whisk. The mixture will begin to bubble vigorously.

  3. Once the butter has melted, slowly pour in the heavy cream. Careful with this step because the cold heavy cream may cause the mixture to splatter. Allow the caramel to boil for about one minute, then take it off the heat and stir in the salt.

  4. Carefully (it will be VERY hot) pour the caramel into your desired container (mason jar, tupperware, etc.) and store it in the fridge for up to 1 month - if it can last that long.

EASY APPLE TART W/ MAPLE WHIPPED CREAM

IMG_1864.jpg

It’s the final countdown! We are just a couple of days away from Thanksgiving and I am so ready for it. Since I went to a Friendsgiving party this past weekend, where I brought two desserts (including my pumpkin cheesecake), Brussels sprouts, and my sangria, I feel like it was a warm-up for the actual day. The Friendsgiving party was a lot of fun and had 16 people in total which is double the amount of people that I’ll be with on Thanksgiving. So even though there will be less mouths to feed on Thursday, I’ll be contributing much more food and helping out in all departments. It will definitely be more work but I'm excited to do it all while being with my family.

I wanted to give you one last Thanksgiving dessert, and even though this recipe is being posted just a couple of days before the big day, it requires less time and effort than most desserts made for the holiday (cough pumpkin cheesecake cough). We’re talking about an apple tart today, and this recipe in particular is one of the simplest apple tart recipes out there. If you want an apple dessert on your dinner table Thursday night, but the idea of baking a deep dish apple pie is daunting to you, then this recipe is perfect for you.

IMG_1746.jpg

This apple tart is baked in a fluted tart pan, which makes it almost fool-proof in the sense that you can’t mess up the shape. Unlike apple pies where you have to worry about making the top crust look all neat and pretty, this apple tart has the apples exposed on the top for a beautiful, rustic look. The only crust on top will be any excess dough that is folded over before baking: a step that doesn't require much skill.

If you want to make this tart galette-style, feel free to ditch the pan and mold the dough freeform on parchment paper on a baking sheet. I recommend using the tart pan if you’re planning on traveling to someone’s house for Thanksgiving. That way, you can keep the tart in its cute little pan and not worry about having your galette flying around in the backseat. But if you’re hosting it at your house and don’t have a tart pan, then by all means, go with the galette. Do what works for you!

IMG_1813.jpg

Since this apple tart is so simple when it comes to the flavor, with only sugar and butter being the added ingredients, you have the option to spice it up if you want to. I would recommend adding your favorite apple pie spices: cinnamon, nutmeg, cloves, cardamom, etc and/or a splash of vanilla extract or lemon juice. But honestly, the way I have the recipe written is fantastic and allows you to really enjoy the perfect crust and in-season apples.

I wanted to add a lil something something to finish the tart with, and decided that maple whipped cream was the best bet. Making it is equally as simple as the tart, but having the cream sweetened by pure maple syrup instead of granulated sugar makes it a bit more interesting and autumn-like. If you plan on serving with the whipped cream, I suggest sprinkling only 2 tablespoons of granulated sugar on the tart before popping it in the oven (that’s why I have 2-4 tbsp. of granulated sugar listed in the filling ingredients). But if you don’t plan on eating the tart with whipped cream or ice cream, add a bit more sugar. Again, it’s up to you, so you can make it as sweet as you want!

I hope all of you have a great Thanksgiving and that you get to spend it with the ones you love!

IMG_1850.jpg

Apple Tart and Maple Whipped Cream

Makes (1) 9-inch tart

Recipe adapted from Smitten Kitchen

Ingredients

For the dough:

  • 1 cup all-purpose flour

  • 1/2 tsp. granulated sugar

  • 1/8 tsp. salt

  • 6 tbsp. unsalted butter, softened to the touch, cut into small pieces

  • 4 tbsp. ice cold water

For the filling:

  • 2 lbs. apples (Granny Smith, Golden Delicious, or any other firm/tart apple variety), peeled, cored, and sliced

  • 2 tbsp. unsalted butter, melted

  • 2-4 tbsp. granulated sugar (make it as sweet as you want! I do 2 tbsp.)

To Finish (optional):

  • Apricot preserves/jam

  • Confectioners’ sugar

  • Maple whipped cream (recipe below)

Directions

  1. In a large bowl, whisk together the flour, sugar, and salt. Add 2 tbsp. of the butter to the mixture by working with your hands or a pastry cutter, and rub the mixture together until it resembles course crumbs. Then add the remaining 4 tbsp. of butter and continue to mix until the butter bits are about the size of a pea.

  2. Add about 2 tbsp. of the water to the mixture and stir it in with a wooden spoon. Add the remaining 2 tbsp. of water and stir again. Using your hands, feel if the dough is too dry and if it is, continue to dribble in more water, 1 tbsp. at a time. Do this until the dough comes together and isn’t predominately full of dry sections. Roll the dough into a ball and flatten it into a 4-inch disc. Wrap the disc in plastic wrap and transfer to the refrigerator for at least 30 minutes.

  3. When ready to roll out, allow the dough to sit at room temperature for about 5-10 minutes so it will be more malleable. Preheat the oven to 400°F. On a lightly floured surface, roll the dough thinly out to about a 14-inch circle. Transfer the dough to a lightly greased 9-inch tart pan, and carefully press the dough into the mold, making sure there is an overhang of dough. Fill the pan with as many apple slices as you can, and arrange them in any pattern you like. Fold over the excess dough over the apples, and tuck/crimp it together. With a pastry brush, brush the melted butter over the folded dough and apples. Sprinkle the granulated sugar on. If you’re making the whipped cream, do 2 tbsp. of sugar, if not, go with 3 or 4 tbsp.

  4. Place in the oven and bake for 45 minutes, making sure to rotate the pan every 15 minutes so it gets evenly baked. It will be done when the dough is golden brown and the apples are soft.

  5. (Optional) Heat up 2 tbsp. of apricot preserves and 1 tbsp. of water in the microwave until it becomes a bit liquefied. Brush the mixture on the crust and apples when the tart is slightly cooled.

  6. Serve with a big dollop of maple whipped cream and a sprinkle of confectioners’ sugar.

Maple Whipped Cream

Ingredients

  • 1 cup heavy cream

  • 2 1/2 tbsp. pure maple syrup

Directions

  1. Place the mixing bowl and whisk in the freezer for about 15 minutes.

  2. Add the heavy cream and pure maple syrup to the bowl and whisk until stiff peaks are formed. Whipped cream can be stored in an airtight container for about a day in the fridge. When ready to use, whisk the mixture again for about 15 seconds.