LEMON + PISTACHIO ICE CREAM SANDWICHES

IMG_3459.jpg

By the time you’ll be reading this, I’ll most likely be sitting by the pool, sweating in 105°F weather, sipping on a frozen strawberry margarita. Alex and I are celebrating the 4th of July in Scottsdale, Arizona this year (this will be our third time for the holiday) and it’s something that we LOVE doing. The house that we stay at is perfect for relaxing and having fun in the pool, and the neighborhood we stay in (Paradise Valley) is pretty dead since most of the residents leave Arizona for the summer once the temperature begins to rise. We jump in the pool all day and night, BBQ, blast bad music, and occasionally leave the house to get a couple of meals from our favorite spots (Pizzeria Bianco for the best pizza west of the Mississippi and Tee Pee for giant margaritas and amazing tamales). The 4th of July had never been my favorite holiday until we started celebrating it in Scottsdale.

In the past few weeks, I’d been having some trouble in the kitchen with creating a successful recipe for the blog. It all started with wanting to post a recipe for my favorite gelato flavor, hazelnut, and even though the finished product came out okay, I wasn’t completely sold on it. I was attempting to recreate the exact feeling when I had my first bite of hazelnut gelato in Rome years ago and unfortunately my recipe just wasn’t it. From there, I worked on a baked peach doughnut with a crumb topping and that was an utter disaster, followed by a summer berry olive oil cake which I was not a fan of. So, with all of these unsuccessful kitchen moments, I returned to my two favorite sweets to make in the kitchen and combined them together to give you my first ice cream sandwich recipe. I’m happy to report that it is anything but unsuccessful.

IMG_3431.jpg

I love ice cream sandwiches because of the endless amount of combinations that you can create. You can essentially bake any type of cookie flavor that you love (plain old chocolate chip, brownie, snickerdoodle, white chocolate macadamia nut, etc.) and sandwich it between any ice cream flavor you can get your hands on (rocky road, cookie dough, mint chip, etc.). Today, I turned to a classic flavor combination that I turn to time and time again (Exhibit A and Exhibit B): citrus and pistachios. In today’s case, we’ll be working with soft and chewy lemon cookies and creamy pistachio ice cream. It’s perfect.

The lemon cookies get their flavor from three additions to the dough: lemon juice, lemon zest and lemon extract. We really want the lemon flavor to stand up against the rich, custard-y ice cream, so these three components are vital to achieving that bright citrus taste. I chose a cookie that was a bit softer and chewier, a texture that after being placed in the freezer (this is of course how you will need to store ice cream sandwiches) will not yield a hard and crunchy cookie when biting into it. Much like my funfetti cookies, this dough has cornstarch added to it to achieve that softer and chewier texture, and it’s also important to not over bake the cookies! The moment you see that the edges are set, quickly take them out of the oven (this should be right before the 10-minute mark).

IMG_3506.jpg

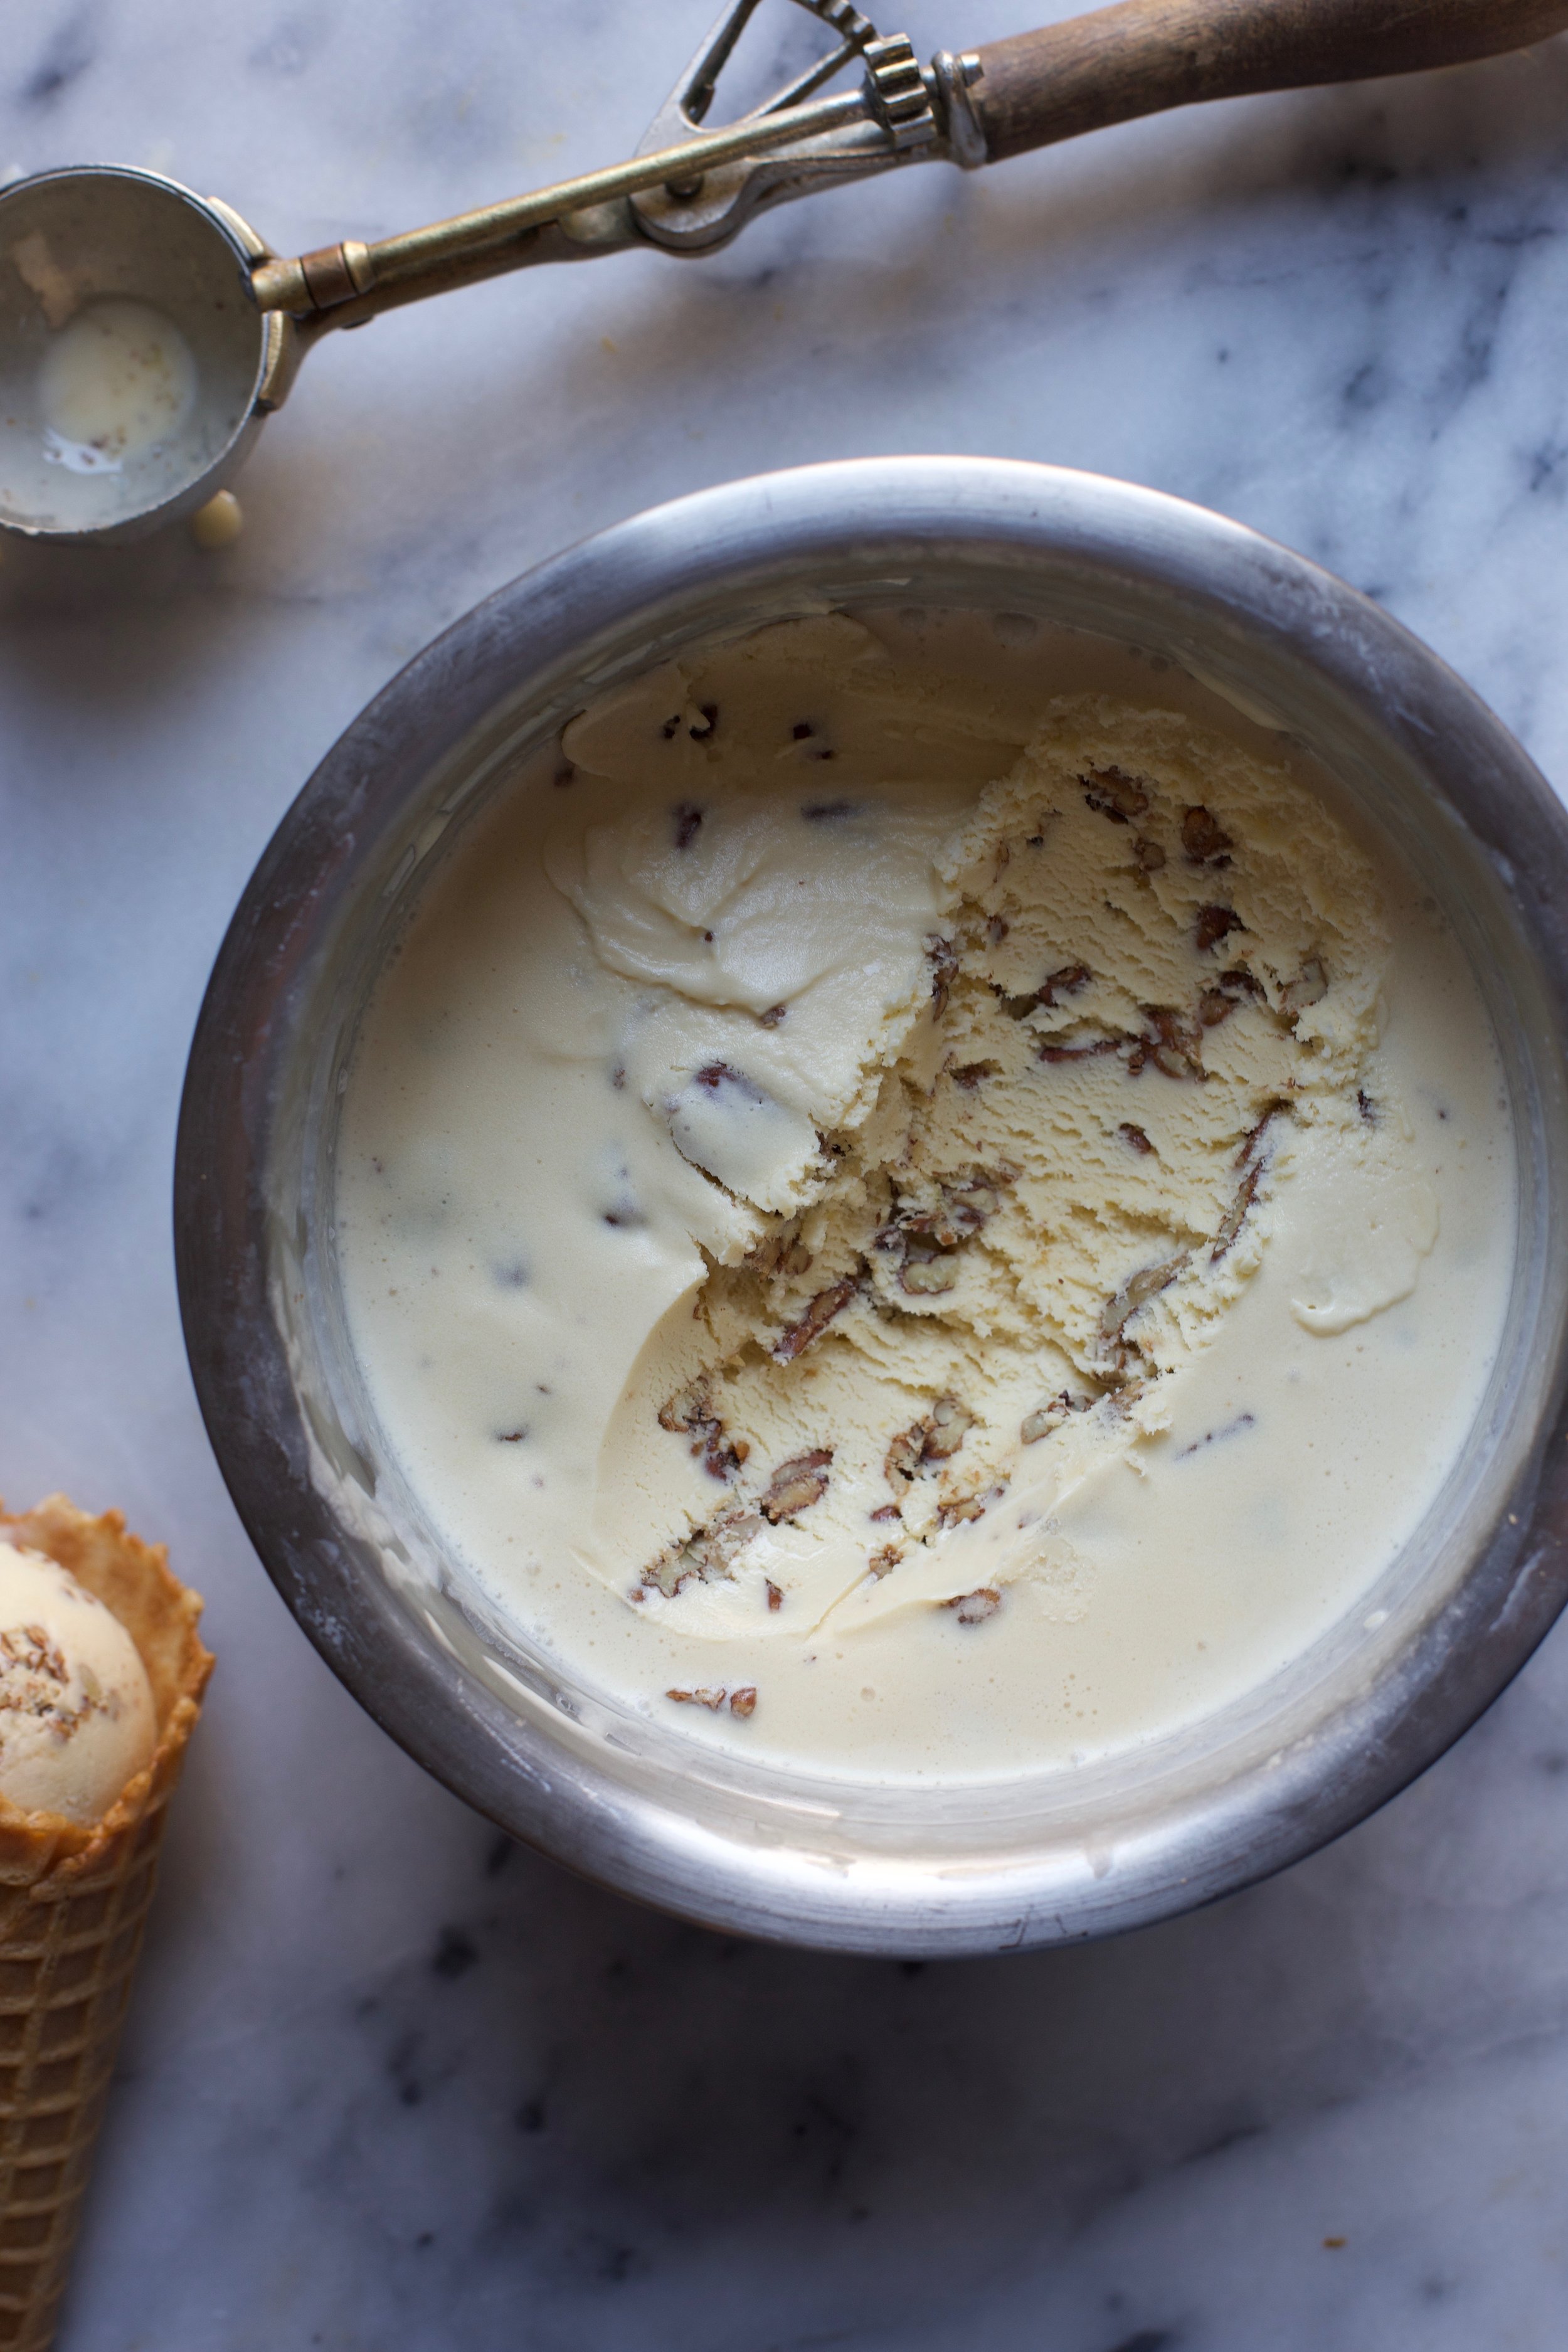
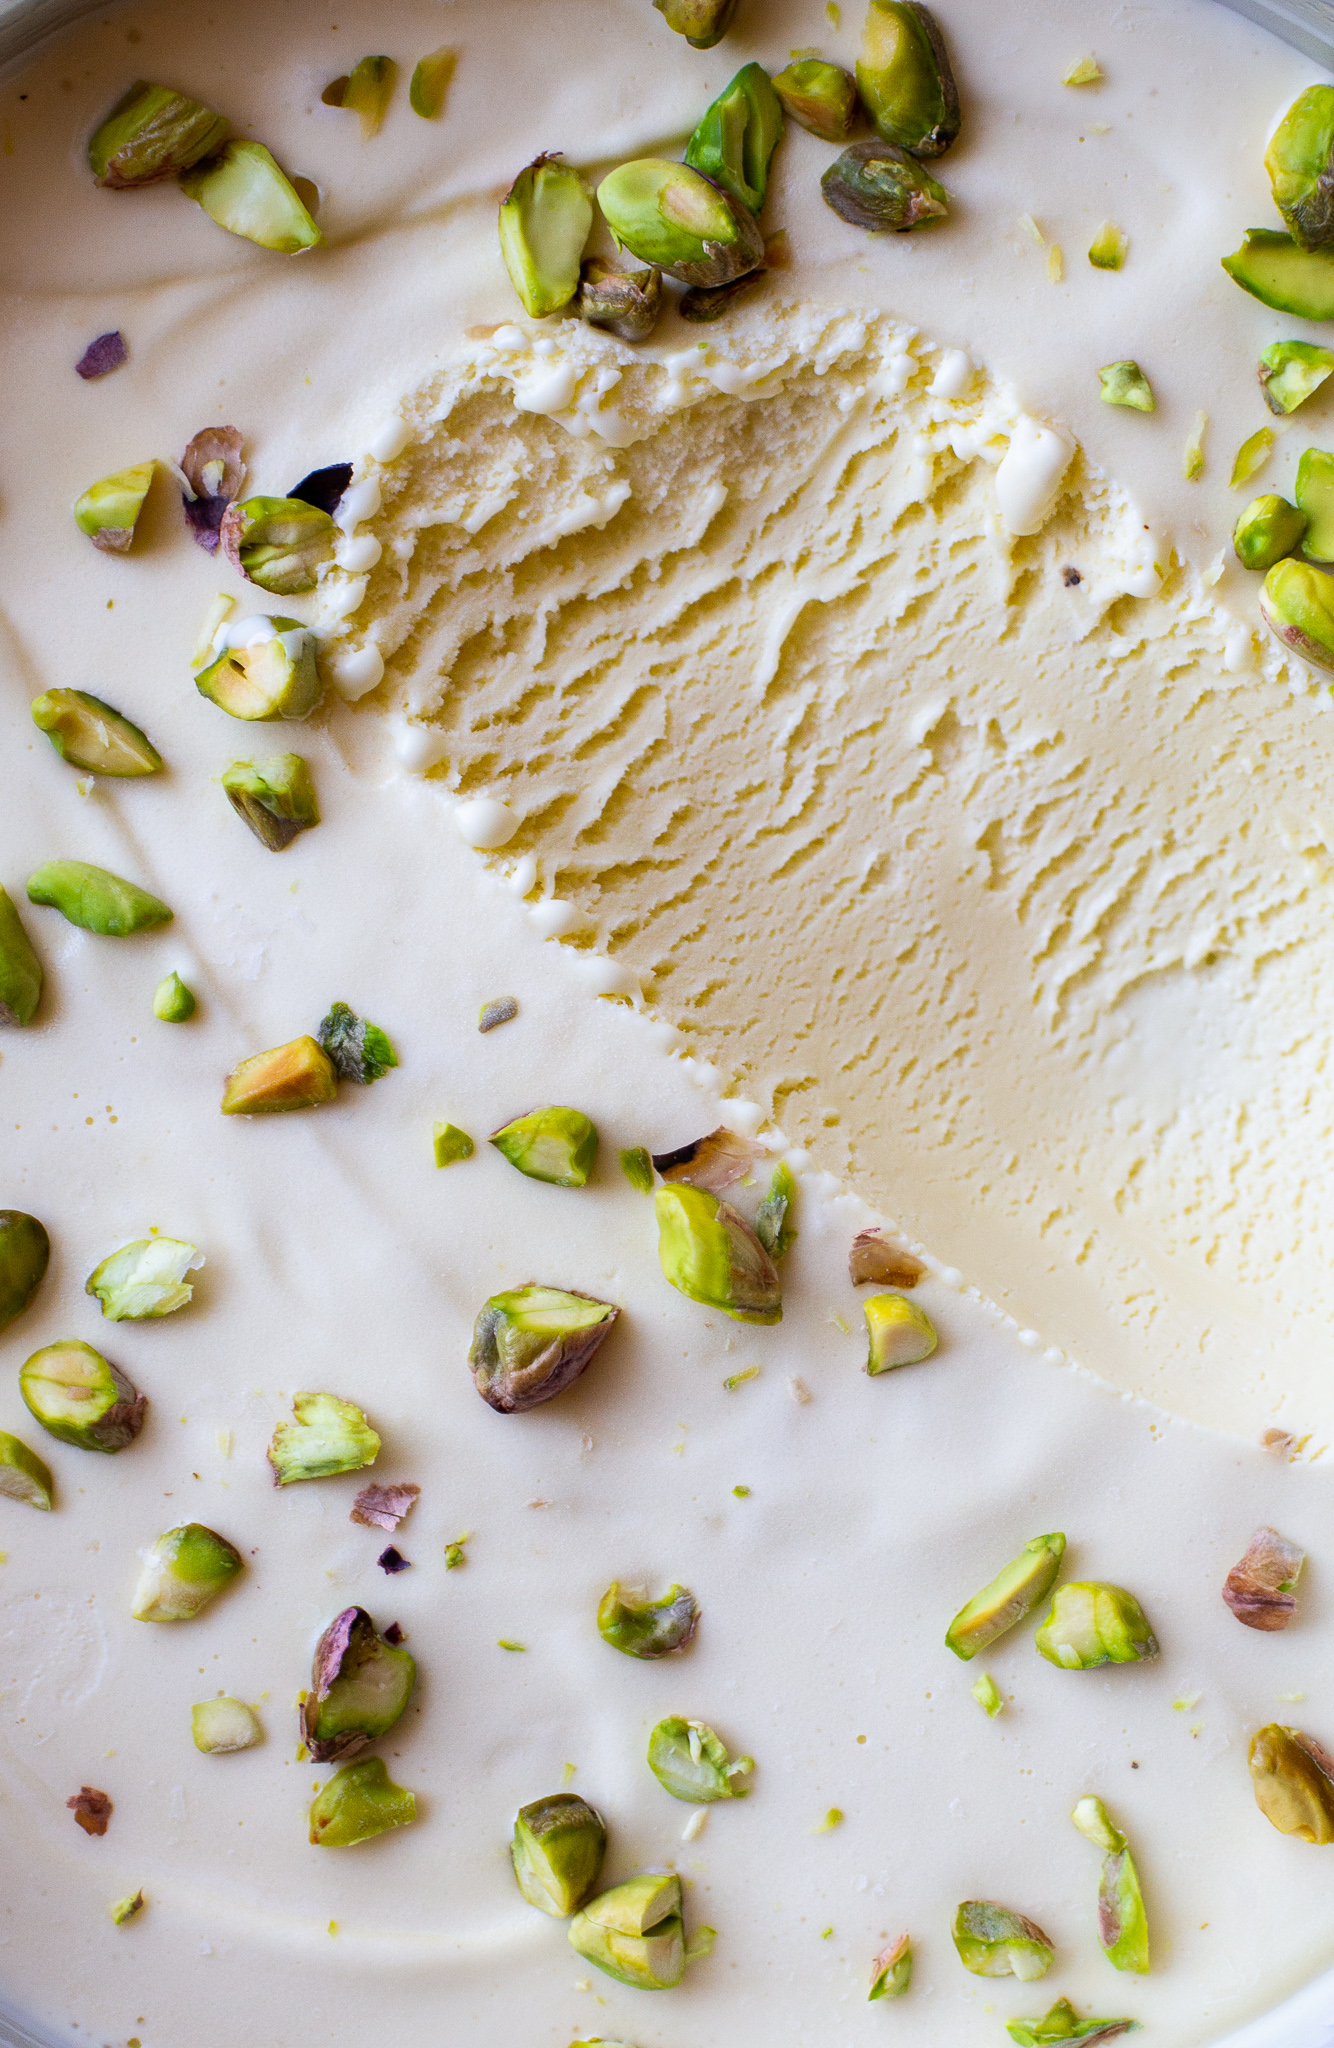
As for the ice cream, it will require you to use quite a bit of pistachios (1 1/2 cups plus more if you roll the ice cream sandwiches through chopped pistachios after they’re assembled). I suggest using raw, unsalted shelled pistachios, which you can find at a Trader Joe’s for a good price. I personally prefer roasting the nuts myself before adding them to the food processor to finely chop them, but if you can’t find them raw at your grocery store, buying them unsalted and roasted would be the next best thing. The only problem with this option is that they are usually still in the shell aka you’ll be cracking a bunch of nuts open which can take a while.

But here’s the thing: if you want to only make the lemon cookies and go out and buy your favorite store bought pistachio ice cream or gelato, that’s totally fine! Or if you just want to make the pistachio ice cream to enjoy on a warm summer night, that’s okay too! Making both components of this recipe is time consuming so I understand if you’d rather just do half of the recipe. But, I will say it’s a very rewarding feeling when you bite into your first ice cream sandwich knowing that you made every component of it from start to finish. And if you do plan on making both the cookies and ice cream, I suggest making the ice cream first since it’s a longer process but can also stay in the freezer for days.

IMG_3447.jpg

The cookie recipe yields 10-12 large cookies and the ice cream yields about 1 quart, which will give you 5 or 6 very large ice cream sandwiches. And if you plan on serving this to more than 6 people, you can easily make the cookies smaller or cut the ice cream sandwiches in half (just wait until they are completely frozen). I store my ice cream sandwiches in the freezer by putting them in tupperware, but you can also wrap them in plastic wrap individually.

Happy Fourth of July!

Pistachio Ice Cream

Yields about 1 quart

Recipe adapted from David Lebovitz

Ingredients

  • 1 1/2 cups unsalted shelled pistachios

  • 1 cup whole milk

  • 2 cups heavy cream, divided

  • 1/4 tsp. kosher salt

  • 5 large egg yolks

  • 1/8 tsp. vanilla extract

Directions

  1. Preheat the oven to 350°F. Toast the pistachios for about 6-8 minutes, keeping a careful eye on them. Transfer the pistachios to the food processor fitted with the S-blade and finely chop them.

  2. In a small saucepan, warm up the milk, 1 cup of the heavy cream, granulated sugar and salt over medium heat. Do not let it come to a simmer. Turn off the stove, remove the pan from the heat, and add the chopped pistachios. Stir until they are all fully submerged, cover the pan with a lid, and allow the mixture to steep for one hour at room temperature.

  3. After an hour, pour the pistachio-infused mixture through a strainer over a medium saucepan. Press down on the nuts in order to extract as much flavor from them as you can. Discard the pistachios and begin to rewarm the pistachio-mixture over medium-low heat. Meanwhile, pour the remaining 1 cup of heavy cream into a large bowl and set a strainer over the top (use a bowl that will be able to fit over an ice bath for later).

  4. In a medium bowl, whisk the egg yolks together. Just as the pistachio mixture is beginning to simmer, gradually add some of it to the bowl of egg yolks, whisking constantly as to not scramble the eggs. Once the egg yolk mixture temperature has raised, pour the mixture back into the saucepan. Stir constantly until the mixture thickens and coats the back of your spatula or spoon.

  5. Pour the mixture over the strainer and into the bowl with the remaining 1 cup of heavy cream. Stir in the vanilla extract. Let the ice cream base sit over an ice bath for about an hour before moving to the refrigerator. Chill for at least 4 hours, or overnight.

  6. Churn the ice cream in your maker according to the manufacturer's instructions and allow it to harden in the freezer for about 2 hours before enjoying.

Soft and Chewy Lemon Cookies

Yields 10-12 large cookies

Recipe adapted from Averie Cooks

Ingredients

  • 1/2 cup (1 stick) unsalted butter, room temperature

  • 3/4 cup granulated sugar

  • 2 tbsp. brown sugar, light or dark works

  • 1 large egg, room temperature

  • 1 tbsp. honey

  • 1 tbsp. lemon extract

  • 2 tbsp. lemon zest

  • 2 tbsp. fresh lemon juice

  • 2 cups all-purpose flour

  • 1 tsp. baking soda

  • 2 tsp. cornstarch

  • 1/2 tsp. kosher salt

Directions

  1. In the bowl of a stand mixer fitted with the paddle attachment (or in a large bowl if using a hand mixer) cream the butter and sugars together until the mixture is light and fluffy, about 3 minutes. Add the egg, honey, lemon extract, zest and juice and mix again for a couple more minutes. Scrape down the sides of the bowl.

  2. Add all the dry ingredients (flour, baking soda, cornstarch and salt) to the bowl and mix until just combined. Cover the bowl with plastic wrap and refrigerate for at least one hour. (Tip: you can scoop out the dough before or after chilling).

  3. Preheat the oven to 350°F and line a baking sheet with parchment paper. Using a large cookie or ice cream, scoop out the dough and place them on the sheet. If you don’t have an ice cream scoop, each cookie will be about 1/4 cup of dough. Do to the size of the cookie, do not bake more than 6 on a given tray.

  4. Bake in the oven for about 10 minutes. The cookies will be a light golden brown on the edges and just set when they are ready - they may look underbaked, but they won’t be since these are a softer texture of cookie. Allow the cookies to cool on the baking sheet for 5 minutes before transferring to a cooling rack.

To assemble the cookies;

  1. Make sure the cookies are completely cooled and the ice cream is frozen solid before assembling the sandwiches.

  2. Try to find two cookies that match exactly in shape and size. Using a ice cream scoop, scoop out about a 1/4 cup of ice cream onto one of the cookies, add the other on top, and gently press down until the ice cream spreads to the width of the cookie.

  3. Roll the ice cream sandwiches through chopped pistachios (optional).

  4. Place the ice cream sandwiches onto a large plate and put it in the freezer for about an hour. Then, either store them in Tupperware or wrap each one individually in plastic wrap.

FRESH MINT CHOCOLATE CHIP ICE CREAM

IMG_9228.jpg

And just like that, it’s springtime. Even though in my last post I was craving summer and all the flavors and desserts that come with it, I of course wasn’t going to brush over spring! It’s a time when everything is blooming and coming back to life, and I’ll never get over how beautiful it is. Living in an apartment, I so look forward to the day when I’ll have my own house with a huge backyard (a girl can dream, ok?) where I’ll harvest my own fruits and veggies, and have flowers everywhere. Until that day, I’ll settle on having little flower pots dedicated to certain herbs and random house plants in my living room that brighten up the place.

One herb plant that I keep in my kitchen window is mint, which if you’re a gardener, you know is a plant that is nearly impossible to kill. It thrives in sun and shade perennially and has the tendency to spread and conquer as much territory as it can. To combat this weed-like herb, you must pick and trim it, and what better way to use up that mint than making homemade ice cream!

IMG_8905.jpg

I’ve always been a huge fan of mint chocolate chip ice cream, but over the years, I’ve honed in on what to me “mint ice cream” means. When I was younger, store-bought neon colored and artificially flavored mint versions reigned supreme in my house. It’s what most people in America are used to when they think of mint ice cream - the color has to be that greenish blue. When I got a little older, I remember my mom coming home with a tub of Breyers mint chip and I was seriously skeptical of it because it wasn’t a green color, but rather a creamy white. The moment I took a bite, I was blown away and vouched to never touch any brand that added dyes to their ice cream. FYI, to this day, if I’m ever too lazy to make my own, Breyers ice cream is still the winner for me in that department.

And then once again, a couple years later, I had another epiphany with mint ice cream. My dad and I went to Sweet Rose Creamery at the Brentwood Country Mart in LA for the first time because we both share a love of ice cream and wanted to check out the shop. My dad ordered a brownie ice cream sundae with vanilla ice cream and I opted to try a scoop of their “fresh” mint ice cream. I was completely taken aback by the taste of it - after years of artificially flavored mint ice cream and added dyes, I could not believe that I had been missing out on the real thing for so long. Fresh mint ice cream is truly a different experience than what you can find at the grocery store and really tastes light, fresh, and worlds better than the fake stuff.

IMG_8992.jpg

So when I eventually got an ice cream maker for Christmas later that year (2012), I chose to make mint chocolate chip ice cream for my first ever homemade batch. And let me tell you: it was a struggle. I of course chose a recipe (the one below!) that probably wasn’t best for a beginner and I remember having my mom help me along every step of the way. To be clear, this was not only marking the beginning of me making ice cream, but also when I was just getting into baking and was less than an amateur. So for example, I had no idea how to temper eggs when making the custard-based ice cream, whereas today, it’s something that doesn't even phase me. Anyway, somehow my mom and I figured out how to make the mint ice cream and I’m pretty sure I cried tears of joy after my first bite. I think I’ve said this before, but making homemade ice cream is quite the accomplishment and something to be proud of. I still get giddy with excitement after every batch I make.

IMG_9347.jpg

This recipe requires a little more than 2 cups of fresh mint, which is a lot, so chances are that your garden may not have enough for this recipe. And that’s fine! You can use a mixture of store bought fresh mint and some of your own (or all store bought if you don’t have a garden, of course). Trader Joe’s sells organic fresh mint for a great price. As for the “chocolate chip” aspect of this ice cream, I’m finally able to give my trick for getting those evenly distributed chocolate flecks that you see in my pictures. Instead of chopping up a chocolate bar or adding chocolate chips to the finished ice cream, I melt my chocolate and slowly pour it into the ice cream maker while it’s churning, but almost done. This allows the chocolate to break up into tiny pieces and therefore gives a creamier texture without having bites with big pieces of chocolate in it. If you’re familiar with Thrifty’s chocolate chip and mint chip ice creams, the texture is most similar to theirs (aka the best!).

IMG_9359.jpg

Fresh Mint Chocolate Chip Ice Cream

IMG_9108.jpg

Yields about 1 quart

Recipe adapted from David Lebovitz

Ingredients

  • 1 cup whole milk

  • 2 cups heavy cream, divided

  • 3/4 cup granulated sugar

  • Pinch of salt

  • 2 cups lightly packed fresh mint leaves

  • 5 large egg yolks

  • 5 oz. bittersweet or semisweet chocolate (in chip or bar form)

Directions

  1. In a small saucepan, warm up the milk, 1 cup of the heavy cream, granulated sugar and salt over medium heat. Do not let it come to a simmer. Add the mint leaves to the pan and stir until every leaf is immersed in the liquid. Remove the pan from the heat, cover with a lid, and let it sit at room temperature for an hour.

  2. Place a strainer over a medium/large saucepan, and pour the mint/milk mixture through (the mint leaves will be left in the strainer). Using a spatula, press down firmly on the mint leaves, making sure to get any and all liquid out of them. In a large bowl, add the remaining 1 cup of heavy cream and set a strainer over the top (use a bowl that will be able to fit over an ice bath for later).

  3. Over medium-low heat, rewarm the mint-infused mixture. In a medium bowl, whisk the egg yolks together. Just as the milk mixture is beginning to simmer, gradually add some of it to the bowl of egg yolks, whisking constantly as to not scramble the eggs (this is called tempering). Once the egg yolk mixture temperature has raised, pour the mixture back into the saucepan. Stir constantly over medium-low heat until the mixture thickens and coats the back of your spatula or spoon.

  4. Pour the mixture over the strainer-lined bowl and stir the mint-custard in with the heavy cream that is already in the bowl. Let the ice cream base sit over an ice bath for about an hour before moving to the refrigerator. Chill for at least 4 hours, or overnight.

  5. Churn the ice cream in your maker according to the manufacturer's instructions. When the ice cream is almost finished churning, melt the chocolate in a microwave and slowly pour it into the ice cream maker (while it’s still on). This will create tiny chocolate flecks all through out the ice cream. If big globs are created, simply use a spatula to help break it up. Transfer to an airtight container and freeze until solid.

216DB314-2DD6-465E-B927-6D4D3A309857.jpeg

I’d like to dedicate this post to my dog niece, Dolce. This beautiful girl had to be put down on Wednesday (the first day of spring), and to say that I’m devastated is a severe understatement. I have a million pictures of her goofy, expressive face and it was hard to choose just one. Here she is with her bone looking crazy happy, and sitting on her mom and dad’s bed.

I love you babygirl and I’ll miss giving you tons of kisses, which you always let me do. You made a lot of people smile, but made your mom and dad the happiest.

MAPLE PECAN ICE CREAM

IMG_1265.jpg

I’ll never forget the first time I was in charge of desserts for a Thanksgiving dinner. Yes, it’s not like I’m a grandma and it was over 50 years ago, but like I’ve mentioned before, I didn't fully get into baking until after college. In 2013, my Thanksgiving was very low-key that year and only consisted of me, my mom, my sister and her now-husband for dinner; a small get together but we had a really fun time nevertheless. Even though I knew it was going to be just the four of us, I went completely over the top with planning the desserts since it was my first time and ended up serving 4 (!!!) dishes.

IMG_1092.jpg

The 4 dishes - a deep dish apple pie with a side of spiced caramel, chocolate chip cookies, cranberry hand pies, and today’s recipe of maple pecan ice cream - were a lot of work. But I remember being so happy and excited to feed my family that day that I didn’t care if I was in way over my head. Every night of the week leading up to the big day, I prepped and worked on different components of the 4 dishes (while also helping my mom with the main meal) and despite being told that I didn’t need to put so much effort into it because it was only going to be “us”, I kept my head down and finished what I started. And everything honestly came out great, surprisingly! The high I felt from accomplishing something like that was 100% worth it all.

Every Thanksgiving since then, I’ve calmed down a bit on the quantity of desserts and have shifted my focus on making a couple of really, really good dishes. Besides returning year after year to the pumpkin cheesecake recipe I gave you earlier this week, I sometimes opt to re-make the maple pecan ice cream that I first tried in 2013.

IMG_1107.jpg

Not that many people think to make homemade ice cream for Thanksgiving. Of course, this is because it’s just another thing that would need to be added to an already long to-do list and not everyone has the time. The norm for most people, and trust me, my family does this as well, is to buy a big ole tub of vanilla ice cream for anyone that may want a scoop with their slice of pie. And chances are, only about a 1/3 of the party will want some, whereas another 1/3 would prefer whipped cream, and the remaining would prefer nothing. But l wholeheartedly believe that this maple pecan ice cream will be requested by EVERYONE at the dinner table. Unless you have nut allergies, and if you do, I apologize because you are missing out!

IMG_1201.jpg

First of all, the flavor alone is pretty unique and something that you wouldn’t be able to find in the freezer section of your local grocery store. There is of course the ever so popular “Butter Pecan” flavor that most people are familiar with, but this ice cream is definitely on a whole different level, largely due to the maple syrup aspect. The ice cream base is only sweetened by pure maple syrup (the good stuff, not Aunt Jemima’s) and in fact, the only “sugar sugar” found in this recipe belongs to the candied pecans that are folded in with the maple ice cream after it’s churned. And speaking of those candied pecans - that are simply cooked with butter and brown sugar - they add such an incredible flavor and crunch to the ice cream that it makes it unbelievably addicting. There’s a full cup of pecans in this recipe and that’s because I want you to get pecans with every bite.

This ice cream is custard based - the best ice creams are - and so this means that you’ll have to temper the eggs when making the base. But besides that little step, everything else is fairly simple! And what’s most important is that you can make this days (but no more than a week) before Thanksgiving and thus have more time to give to your turkey, stuffing, and other desserts.

I say give this maple pecan ice cream for Thanksgiving a try and you’ll see how your guests (or hosts) go completely insane over it. And for those who still take the whipped cream over the ice cream: they will never know what they’re missing.

IMG_1214.jpg

Maple Pecan Ice Cream

Yields a little less than a quart

Recipe adapted from Closet Cooking

Ingredients

  • 1 cup raw pecans, roughly chopped

  • 2 tbsp. unsalted butter

  • 2 tbsp. brown sugar, light or dark

  • 1 cup whole milk

  • 1 cup heavy cream

  • 3/4 cup pure maple syrup (Grade A or B works)

  • Pinch of salt

  • 4 large egg yolks

Directions

  1. Melt the butter in a large skillet. Add the chopped pecans and toss to coat with butter. Sprinkle in the brown sugar, and cook for 3-4 minutes, or until the pecans are candied. Transfer to a bowl and allow to cool completely.

  2. Warm the milk, heavy cream, maple syrup, and salt in a saucepan over medium-low heat. In a medium bowl, whisk the egg yolks together. Just as the milk mixture is beginning to simmer, gradually add some of it to the bowl of egg yolks, whisking constantly as to not scramble the eggs (this is called tempering). Once the egg yolk mixture temperature has raised, pour the mixture back into the saucepan. Stir constantly over medium-low heat until the mixture thickens and coats the back of your spatula or spoon.

  3. Transfer the mixture to a bowl set over an ice bath for about an hour before moving to the refrigerator. Chill for at least 4 hours, or overnight.

  4. Churn the ice cream in your maker according to the manufacturer's instructions. Transfer to an airtight container and mix in the candied pecans. Freeze until solid.