CHOCOLATE RICOTTA CAKE w/ CHOCOLATE COFFEE BUTTERCREAM FROSTING

Now that we’re in the month of November, I’m sure that most people are busy with researching recipes and finalizing their menus for the big food holiday at the end of the month. Just about every year at this time, I save a bunch of new-t0-me dessert recipes only to find myself falling back on my tried-and-true favorites like my pumpkin cheesecake and maple pecan ice cream. But before I plan on giving you a new Thanksgiving-friendly dessert recipe by next week (hopefully), I wanted to share a simple, yet perfect chocolate cake that can be enjoyed every day of the year.

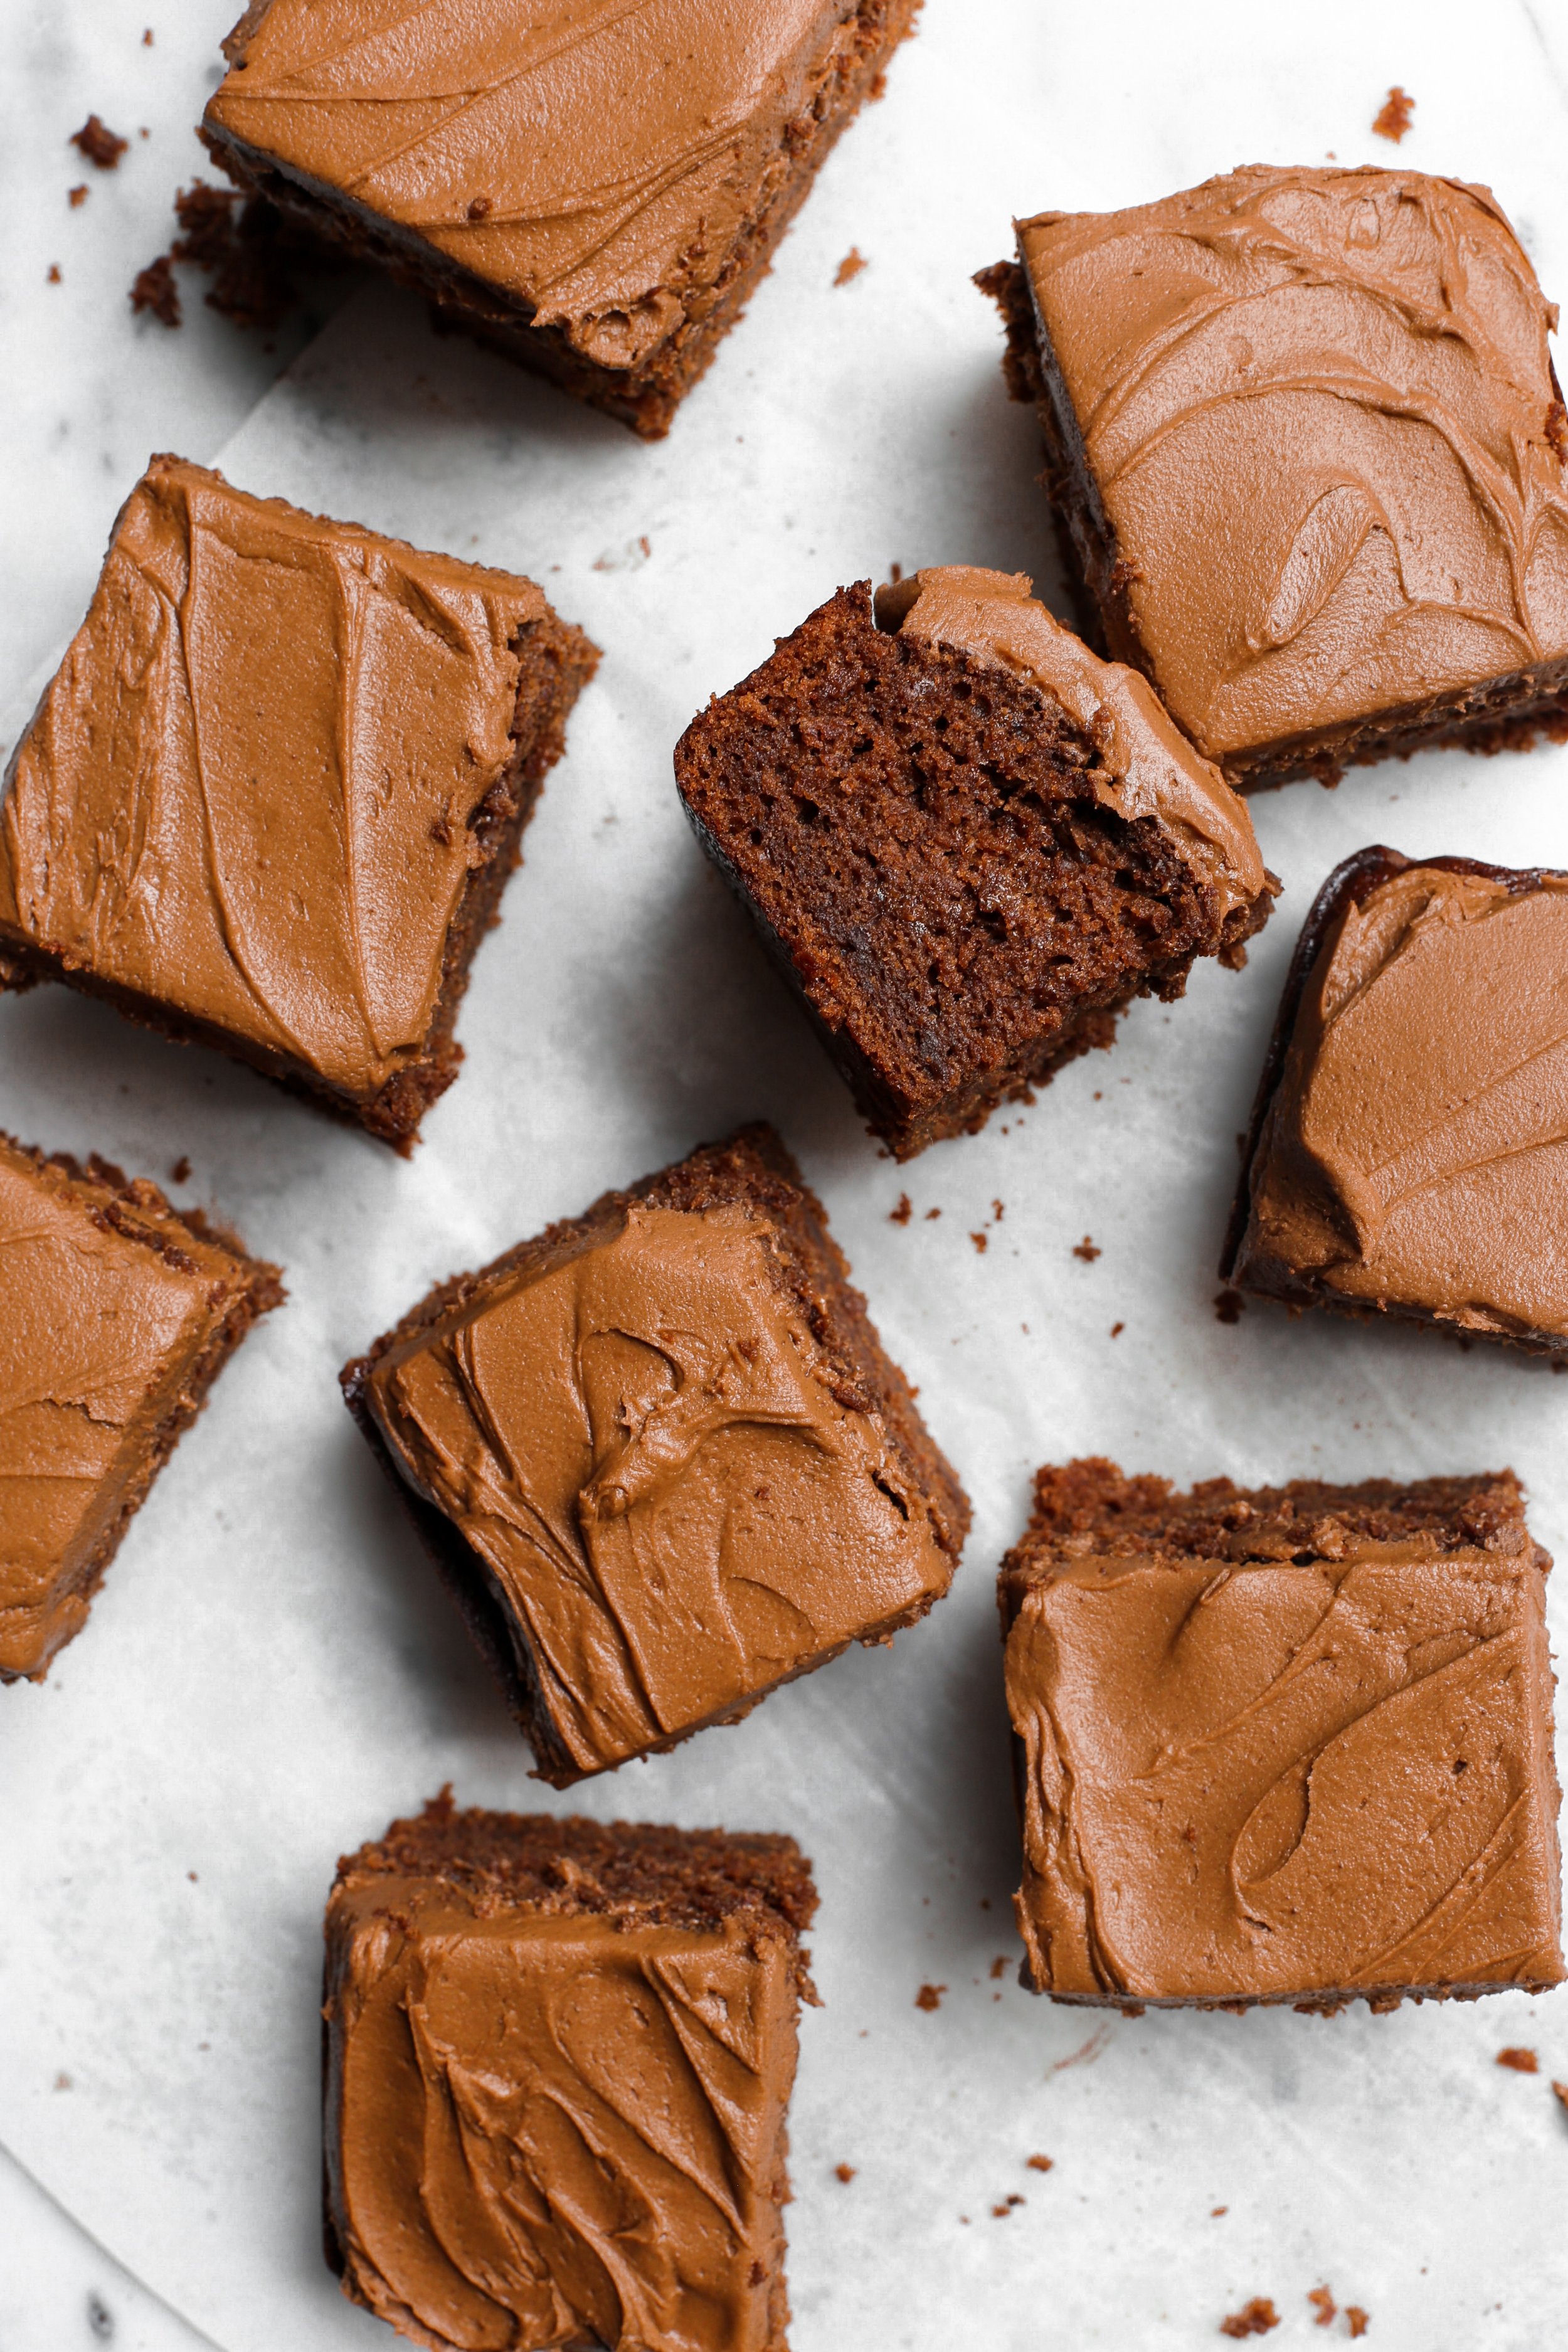
Today’s chocolate cake isn’t anything fancy, but that’s what we like about it. It’s a single layer cake that comes together quickly with an equally simple buttercream frosting. I would categorize it as a “snacking cake” which pretty much just means that it isn’t baked for a celebration in mind, but just to have on hand when a cake craving strikes. Being 8 months pregnant, this is exactly the kind of treat that I’m craving on almost a daily basis so I guess I’m admitting that I thought of this recipe for selfish reasons. Chocolate cake will always be a top 5 favorite dessert for me and so I’m glad that I was able to come up with such a delicious recipe.

What makes today’s chocolate cake recipe so good is that there’s a handful of ingredients called for to make it extremely moist. Not only will you find the typical additions of vegetable oil and milk, but there’s also one of my favorite ingredients that I love to use not only in dessert recipes, but in savory dishes as well: ricotta cheese. Adding ricotta cheese to any baked good not only guarantees an amazing texture, but it also adds a creamy and rich flavor that is addicting. If you’ve never baked anything with ricotta in it and find yourself weary of its inclusion in the recipe, just think of it as a substitute for sour cream or buttermilk.

Another ingredient listed for the chocolate cake that may stand out to you is the freshly brewed coffee. The coffee takes place of the typical hot water that you find in most chocolate cake recipes, which is used to help “bloom” the cocoa powder and therefore intensify the chocolate flavor. With using hot coffee, we’re not only amplifying the cocoa flavor with the heat of the liquid, but also because coffee is used to naturally enhance the flavor of chocolate. So essentially you won’t be tasting coffee in the cake, but will only have the benefit of enjoying a more chocolate-forward taste. If you’re a non-coffee drinker, then I would recommend sticking with hot water and adding a teaspoon of instant espresso/coffee powder to the recipe.

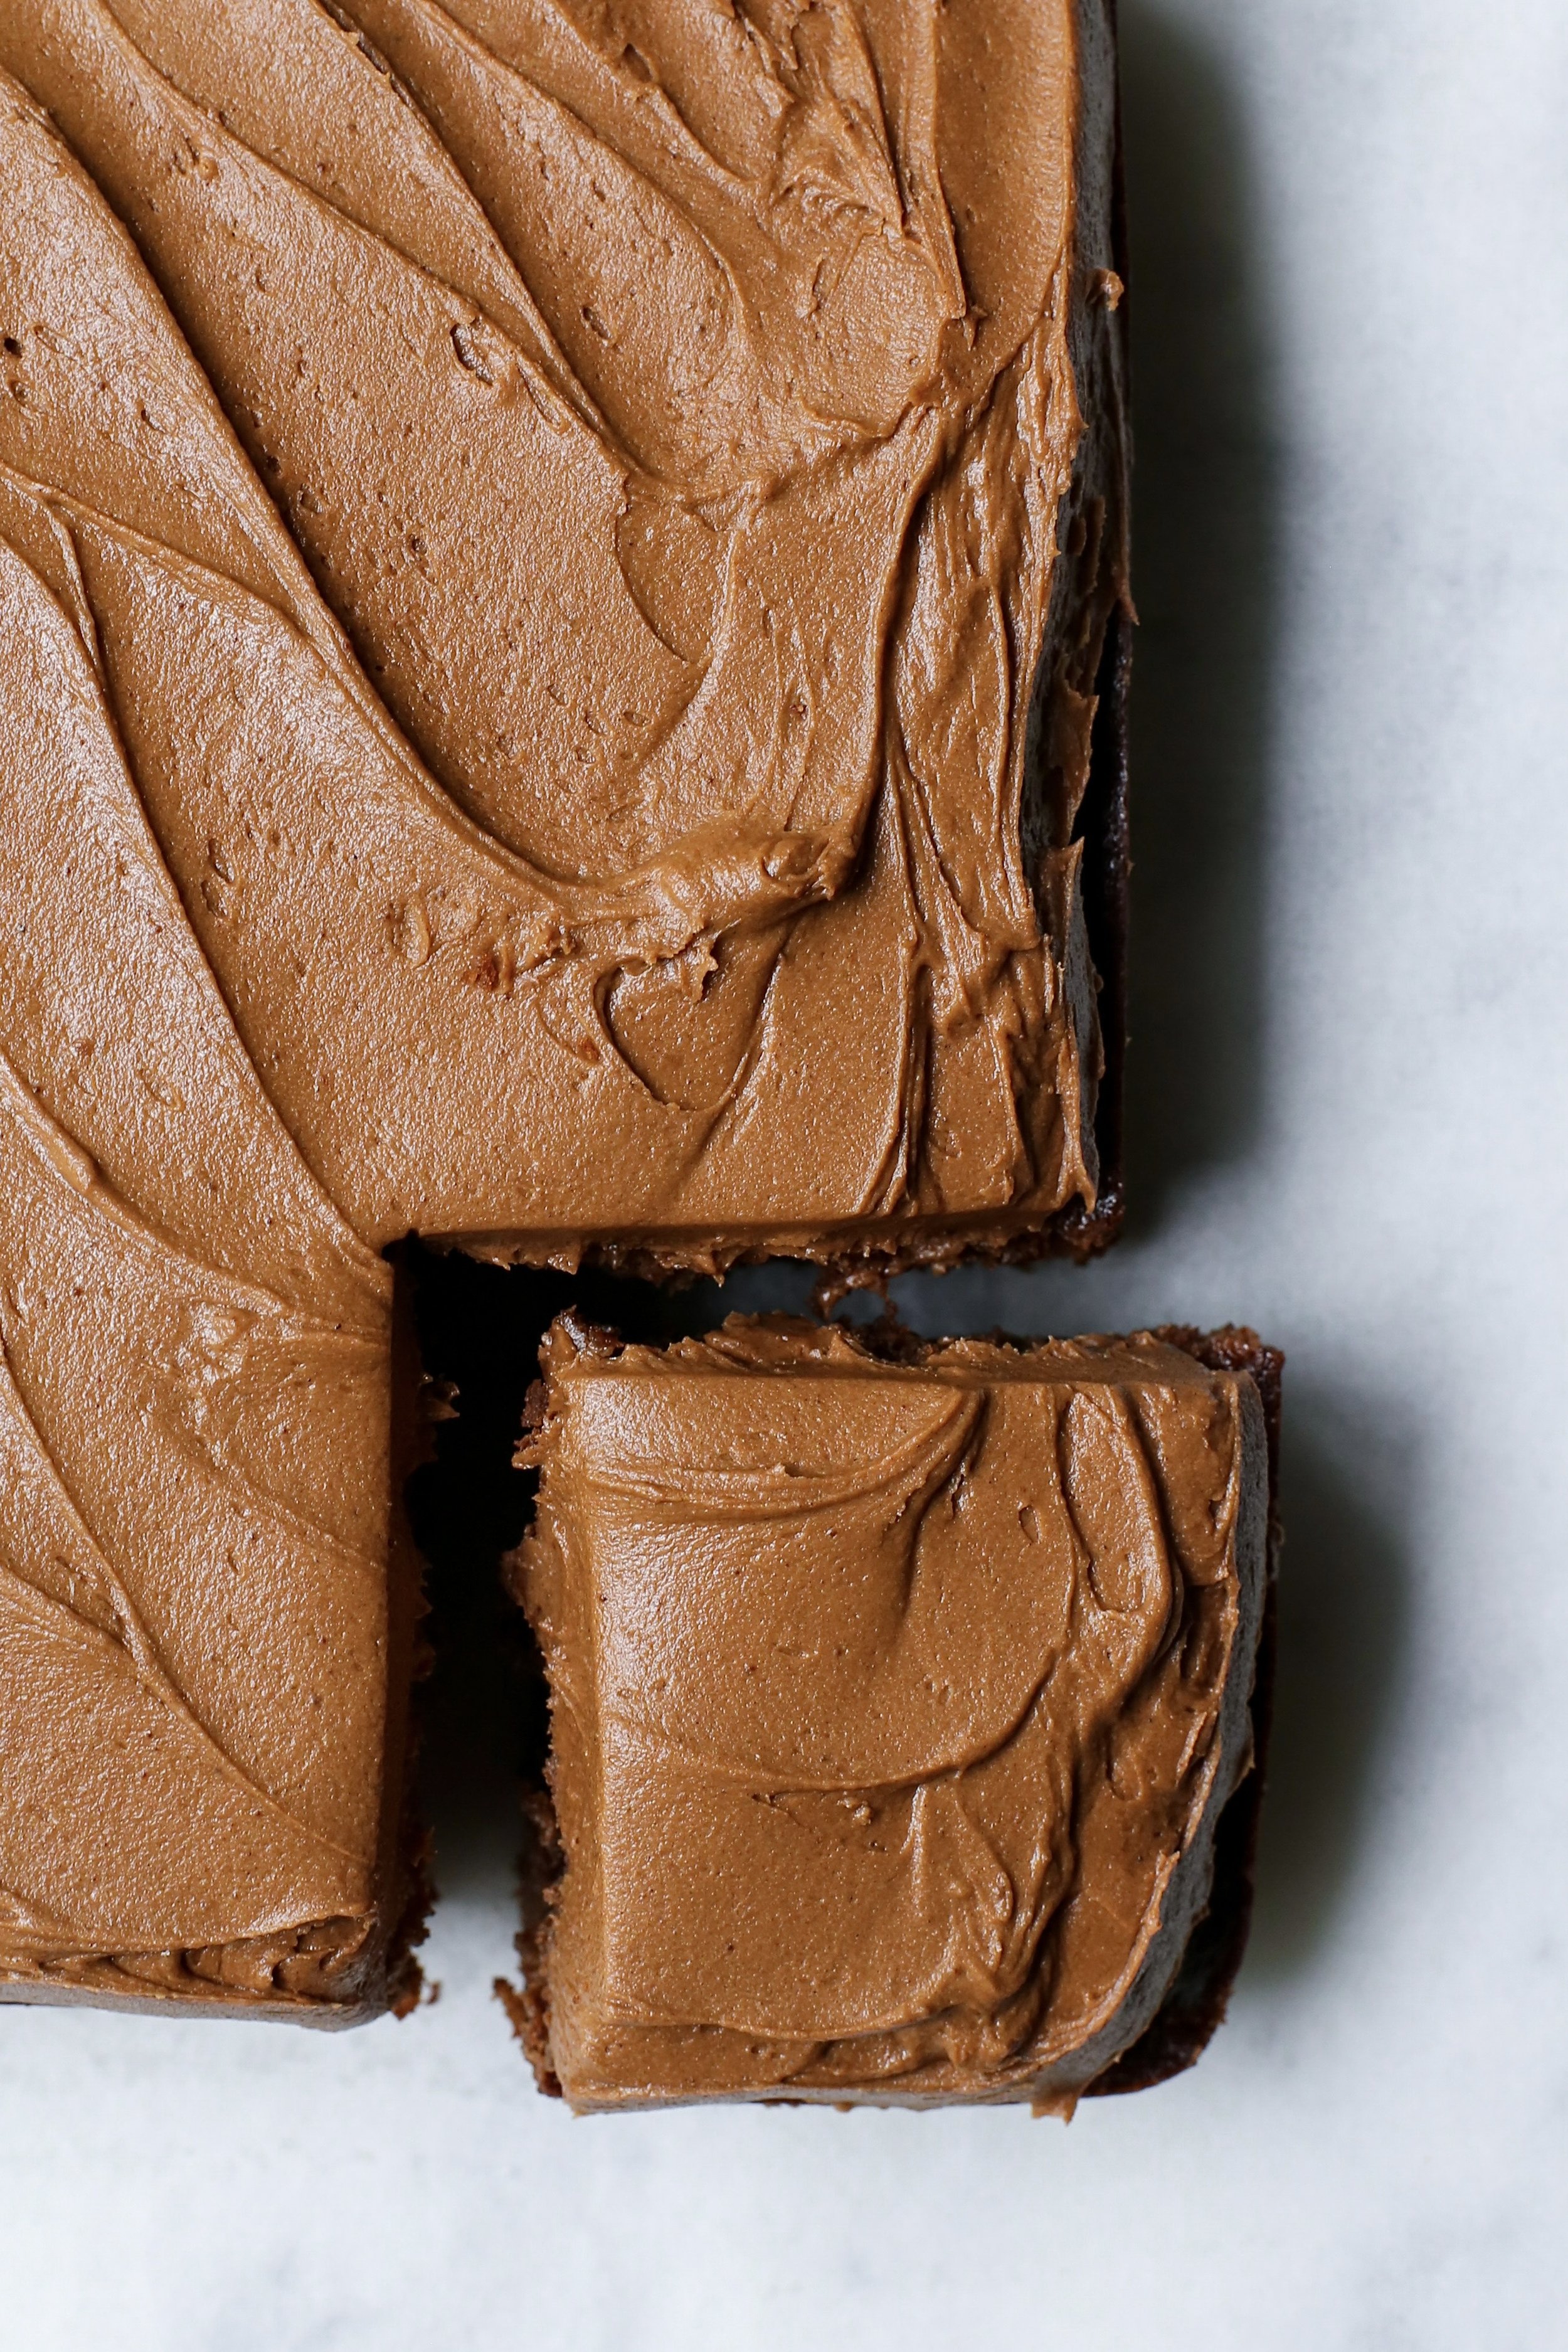
As for the buttercream frosting, it’s a pretty straightforward chocolate version with the typical ingredients of butter, powdered sugar, cocoa powder and milk. But because the chocolate cake calls for freshly brewed coffee to intensify the chocolate flavor, I decided to also add a coffee component to the frosting with the inclusion of instant espresso/coffee powder. Again, the coffee flavor won’t be completely in your face, but will be more subtle and create a much more rich, chocolate-y flavor. I added two teaspoons of instant espresso powder to the frosting and thought it created the best “mocha” flavor, but if you are searching for more of a coffee taste, you can add another 1/2-1 teaspoon to the recipe. Again, if coffee is not your thing or if you don’t have instant coffee lying around, feel free to leave it out completely and you’ll still have a great topping for your perfect chocolate ricotta cake.

Chocolate Ricotta Cake w/ Chocolate Coffee Buttercream Frosting

Makes (1) 8 inch round/square cake

Recipe adapted from Baker by Nature

Ingredients

For the cake:

  • 1 1/4 cups all-purpose flour

  • 1/2 cup unsweetened cocoa powder

  • 3/4 cup granulated sugar

  • 1/2 cup light brown sugar, packed

  • 1/4 tsp. baking powder

  • 1/4 tsp. baking soda

  • 1/2 tsp. kosher salt

  • 3/4 cup (6oz.) whole milk ricotta cheese

  • 1/2 cup neutral oil, like vegetable

  • 1/4 cup milk, whole or 2%

  • 2 large eggs

  • 2 tsp. vanilla extract

  • 1/3 cup freshly brewed coffee (or hot water)

For the frosting:

  • 1/2 cup (1 stick) unsalted butter, room temperature

  • 1 1/4 cups confectioners’ sugar

  • 1/4 cup unsweetened cocoa powder

  • 1 1/2 tbsp. milk

  • 2 tsp. instant espresso/coffee powder

  • 2 tsp. vanilla extract

  • Pinch of kosher salt

Directions

Make the cake:

  1. Preheat the oven to 350°F. Grease an 8-inch round/square cake pan with spray or butter, then line with parchment paper and grease the paper as well. If using a square pan, make sure to have enough overhang of the parchment paper for an easier removal of the cake.

  2. In a large bowl, whisk together the dry ingredients (flour, cocoa powder, both sugars, baking powder baking soda, and salt). Set aside.

  3. In a medium bowl, whisk the ricotta cheese, oil, milk, eggs and vanilla until combined. Slowly pour in the hot coffee while whisking (just to make sure you don’t cook the eggs in case your coffee is very hot). Add this mixture to the dry ingredients and gently fold together using a spatula. Do not over mix! The batter will be quite thin.

  4. Pour the batter into the prepared pan and bake for 45 to 50 minutes, or until a toothpick inserted in the center of the cake comes out clean.

  5. Allow to cool in the pan for about 5 minutes before transferring to a cooling rack. Cool completely before frosting.

Make the frosting:

  1. In the bowl of stand mixer fitted with the paddle attachment (or in a large bowl if using a hand mixer) beat the butter until soft and creamy.

  2. In a small bowl, whisk together the milk and instant coffee until combined.

  3. Directly into the stand mixer bowl, sift in the confectioners’ sugar and cocoa powder, then add in the milk/coffee mixture, vanilla extract and salt. Mix on low for about 10 seconds, then increase the speed to medium and mix for another minute, or until completely combined.

  4. Add the frosting to the cooled cake and spread evenly using an offset spatula or butter knife. Enjoy!

TOFFEE CHOCOLATE CHIP COOKIES

Since February, I’ve been on a quest to find a new favorite chocolate chip cookie recipe. After making my go-to recipe exclusively for years, which just so happens to be my pistachio chocolate chip cookie recipe sans the nuts, I felt like I needed to switch things up a bit. After scouring the internet for a basic recipe, I turned to my very small library of cookbooks here in Portland and found the winner within Baking at République.

Baking at République shares all the amazingly beautiful and decadent baked goods created by Margarita Manzke at the French restaurant République located in Los Angeles, CA. With a line outside the door just about every time you drive by it, Republique is deservedly famous not only for its stunning interior, but for the stellar lineup of pastries put on display in the front of the restaurant (they also serve lunch and dinner that is equally perfect). I am pretty picky when it comes to buying cookbooks especially since you can find just about any recipe on the internet these days, but trust me when I say that the République cookbook is worth it.

The chocolate chip cookie recipe from Baking at République is as straight-forward as it gets: there are only 8 ingredients, no browning of butters and no crazy ingredients added. The only thing that caught me off guard as I was reading through the recipe was the fact that there’s no vanilla extract (!!!) used. I actually thought my book had a misprint to the point that I cross-checked by finding the recipe on another random blog, but sure enough, my book’s recipe was actually correct. As any baker knows, the addition of vanilla extract is similar to adding salt to a recipe: it enhances the flavor of all the other ingredients in the recipe and essentially gives life to whatever dish it’s in. Without it, I was worried that the cookies would taste flat or bland, but to my surprise, I didn’t even notice it was missing when eating the cookies! The only thing I did notice was that the cookie dough didn’t smell as enticing as it normally would with vanilla in it (I seriously could smell cookie dough all day, every day), but that just meant it smelled more buttery, which isn’t necessarily a bad thing. I’m not really sure why République chooses to leave the extract out - could be for cost purposes since we all know how expensive the stuff is - but after eating the cookies, I'm okay with their decision.

As I’m sure you noticed in the title of this recipe, these cookies have toffee in them and that’s because of a happy accident that occurred the first time I baked them. République’s recipe for these cookies calls for about 1 cup of chopped dark chocolate and at the time, I only had about half of that in my fridge. Determined to get the full amount of chocolate to dough ratio that was needed, I decided to add in chopped up Heath bars that I had leftover from making my coffee toffee ice cream. This turned out to be the best decision I could ever make and is what I think makes these perfect cookies that much better. Adding Heath or Skor candy bars to any dessert is kind of like cheating because you’re not only getting more chocolate (in this case, milk chocolate) but you’re getting the addicting caramel-y flavor of toffee that melts in your mouth. I know I said I wanted to find a new basic chocolate chip cookie recipe, but it’s 2021… we can add something a little interesting (even if it’s straight-up candy bars) to our cookies these days. If you want to make these cookies as just a normal chocolate chip cookie, simply leave out the toffee and add only the chocolate, but I promise you that the toffee candy doesn’t make it “too much” or overly decadent… the toffee is almost like a secret ingredient that elevates it. But as always, you do you.

The last thing I wanted to comment on is that I also shared the weight measurements for this recipe, something that I rarely do. As an American, baking with a scale isn’t the norm but I’ve been trying to get into the habit of doing it more often, especially since it requires less time in making the dough and less time cleaning up after.

Toffee Chocolate Chip Cookies

Yields a dozen large cookies

Recipe adapted from the Baking at République Cookbook

Ingredients

  • 1 1/3 cups plus 1 tbsp. (175g) all-purpose flour

  • 3/4 tsp. (5g) baking soda

  • 1/4 tsp. kosher salt

  • 1/2 cup (113g) unsalted butter, slightly softened but still cold (should leave an indentation when poked)

  • 3/4 cup plus 1 tbsp. (130g) packed light brown sugar

  • 1/2 cup (100g) granulated sugar

  • 1 large egg

  • 1 cup plus 2 tbsp. (150g) mix of chopped dark chocolate AND chopped chocolate-covered toffee candy (Heath or Skor works) - I do equal parts of both

  • Flaky sea salt, to finish

Directions

  1. In a medium-sized bowl, sift the flour, baking soda and salt together. Whisk until combined and set aside.

  2. Using a stand mixer fitted with the paddle attachment (or in a large bowl if using a hand mixer) cream the butter and both sugars together until incorporated, about 1-2 minutes. Try not to over mix, or the cookies will flatten more while baking. Add the egg and mix again.

  3. Add the dry ingredients to the stand mixer bowl all at once and turn the mixer on low for 10 seconds before increasing the speed to medium for about 30 seconds, or until the dough comes together. Again, try not to over mix the dough. Using a spatula, fold in the chopped chocolate and toffee pieces.

  4. Using a large cookie scoop or spoons, portion out 2oz. or 3 tablespoons of dough for each cookie (you should get 12 cookies), place them on a plate and cover with plastic wrap. Refrigerate the cookie dough overnight / at least 12 hours.

  5. Preheat the oven to 350°F* and cover a baking sheet with parchment paper.

  6. Bake the cookies for 8-11 minutes or until the edges are golden brown (bake only 4 cookies at a time to ensure the cookies will have enough room to spread). Sprinkle flaky sea salt immediately after pulling them out of the oven.

  7. Allow the cookies to sit on the baking sheet for a few minutes before transferring to a cooking rack. Store in an airtight container. Enjoy!

* I’ve made these cookies a few times with the oven temperature at 375°F purposefully and accidentally (my oven isn’t the best) and they still came out amazingly. You’ll end up with a slightly crispier exterior and a deeper color, but it’s not too drastically different. So if you want a cookie like that, bake at 375° and knock a minute of two off the baking time!

OATMEAL PEANUT BUTTER CHOCOLATE CHIP COOKIES

IMG_3428.jpg

Before we get into today’s recipe, I wanted to share with you an article that I was lucky enough to be a part of recently. The wonderful people at Redfin, a top real estate brokerage, reached out to me last week for my top kitchen organization tip and I, of course, was glad to add my two cents. The article is entitled “Kitchen Hacks: Expert Tips for an Organized and Functional Kitchen” and I strongly suggest that all of you give it a read. There are tons of helpful kitchen suggestions from the most practical kitchen tools that every cook should own to various simple organizational hacks like storing your spices in clear containers that are labeled. My tip falls under the category “Game-Changing Kitchen Hacks” and although it’s very simple, it is legitimately something that helps me out greatly while cooking. I won’t spoil it for you here, so click on this link to find my tip and hopefully you’ll learn a few new things. I certainly did.


September is here and although it’s not officially autumn yet, Maine has been showing signs that summer is a thing of the past. The weather has been chillier, with crisp mornings leading into sun-soaked afternoons that turn into cooler nights where I’ve found myself needing to wear a sweater on our after-dinner walks. After months of dealing with my enemy, humidity, I’ve never been happier (and neither has my hair). I haven’t experienced a quintessential autumn season since I lived in Chicago 8 years ago, but instead of feeling the dread of studying and midterms, I have apple picking and fall foliage to look forward to. Honestly, I can’t wait.

With the changing of the seasons, I had to bid adieu to the plethora of recipes that I had been posting that highlighted all things summer fruit. As much as I love fresh berries, sweet watermelon, and juicy peaches, my love for autumn-centric dishes runs deep. Apple and pumpkin-focused baked goods will always be a standby in my kitchen from September to December, but I also notice an increase in chocolate (hello, Halloween). Today’s cookie recipe is one that not only features chocolate but one that combines oatmeal and peanut butter cookies, other cozy ingredients. It’s the best of all worlds and yet another cookie recipe that I can’t get enough of.

067E8A20-962B-4A8C-B97C-74E60AB88472-057690C1-273B-46A1-9397-0FFF7F18B9A6.jpg

I feel like I’ve touched on this topic before, but in case this is your first time reading my blog, I love peanut butter. I literally eat the stuff every single day whether its slathered on toast for a preworkout snack or when eating my favorite peanut butter and date bars from Trader Joe’s. Like any other normal kid, Jif and Skippy reigned supreme in my household growing up, but today, I buy the natural variety where the only ingredient listed is roasted peanuts. I don’t even need the salt.

Despite this love for the popular spread, I have never been fond of peanut butter cookies: you know, the ones with indentations on the top that tend to be dry (in my opinion!). But the cookie recipe I’m sharing with you today gives you that roasted peanut flavor but with a perfect chewy texture, which comes from the addition of old fashioned oats. The recipe only calls for 1/2 cup of peanut butter but it’s definitely the ideal ratio when paired with oats and chocolate; the three flavors work in harmony together without one overpowering the other. They’re not just “oatmeal cookies” or “peanut butter cookies” or “chocolate chip cookies”… it really is an amalgamation of all three and unlike any other cookie I’ve had before.

Although I only eat natural peanut butter these days, I strongly advise using standard peanut butters from Jif or Skippy - the ones with added sugar and oil (usually rapeseed or soybean). If you were to use a natural variety, it would actually lead to a more dry and crumbly cookie which is the last thing we want. So, although I’m not a fan of eating nut butters with any additives, all bets are off when it comes to baking. After making today’s cookies, you can use up the rest of the peanut jar by baking my peanut butter swirl brownies or homemade dark chocolate peanut butter cups.

IMG_3468-3.jpg

Oatmeal Peanut Butter Chocolate Chip Cookies

Yields about 15 large cookies

Recipe adapted slightly from Two Peas & Their Pod

Ingredients

AE2B211F-EBB9-480D-9E73-D6BB62DDAA00-F2044EEB-206D-43E0-A5A2-4835DF388116.jpeg
  • 1/2 cup all-purpose flour

  • 1 1/2 cups old fashioned oats

  • 1/2 tsp. cinnamon

  • 1/2 tsp. baking soda

  • 1/4 tsp. kosher salt

  • 1/2 cup (120 grams) creamy peanut butter (any n0n-natural variety)

  • 1/2 cup (1 stick, 4oz.) unsalted butter, room temperature

  • 1/2 cup granulated sugar

  • 1/2 cup brown sugar, lightly packed (light or dark)

  • 1 large egg, room temperature

  • 1 tsp. vanilla extract

  • 4 oz. dark chocolate bar, roughly chopped

  • Flaky sea salt, to finish (optional)

Directions

  1. In a medium sized bowl, whisk the flour, oats, cinnamon, baking soda and salt together. Set aside.

  2. To the bowl of stand mixer fitted with the paddle attachment (or in a large bowl if using a hand mixer), cream the peanut butter, butter and both sugars on medium speed until the mixture is light and fluffy, about 2-3 minutes. Add the egg and vanilla extract and mix until incorporated. Scrape down the sides of the bowl.

  3. With the mixer turned off, add the oats/flour mixture all at once and turn the mixer on low for about 10 seconds before turning up the speed to medium. Mix for about 30 seconds. Using a spatula, fold in the chopped dark chocolate and make sure to not over mix the dough. Cover the bowl with plastic wrap and refrigerate for one hour.

  4. Preheat the oven to 350degreesF and line a baking sheet with parchment paper.

  5. Using a large cookie scoop or a spoon, scoop our 3 tbsp. portions of dough per cookie and place on the prepared baking sheet. Bake only 6 at a time since they will be larger.

  6. Bake the cookies for about 12-13 minutes. The cookies will look soft in the middle, but the edges will be set and golden brown. Sprinkle immediately with flaky sea salt. Allow the cookies to sit on the baking sheet for about 5 minutes before transferring to a cooling rack.