BROWN SUGAR + (EDIBLE) CHOCOLATE CHIP COOKIE DOUGH ICE CREAM

public.jpeg

After my sister’s baby shower in July - which if you forgot, I made enough ice cream to feed a small army - I decided to take a break from making my favorite frozen dessert. And even though it was much needed, and I was happily baking cookies, tarts and cheesecakes these past few months, I knew it wouldn’t be long before the ice cream maker was calling my name.

What also prompted me to pull my ice cream maker out of the pantry was in part from binge-watching Viceland’s TV show “The Ice Cream Show”. Although the show debuted in 2018, it just came onto my radar last week when Viceland aired a marathon of the series (there’s only 10 episodes total). The show is hosted by Isaac Lappert, a third generation ice cream maker who has been working for his family’s ice cream company, Lappert’s, since he was 6 years old. Throughout the series, Isaac travels around the country visiting and eating at America’s most beloved ice cream destinations; a very basic formula for food television, but one that resonated with me because I dream of opening up my own cream shop one day. To see various companies that started from all different backgrounds and hear their stories of blooming into huge successful companies or remain “mom and pop” shops that have a cult following, was seriously inspiring.

public.jpeg

In one of the episodes, Isaac visits the Mecca of the ice cream world: the Ben & Jerry’s factory in Vermont. When I was watching this episode (and if I’m being honest, every other episode as well) I was dying to get into the kitchen to make a quart of ice cream. When I was little, if you were to ask me what my favorite foods were, I 100% would have answered with “chicken fingers and fries and chocolate chip cookie dough ice cream”. And although I was obsessed with Thrifty’s version of the popular ice cream flavor, Ben & Jerry’s was the kind I always wanted but only got on special occasions because it was the “fancier” ice cream. Regardless, I am a chocolate chip cookie dough (CCCD from here on out!) ice cream fanatic and once I was able to make my version of it at home, adult version of me was not only elated but worried about not fitting into my clothes anymore. Because I will say this, the recipe I’m giving you below for my version of a CCCD ice cream is just as, if not better, than Ben & Jerry’s. And I think that’s a big deal!

I’ve made this ice cream for myself a handful of times over the years and I usually combined the cookie dough with a basic vanilla ice cream recipe. But for my blog, I wanted to give you another option but keep it simple enough so that the ice cream base wouldn’t overpower the cookie dough: enter brown sugar ice cream. I basically took my vanilla ice cream recipe and swapped in brown sugar where the granulated sugar went, took out one egg yolk and called it a day! I was worried that you wouldn’t be able to tell a difference between this and my basic vanilla recipe, but there’s definitely a distinction albeit a subtle one. Since brown sugar has molasses in it, the ice cream will have a slight caramel/toffee taste to it and the overall appearance (especially pre-churned) will be a darker/more tan color than plan vanilla. As for what kind of brown sugar to use… light, golden, dark… you’re good to use any of the three. I’ve made it with light brown sugar and then once with dark brown and I saw no difference in the color of the ice cream base nor did I taste anything different. So whatever you have in you’re pantry, use it up.

public.jpeg

Let’s get to the most important aspect of today’s ice cream: the cookie dough. I’d like to think of myself as a “normal” fan when it comes to cookie dough and how I eat it. For example, whenever I make a batch of cookies, I of course steal bits of dough here and there and love to lick clean the spatula and mixing bowl (yet, I’m nice and usually give it to Alex because we’re in a healthy, sharing relationship). But, I am pretty grossed out with the new fad of shops that solely sell scoops of cookie dough, instead of scoops of ice cream. I don’t know why but I feel like a bowl of cookie dough is too much and it should be a little treat that you either sneak when baking cookies or search for pockets of when eating a pint of ice cream. My point is… cookie dough is sacred and there’s a right time and place for it. Don’t exploit it!

Growing up, I know we all were warned by our parents that it was unsafe to consume raw cookie dough, and obviously, the moment my mom left the kitchen, I would take a HUGE spoonful out of the Pillsbury cookie dough tube (you know the one). I still stand by the fact that a little bit can’t hurt you, but if you’re going to make your own CCCD ice cream with the only intention of eating raw cookie dough, then definitely you need to take the proper steps to avoid getting sick. It was always thought that consuming raw eggs were the problematic part of cookie dough, but as we’ve come to find out, it’s also the flour as well! Raw flour is loaded with bacteria, so the cookie dough recipe below will not only be missing eggs but will have instructions for you to heat the flour to 160° F. This can be done in the microwave and only takes about 1 minute, but it’s an important step! Don’t skip it.

public.jpeg

So since we’re taking eggs out of the cookie dough, we’re going to have to add something that helps bind the dough together as well as provides fat for flavor. The best way to achieve that is by using heavy cream, but in a pinch, you can also use whole milk especially since you’ll have leftover if you’re making the ice cream base. As for the rest of the dough and the process of making it, it’s totally simple. You don’t need the rising agents (baking powder and baking soda) because you won’t be baking off the dough and overall, you can be pretty lackadaisical when making the dough. You don’t have to worry too much about having perfectly room temperature butter or whether or not you over mixed the dough… these are all things that need to be taken into account when baking off the cookies, not for consuming raw cookie dough. The only thing you have to worry about is if the dough tastes amazing. It will, I promise.

public.jpeg

Brown Sugar and Chocolate Chip Cookie Dough Ice Cream

Yields about 1 quart

Ingredients

For the ice cream:

  • 1 cup whole milk

  • 2 cups heavy cream, divided

  • 1 cup brown sugar, lightly packed (light or dark works)

  • Pinch of salt

  • 5 large egg yolks

  • 2 tsp. vanilla extract

  • Chocolate chip cookie dough, to finish (recipe below)

For the edible cookie dough (recipe adapted from Brown Eyed Baker)

  • 3/4 cup all-purpose flour

  • 1/2 cup (1 stick) unsalted butter, room temperature

  • 1/4 cup granulated sugar

  • 1/2 cup light brown sugar, lightly packed

  • 2 tbsp. heavy cream (or whole milk)

  • 1/2 tsp. vanilla extract

  • 1/4 tsp. kosher salt

  • 1/2 cup mini chocolate chips or chopped chocolate

Directions

  1. In a large bowl, add 1 cup of the heavy cream and set a strainer over the top (use a bowl that will be able to fit over an ice bath for later).

  2. Warm the milk, 1 cup of heavy cream, brown sugar, and salt in a saucepan over medium-low heat. In a medium bowl, whisk the egg yolks together. Just as the milk mixture is beginning to simmer, gradually add some of it to the bowl of egg yolks, whisking constantly as to not scramble the eggs (this is called tempering). Once the egg yolk mixture temperature has raised, pour the mixture back into the saucepan. Stir constantly over medium-low heat until the mixture thickens and coats the back of your spatula or spoon.

  3. Pour the custard mixture over the strainer-lined bowl. Stir the custard in with the heavy cream that is already in the bowl and add in the vanilla extract. Let the ice cream base sit over an ice bath for about an hour before moving to the refrigerator. Chill for at least 4 hours, or overnight.

  4. Make the cookie dough: Place the flour in a small bowl and microwave on high for 1 minute and 15 seconds, stirring well every 15 seconds. You want to get the flour’s temperature up to 160°, but if you don’t have a thermometer, 1:15 should be more than enough time to kill any bacteria. Set the flour aside. In the bowl of stand mixer fitted with the paddle attachment (or in a large bowl if using a hand mixer) cream the butter and sugars together until light and fluffy, 2-3 minutes. Add in the heavy cream and vanilla extract and mix until incorporated. Add the flour and salt and mix on low for 10 seconds, then mix on medium until no flour bits remain. Stir in the chocolate chips. Cover the bowl with plastic wrap and refrigerate for about an hour (this will help in scooping out the cookie dough bites).

  5. Right before churning the ice cream, scoop out the cookie dough bites. You can use a teaspoon to help make more uniform bites, but honestly, I just used my hands and eyeballed it. The dough bites don’t have to be perfectly matched! Quickly roll each cookie dough bite into a ball and stick them onto a plate and place them in the freezer.

  6. Churn the ice cream in your maker according to the manufacturer's instructions. Transfer the finished ice cream to an airtight container and stir in the cookie dough bites. Freeze until solid. Enjoy!

LEMON + PISTACHIO ICE CREAM SANDWICHES

IMG_3459.jpg

By the time you’ll be reading this, I’ll most likely be sitting by the pool, sweating in 105°F weather, sipping on a frozen strawberry margarita. Alex and I are celebrating the 4th of July in Scottsdale, Arizona this year (this will be our third time for the holiday) and it’s something that we LOVE doing. The house that we stay at is perfect for relaxing and having fun in the pool, and the neighborhood we stay in (Paradise Valley) is pretty dead since most of the residents leave Arizona for the summer once the temperature begins to rise. We jump in the pool all day and night, BBQ, blast bad music, and occasionally leave the house to get a couple of meals from our favorite spots (Pizzeria Bianco for the best pizza west of the Mississippi and Tee Pee for giant margaritas and amazing tamales). The 4th of July had never been my favorite holiday until we started celebrating it in Scottsdale.

In the past few weeks, I’d been having some trouble in the kitchen with creating a successful recipe for the blog. It all started with wanting to post a recipe for my favorite gelato flavor, hazelnut, and even though the finished product came out okay, I wasn’t completely sold on it. I was attempting to recreate the exact feeling when I had my first bite of hazelnut gelato in Rome years ago and unfortunately my recipe just wasn’t it. From there, I worked on a baked peach doughnut with a crumb topping and that was an utter disaster, followed by a summer berry olive oil cake which I was not a fan of. So, with all of these unsuccessful kitchen moments, I returned to my two favorite sweets to make in the kitchen and combined them together to give you my first ice cream sandwich recipe. I’m happy to report that it is anything but unsuccessful.

IMG_3431.jpg

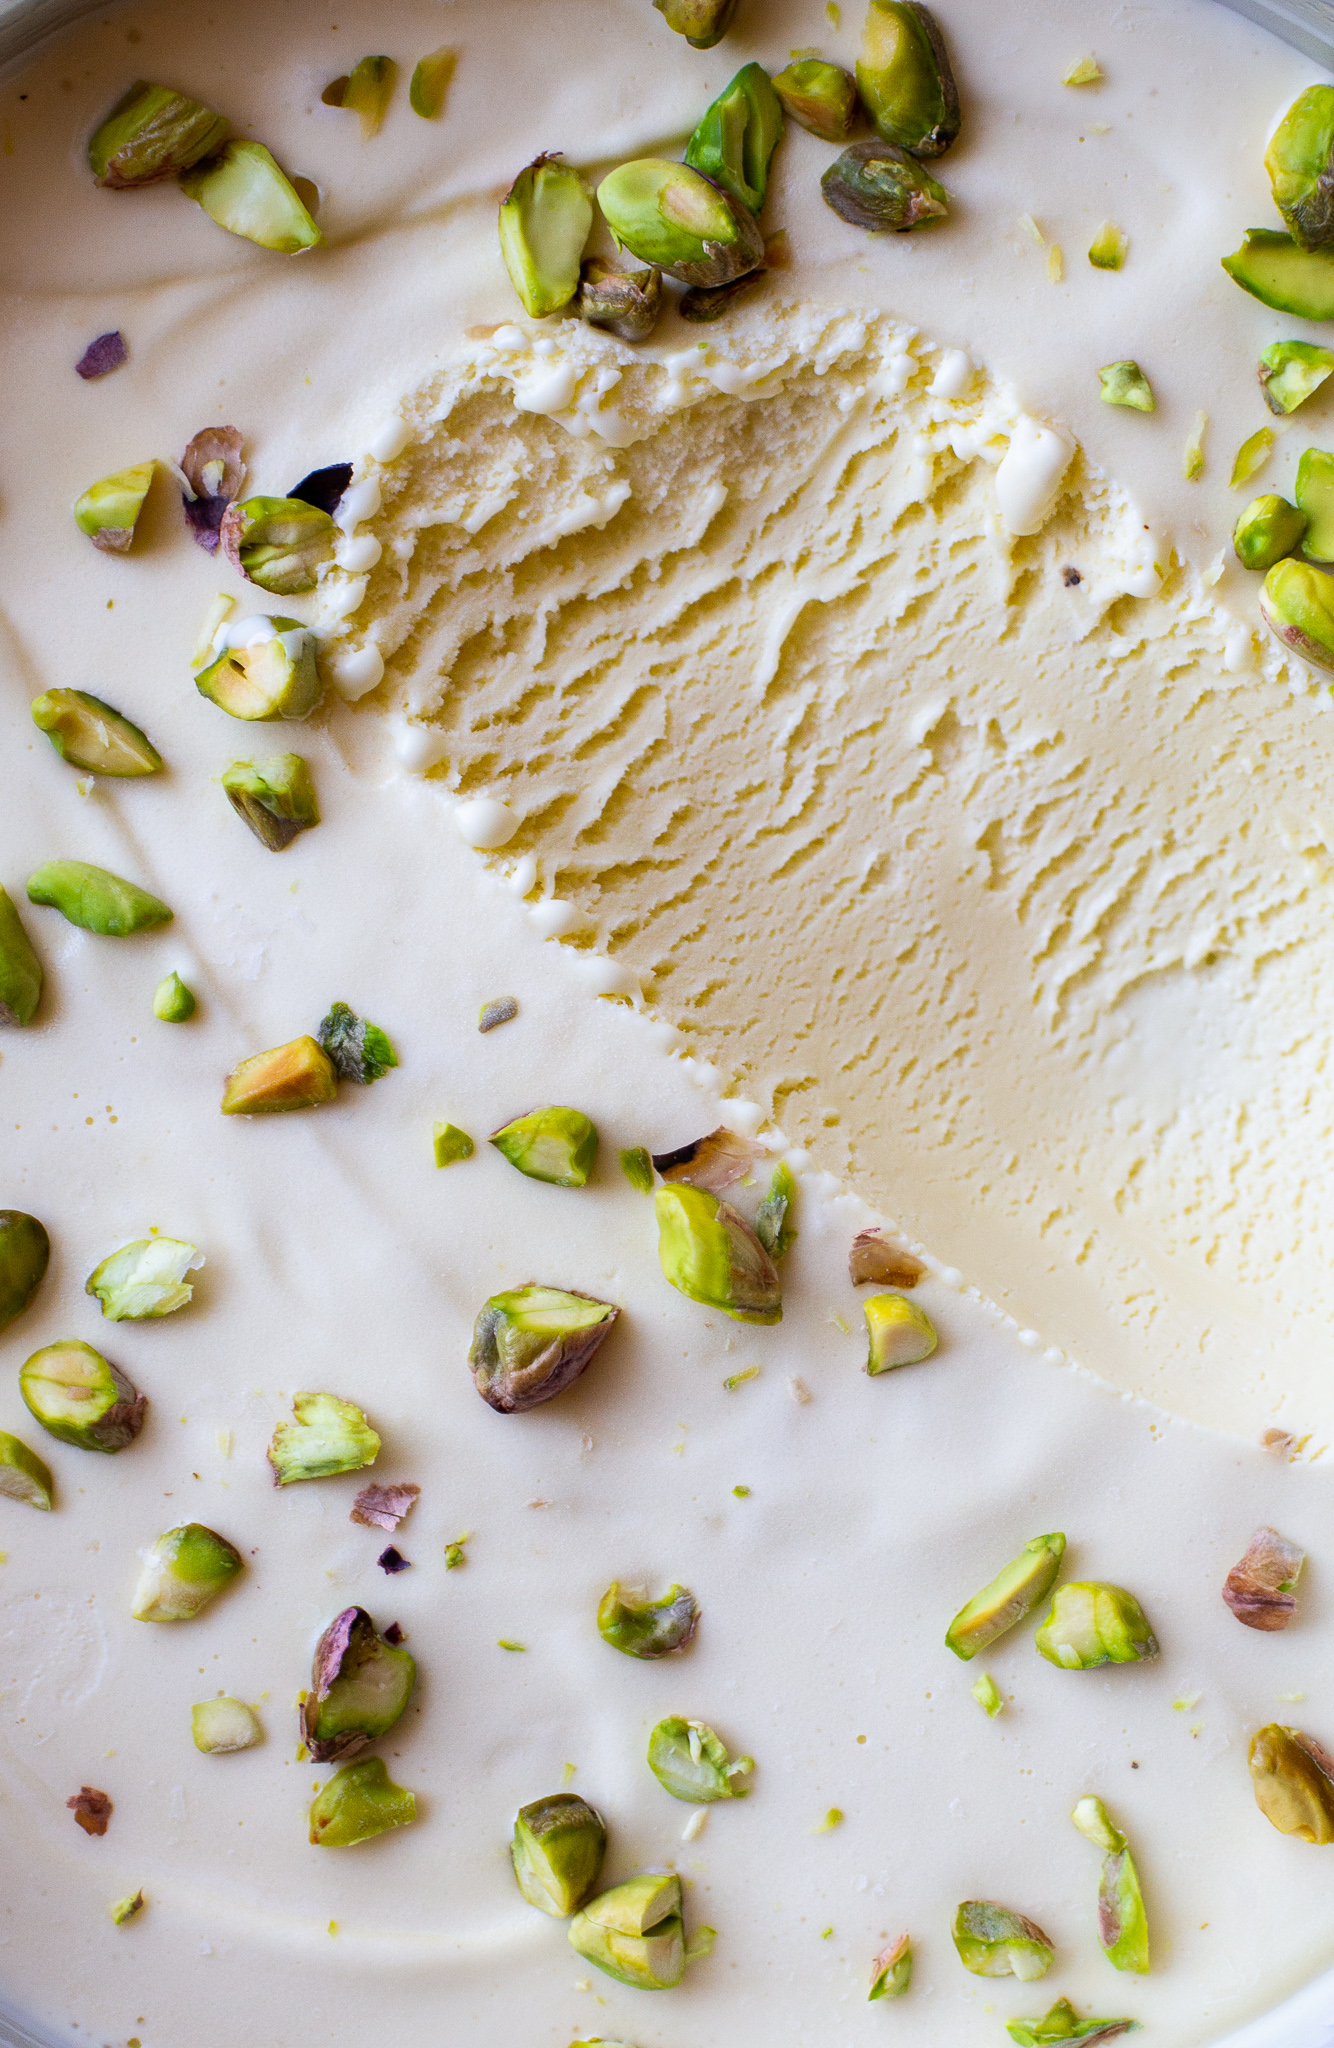
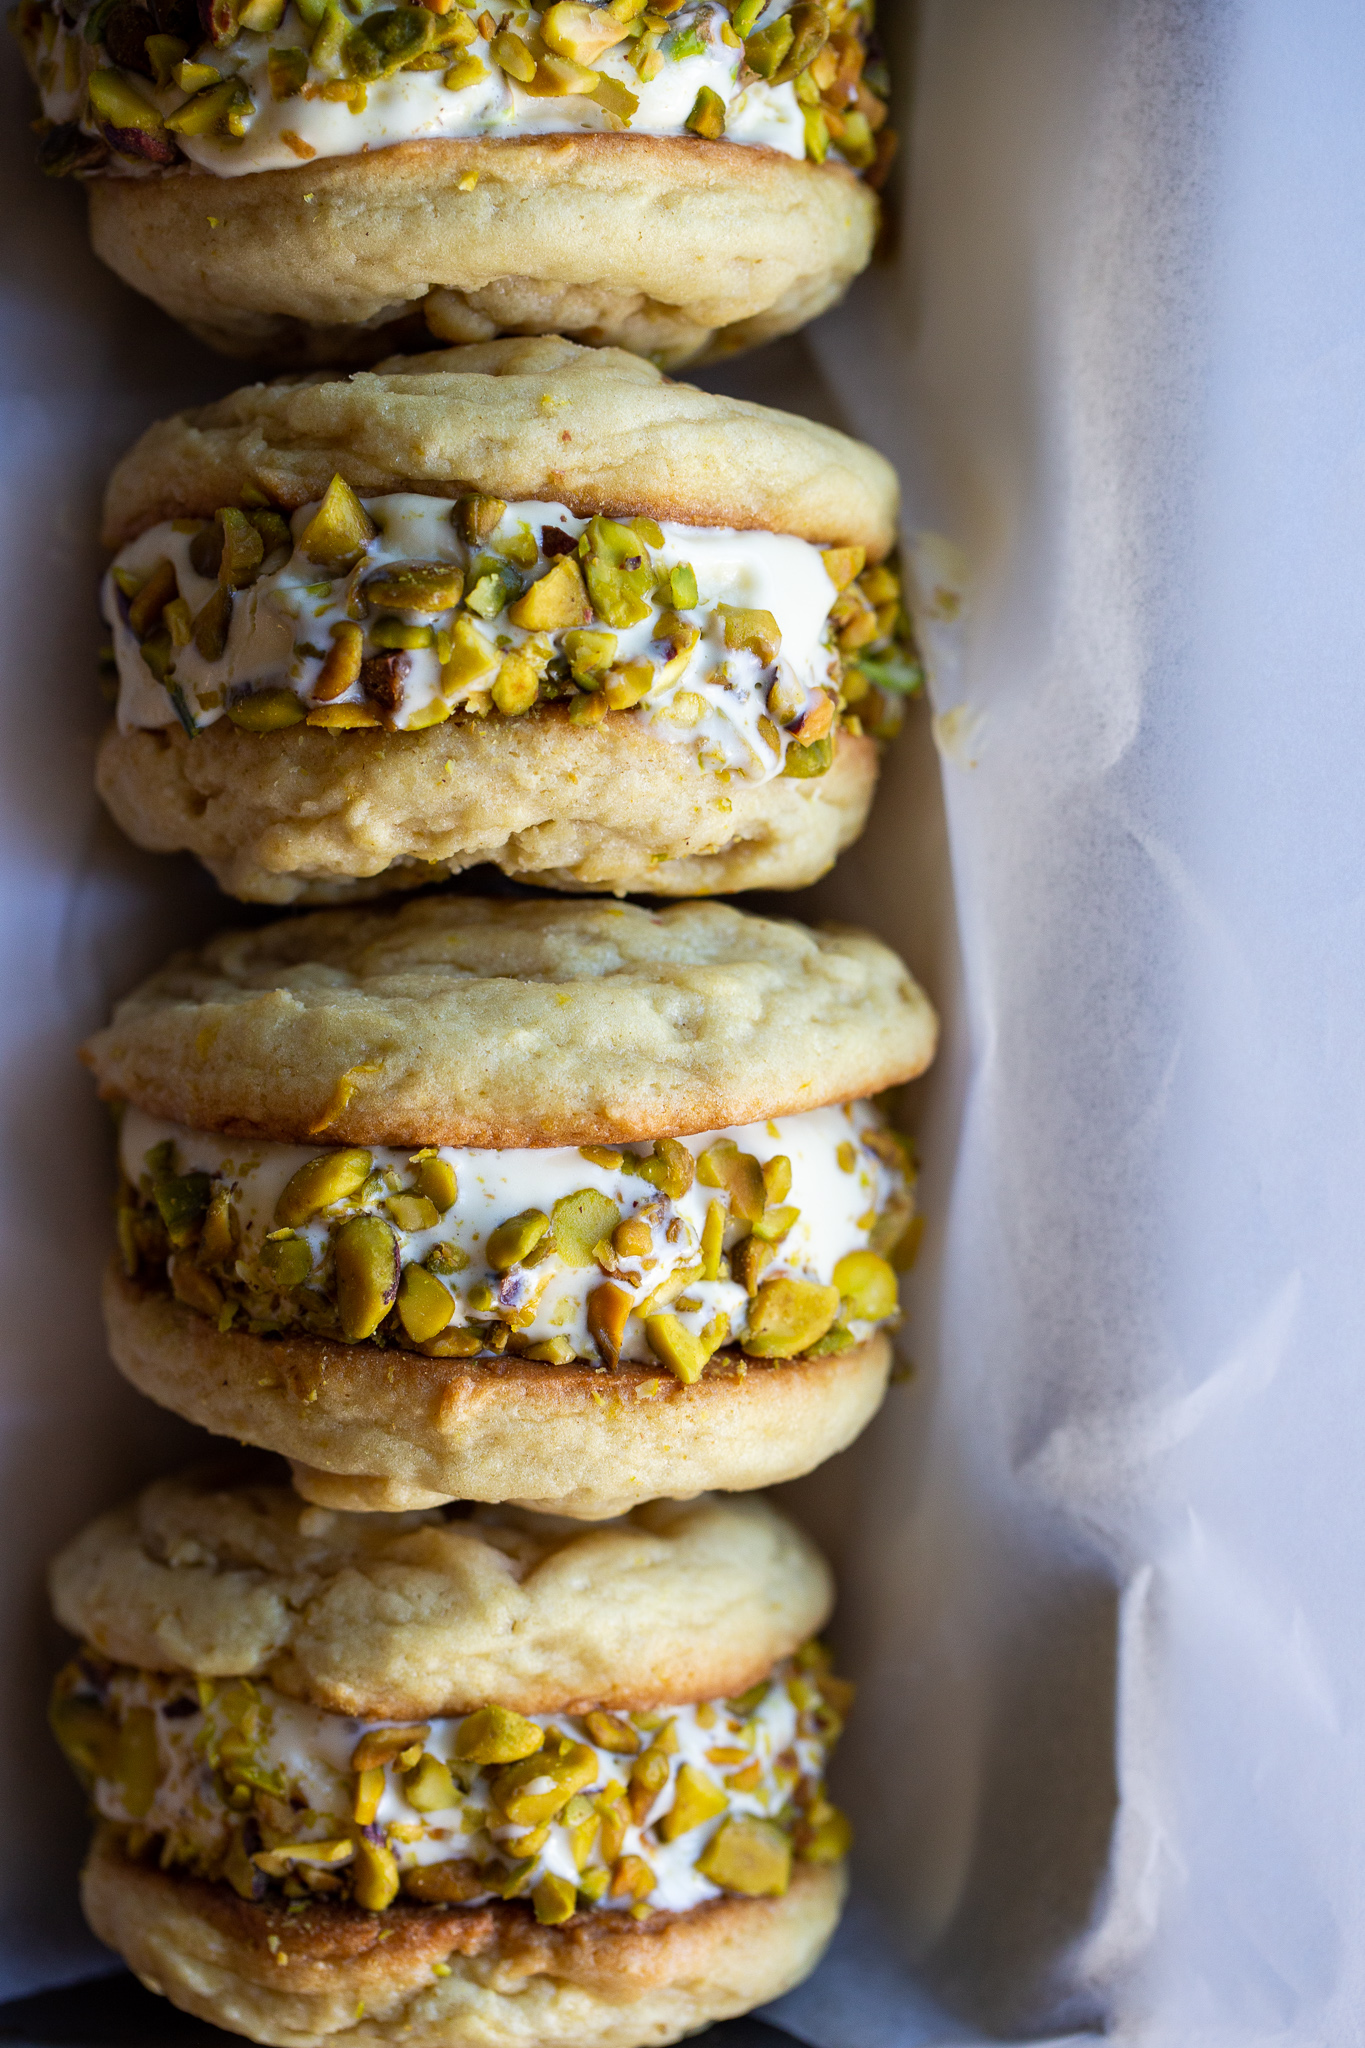
I love ice cream sandwiches because of the endless amount of combinations that you can create. You can essentially bake any type of cookie flavor that you love (plain old chocolate chip, brownie, snickerdoodle, white chocolate macadamia nut, etc.) and sandwich it between any ice cream flavor you can get your hands on (rocky road, cookie dough, mint chip, etc.). Today, I turned to a classic flavor combination that I turn to time and time again (Exhibit A and Exhibit B): citrus and pistachios. In today’s case, we’ll be working with soft and chewy lemon cookies and creamy pistachio ice cream. It’s perfect.

The lemon cookies get their flavor from three additions to the dough: lemon juice, lemon zest and lemon extract. We really want the lemon flavor to stand up against the rich, custard-y ice cream, so these three components are vital to achieving that bright citrus taste. I chose a cookie that was a bit softer and chewier, a texture that after being placed in the freezer (this is of course how you will need to store ice cream sandwiches) will not yield a hard and crunchy cookie when biting into it. Much like my funfetti cookies, this dough has cornstarch added to it to achieve that softer and chewier texture, and it’s also important to not over bake the cookies! The moment you see that the edges are set, quickly take them out of the oven (this should be right before the 10-minute mark).

IMG_3506.jpg

As for the ice cream, it will require you to use quite a bit of pistachios (1 1/2 cups plus more if you roll the ice cream sandwiches through chopped pistachios after they’re assembled). I suggest using raw, unsalted shelled pistachios, which you can find at a Trader Joe’s for a good price. I personally prefer roasting the nuts myself before adding them to the food processor to finely chop them, but if you can’t find them raw at your grocery store, buying them unsalted and roasted would be the next best thing. The only problem with this option is that they are usually still in the shell aka you’ll be cracking a bunch of nuts open which can take a while.

But here’s the thing: if you want to only make the lemon cookies and go out and buy your favorite store bought pistachio ice cream or gelato, that’s totally fine! Or if you just want to make the pistachio ice cream to enjoy on a warm summer night, that’s okay too! Making both components of this recipe is time consuming so I understand if you’d rather just do half of the recipe. But, I will say it’s a very rewarding feeling when you bite into your first ice cream sandwich knowing that you made every component of it from start to finish. And if you do plan on making both the cookies and ice cream, I suggest making the ice cream first since it’s a longer process but can also stay in the freezer for days.

IMG_3447.jpg

The cookie recipe yields 10-12 large cookies and the ice cream yields about 1 quart, which will give you 5 or 6 very large ice cream sandwiches. And if you plan on serving this to more than 6 people, you can easily make the cookies smaller or cut the ice cream sandwiches in half (just wait until they are completely frozen). I store my ice cream sandwiches in the freezer by putting them in tupperware, but you can also wrap them in plastic wrap individually.

Happy Fourth of July!

Pistachio Ice Cream

Yields about 1 quart

Recipe adapted from David Lebovitz

Ingredients

  • 1 1/2 cups unsalted shelled pistachios

  • 1 cup whole milk

  • 2 cups heavy cream, divided

  • 1/4 tsp. kosher salt

  • 5 large egg yolks

  • 1/8 tsp. vanilla extract

Directions

  1. Preheat the oven to 350°F. Toast the pistachios for about 6-8 minutes, keeping a careful eye on them. Transfer the pistachios to the food processor fitted with the S-blade and finely chop them.

  2. In a small saucepan, warm up the milk, 1 cup of the heavy cream, granulated sugar and salt over medium heat. Do not let it come to a simmer. Turn off the stove, remove the pan from the heat, and add the chopped pistachios. Stir until they are all fully submerged, cover the pan with a lid, and allow the mixture to steep for one hour at room temperature.

  3. After an hour, pour the pistachio-infused mixture through a strainer over a medium saucepan. Press down on the nuts in order to extract as much flavor from them as you can. Discard the pistachios and begin to rewarm the pistachio-mixture over medium-low heat. Meanwhile, pour the remaining 1 cup of heavy cream into a large bowl and set a strainer over the top (use a bowl that will be able to fit over an ice bath for later).

  4. In a medium bowl, whisk the egg yolks together. Just as the pistachio mixture is beginning to simmer, gradually add some of it to the bowl of egg yolks, whisking constantly as to not scramble the eggs. Once the egg yolk mixture temperature has raised, pour the mixture back into the saucepan. Stir constantly until the mixture thickens and coats the back of your spatula or spoon.

  5. Pour the mixture over the strainer and into the bowl with the remaining 1 cup of heavy cream. Stir in the vanilla extract. Let the ice cream base sit over an ice bath for about an hour before moving to the refrigerator. Chill for at least 4 hours, or overnight.

  6. Churn the ice cream in your maker according to the manufacturer's instructions and allow it to harden in the freezer for about 2 hours before enjoying.

Soft and Chewy Lemon Cookies

Yields 10-12 large cookies

Recipe adapted from Averie Cooks

Ingredients

  • 1/2 cup (1 stick) unsalted butter, room temperature

  • 3/4 cup granulated sugar

  • 2 tbsp. brown sugar, light or dark works

  • 1 large egg, room temperature

  • 1 tbsp. honey

  • 1 tbsp. lemon extract

  • 2 tbsp. lemon zest

  • 2 tbsp. fresh lemon juice

  • 2 cups all-purpose flour

  • 1 tsp. baking soda

  • 2 tsp. cornstarch

  • 1/2 tsp. kosher salt

Directions

  1. In the bowl of a stand mixer fitted with the paddle attachment (or in a large bowl if using a hand mixer) cream the butter and sugars together until the mixture is light and fluffy, about 3 minutes. Add the egg, honey, lemon extract, zest and juice and mix again for a couple more minutes. Scrape down the sides of the bowl.

  2. Add all the dry ingredients (flour, baking soda, cornstarch and salt) to the bowl and mix until just combined. Cover the bowl with plastic wrap and refrigerate for at least one hour. (Tip: you can scoop out the dough before or after chilling).

  3. Preheat the oven to 350°F and line a baking sheet with parchment paper. Using a large cookie or ice cream, scoop out the dough and place them on the sheet. If you don’t have an ice cream scoop, each cookie will be about 1/4 cup of dough. Do to the size of the cookie, do not bake more than 6 on a given tray.

  4. Bake in the oven for about 10 minutes. The cookies will be a light golden brown on the edges and just set when they are ready - they may look underbaked, but they won’t be since these are a softer texture of cookie. Allow the cookies to cool on the baking sheet for 5 minutes before transferring to a cooling rack.

To assemble the cookies;

  1. Make sure the cookies are completely cooled and the ice cream is frozen solid before assembling the sandwiches.

  2. Try to find two cookies that match exactly in shape and size. Using a ice cream scoop, scoop out about a 1/4 cup of ice cream onto one of the cookies, add the other on top, and gently press down until the ice cream spreads to the width of the cookie.

  3. Roll the ice cream sandwiches through chopped pistachios (optional).

  4. Place the ice cream sandwiches onto a large plate and put it in the freezer for about an hour. Then, either store them in Tupperware or wrap each one individually in plastic wrap.

VICTORIA SPONGE CAKE

IMG_1563.jpeg

Another trip to Portland, Maine has come and gone, and once again I’m counting down the days until Alex and I can return. This being our third time visiting Portland, we went with the plan of hitting up our favorite spots that we miss while back at home (Bonobo for our favorite pizza, Belleville for the best croissants I’ve ever had, Ruski’s for drinks, etc.), but made it a point to try things that we never had time to try on prior trips. And thanks to finally having a rental car, we were able to leave the peninsula and see places that I always had wished to.

Among these must-see places were: Palace Diner in Biddeford for a perfect breakfast set in a 15-seat dining car; driving up to Yarmouth to check out More and Co. - a shop that sells amazing ceramics and glassware.; and hiking around Mackworth Island, where fairies apparently live (don’t ask). But most importantly, with a car, we were able to make the trek up north to see Mount Desert Island, home to Acadia National Park. Since we only spent one night in MDI, I don’t have that many tips** on what to do or see (besides the basic tourist-y locations in the park), and therefore, I won’t be giving a guide for MDI. BUT, I did update my Portland City Guide post and added some new spots that I deemed worthy of checking out, with a few of them being a short car ride away from the peninsula.

IMG_1465.jpeg

And now, it’s time for baking again. Leading up to our trip to Maine and the week after we came home, I tried my best to eat as “cleanly” as possible. This pretty much meant no sweets, dairy, or alcohol, which was a lot easier than I thought it would be especially since Alex joined me in on this “detox”. But it also meant taking a mini break away from the blog because what fun is it to post something for you guys when I can’t eat it? No fun at all.

Today’s recipe is for a cake that I didn’t even know existed until watching an episode of the Great British Bake Off - the only baking competition show that I enjoy and cherish. I won’t go into detail about the show because I’m sure most of you have at least heard about it, but if you haven’t given the show a watch yet, I strongly recommend you do so (all the episodes are available on Netflix). In one of the season finales, the remaining three contestants had to make a quintessential British cake called a Victoria Sandwich, also known as a Victoria sponge cake. This very traditional layer cake has been around since the Victorian era and is essentially two sponge cakes with raspberry jam and/or a whipped cream OR buttercream frosting sandwiched between, with a generous dusting of confectioners’ sugar on top.

IMG_1505.jpeg

There is much debate on what is most traditional - having a whipped cream or buttercream frosting filling - and after some research, it honestly seems like it’s split down the middle. On the GBBO, the contestants were asked to make one of the judge’s, Mary Berry, version of the simple cake, with raspberry jam and a buttercream frosting. But today, I am giving you a recipe with a whipped cream filling and instead of raspberry, a strawberry jam. I felt like adding a buttercream frosting would make the cake too decadent and I wanted my cake to be more reminiscent of a strawberry shortcake, which is light and fresh. As for using strawberry jam instead of raspberry, that’s due to my preference over the two as well as how amazing the strawberries have been recently at my local farmers market. Therefore, I also added fresh strawberries to the filling, which definitely isn’t the standard, but I think a welcomed addition.

IMG_1600.jpeg

This recipe is kind of perfect to me due to the fact that it is equal parts easy to bake, beautiful to look at, and insanely delicious. Those three vital components are what I look for in recipes and its those dishes that I continue to bake time and time again. The cake layers come together rather quickly (only bake in the oven for less than 30 minutes) and nothing is easier than making fresh whipped cream and cutting up strawberries. If you want to make your own jam, by all means go ahead, but if we really want to call this a simple and quick recipe, store bought will definitely come in handy.

The two layers of sponge cake should be as identical as possible due to the fact that there’s no hiding any flaws that would normally be covered up with frosting. Much like my carrot cake, a Victoria sponge cake is “naked” and therefore you want to make sure the layers are even so the cake looks uniform. But as for the filling, I like having it more rustic-looking with the whipped cream and jam spilling out, especially when you slice into the cake. In my opinion, I think it makes the cake look more appetizing since the ingredients are more on display. The contrast of the perfect cake layers with a “messy” filling makes it that much more beautiful.

If you’d like to go more traditional, then definitely stick with the raspberry jam, or you can fill it with any other jam/fruit that your heart desires. I plan on making a couple Victoria sponge cakes for my sister’s baby shower in July (yes, I’m going to be an aunt!) with one being filled with an assortment of berries and another filled with an in-season stone fruit like apricots or peaches.

IMG_1725.jpeg

(*My only tip is to go to Momo’s Cheesecakes in Ellsworth, Maine. It’s a shop located in a garage that is open 24/7 with an assortment of cheesecake slices to choose from. Alex and I got a slice of blueberry cheesecake (which we immediately ate outside the garage at 10 am) and were genuinely disappointed in ourselves for not having more cash on us… it’s cash only and an honor system, meaning you drop the cash in a little box since no one is working the shop at all hours of the day. 10/10 recommend and now I kind of want to open up my own 24/7 cheesecake shop).

Victoria Sponge Cake

Yields (2) 8-inch cakes

Recipe adapted from the New York Times

Ingredients

  • 1 1/3 cups all-purpose flour

  • 3 1/4 tsp. baking powder

  • 1/2 tsp. kosher salt

  • 12 tbsp. (1.5 sticks) unsalted butter, room temperature

  • 3/4 cup plus 2 tbsp. granulated sugar

  • 3 large eggs, room temperature

  • 2 tbsp. milk, whole or 2% preferably

  • 1/2 - 3/4 cup strawberry jam, homemade or store bought (no judgement!)

  • 1 cup heavy cream

  • 1 tbsp. granulated sugar

  • 1/2 tsp. vanilla extract

  • 8 oz. fresh strawberries, hulled and sliced in half or quarter, depending on size (save some for garnish)

  • Confectioners’ sugar, for topping

Directions

  1. Preheat the oven to 350°F. Grease two 8-inch cake pans and line the bottoms with parchment paper. Set aside.

  2. In a medium bowl, whisk together the flour, baking powder and kosher salt.

  3. Using a stand mixer fitted with the paddle attachment (or in a large bowl if using a hand mixer) cream the butter and sugar together on medium speed until light and fluffy, about 2-3 minutes. Add the eggs, one at a time, and mix fully until adding each one. Pour in the milk and mix again. Scrape down the sides of the bowl.

  4. With the mixer off, pour in the flour mixture and mix until just combined. Evenly distribute the batter between the two cake pans (a scale would be useful here) and smooth the tops using a spatula.

  5. Bake in the oven for 25-30 minutes or until a toothpick inserted in the middle of the cake comes out clean. Allow the cakes to cool in the pan for about 10 minutes before transferring to a cooling rack. Let the cakes cool completely before adding the filling.

  6. Meanwhile, make the whipped cream. In the bowl of a stand mixer fitted with the whisk attachment, whisk the heavy cream, granulated sugar and vanilla extract until stiff peaks are formed.

  7. Take one of the cake layers (preferably the least attractive of the two) and place it on your desired cake stand or plate. Spread an even layer of the jam over the cake using an offset spatula or butterknife. Next, add about 3/4 of the whipped cream and spread evenly over the jam - leftover whipped cream can be used for serving. Over the whipped cream, arrange a layer of the fresh strawberries as evenly as possible. Place the second sponge cake on top and dust with confectioners’ sugar. Enjoy!