LEMON + PISTACHIO ICE CREAM SANDWICHES

IMG_3459.jpg

By the time you’ll be reading this, I’ll most likely be sitting by the pool, sweating in 105°F weather, sipping on a frozen strawberry margarita. Alex and I are celebrating the 4th of July in Scottsdale, Arizona this year (this will be our third time for the holiday) and it’s something that we LOVE doing. The house that we stay at is perfect for relaxing and having fun in the pool, and the neighborhood we stay in (Paradise Valley) is pretty dead since most of the residents leave Arizona for the summer once the temperature begins to rise. We jump in the pool all day and night, BBQ, blast bad music, and occasionally leave the house to get a couple of meals from our favorite spots (Pizzeria Bianco for the best pizza west of the Mississippi and Tee Pee for giant margaritas and amazing tamales). The 4th of July had never been my favorite holiday until we started celebrating it in Scottsdale.

In the past few weeks, I’d been having some trouble in the kitchen with creating a successful recipe for the blog. It all started with wanting to post a recipe for my favorite gelato flavor, hazelnut, and even though the finished product came out okay, I wasn’t completely sold on it. I was attempting to recreate the exact feeling when I had my first bite of hazelnut gelato in Rome years ago and unfortunately my recipe just wasn’t it. From there, I worked on a baked peach doughnut with a crumb topping and that was an utter disaster, followed by a summer berry olive oil cake which I was not a fan of. So, with all of these unsuccessful kitchen moments, I returned to my two favorite sweets to make in the kitchen and combined them together to give you my first ice cream sandwich recipe. I’m happy to report that it is anything but unsuccessful.

IMG_3431.jpg

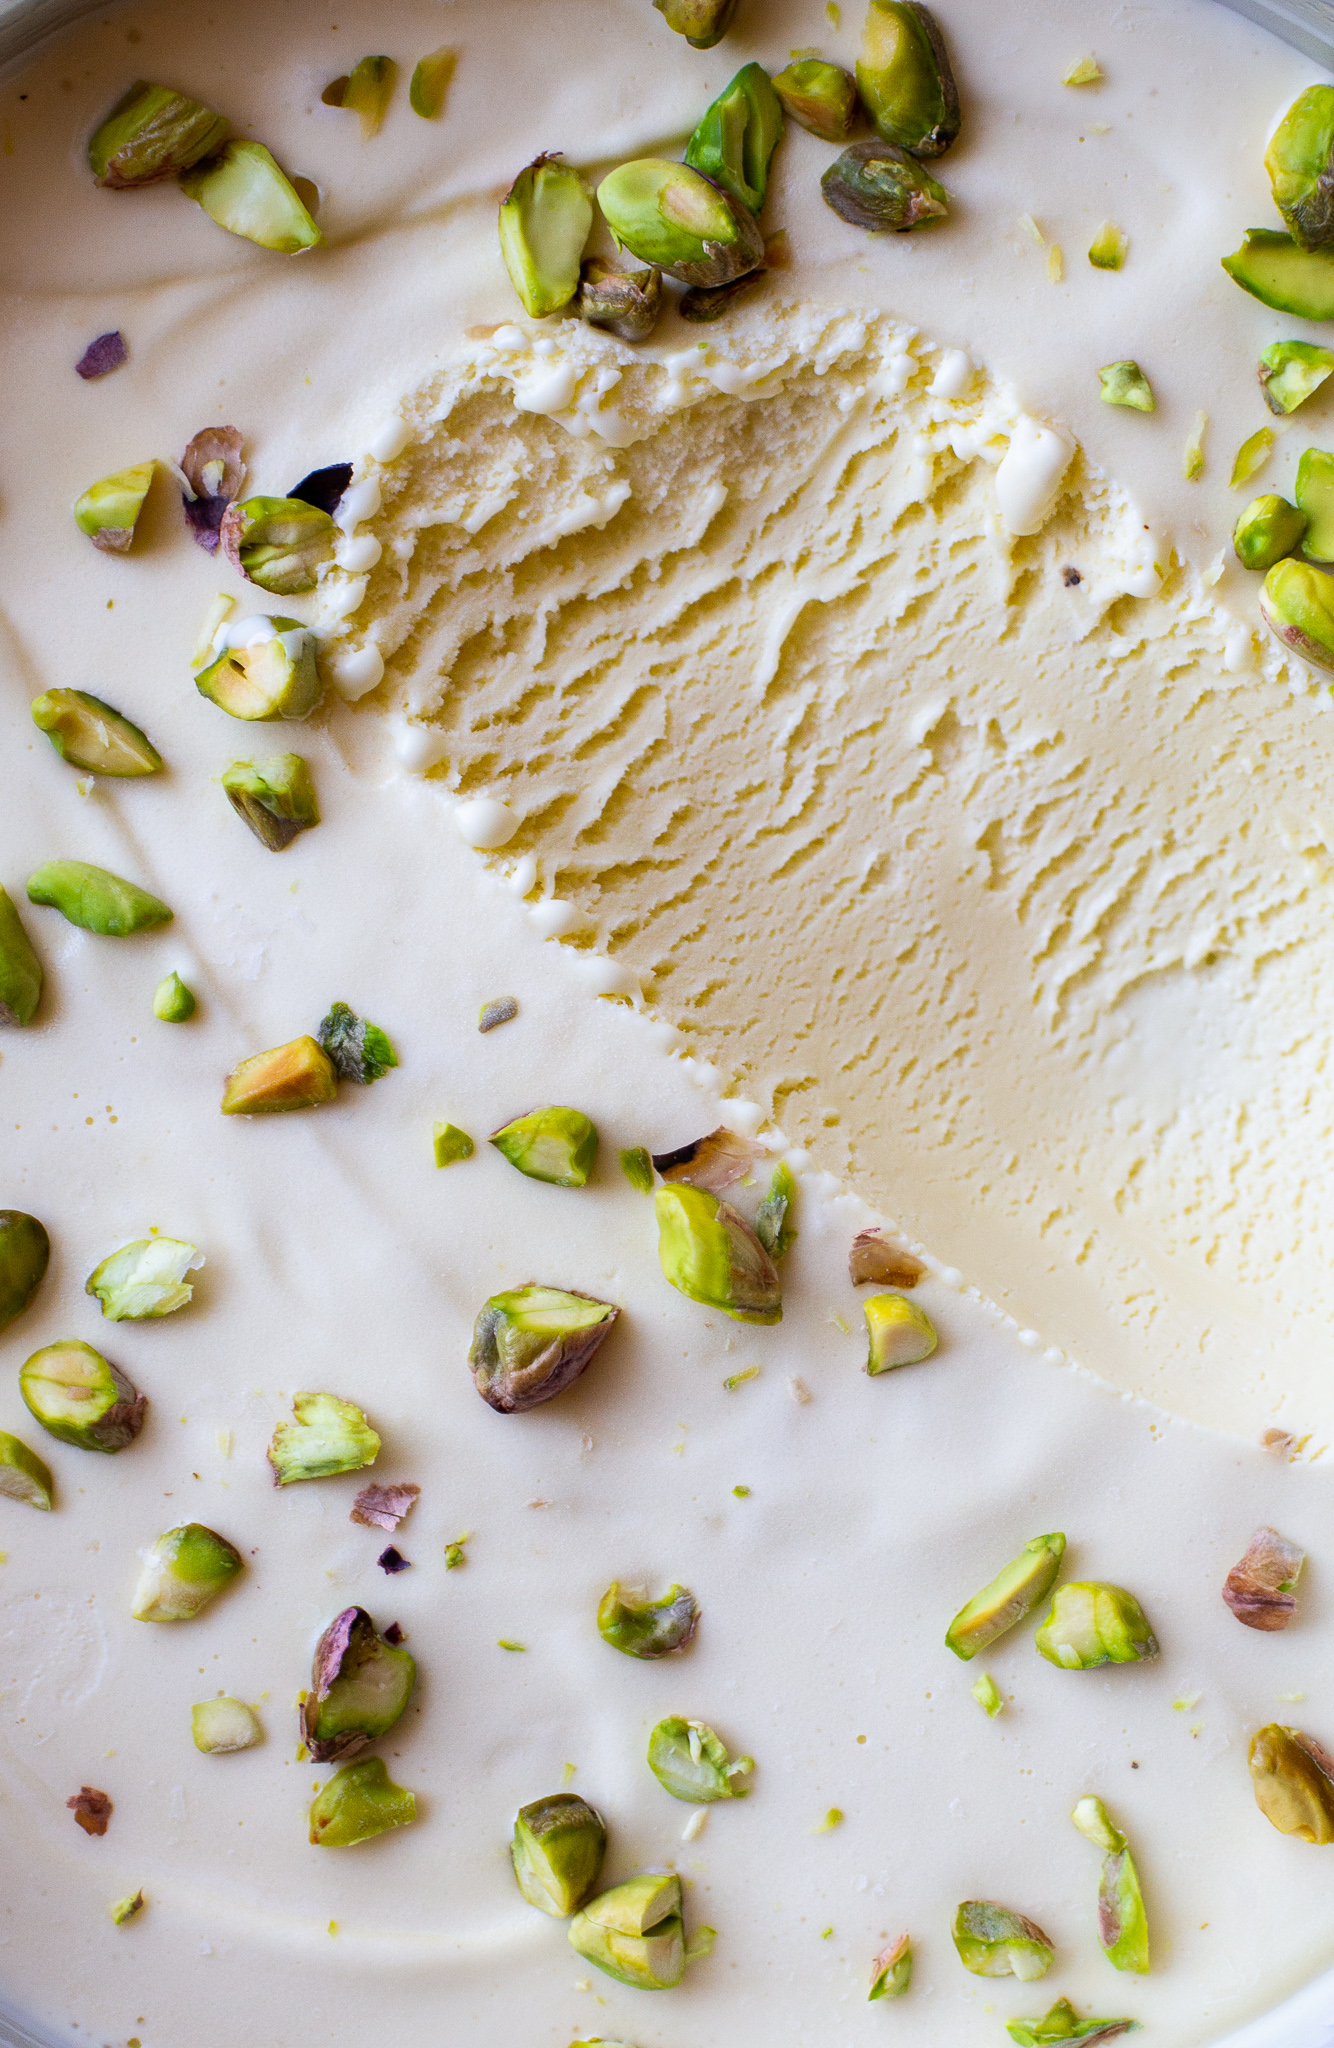
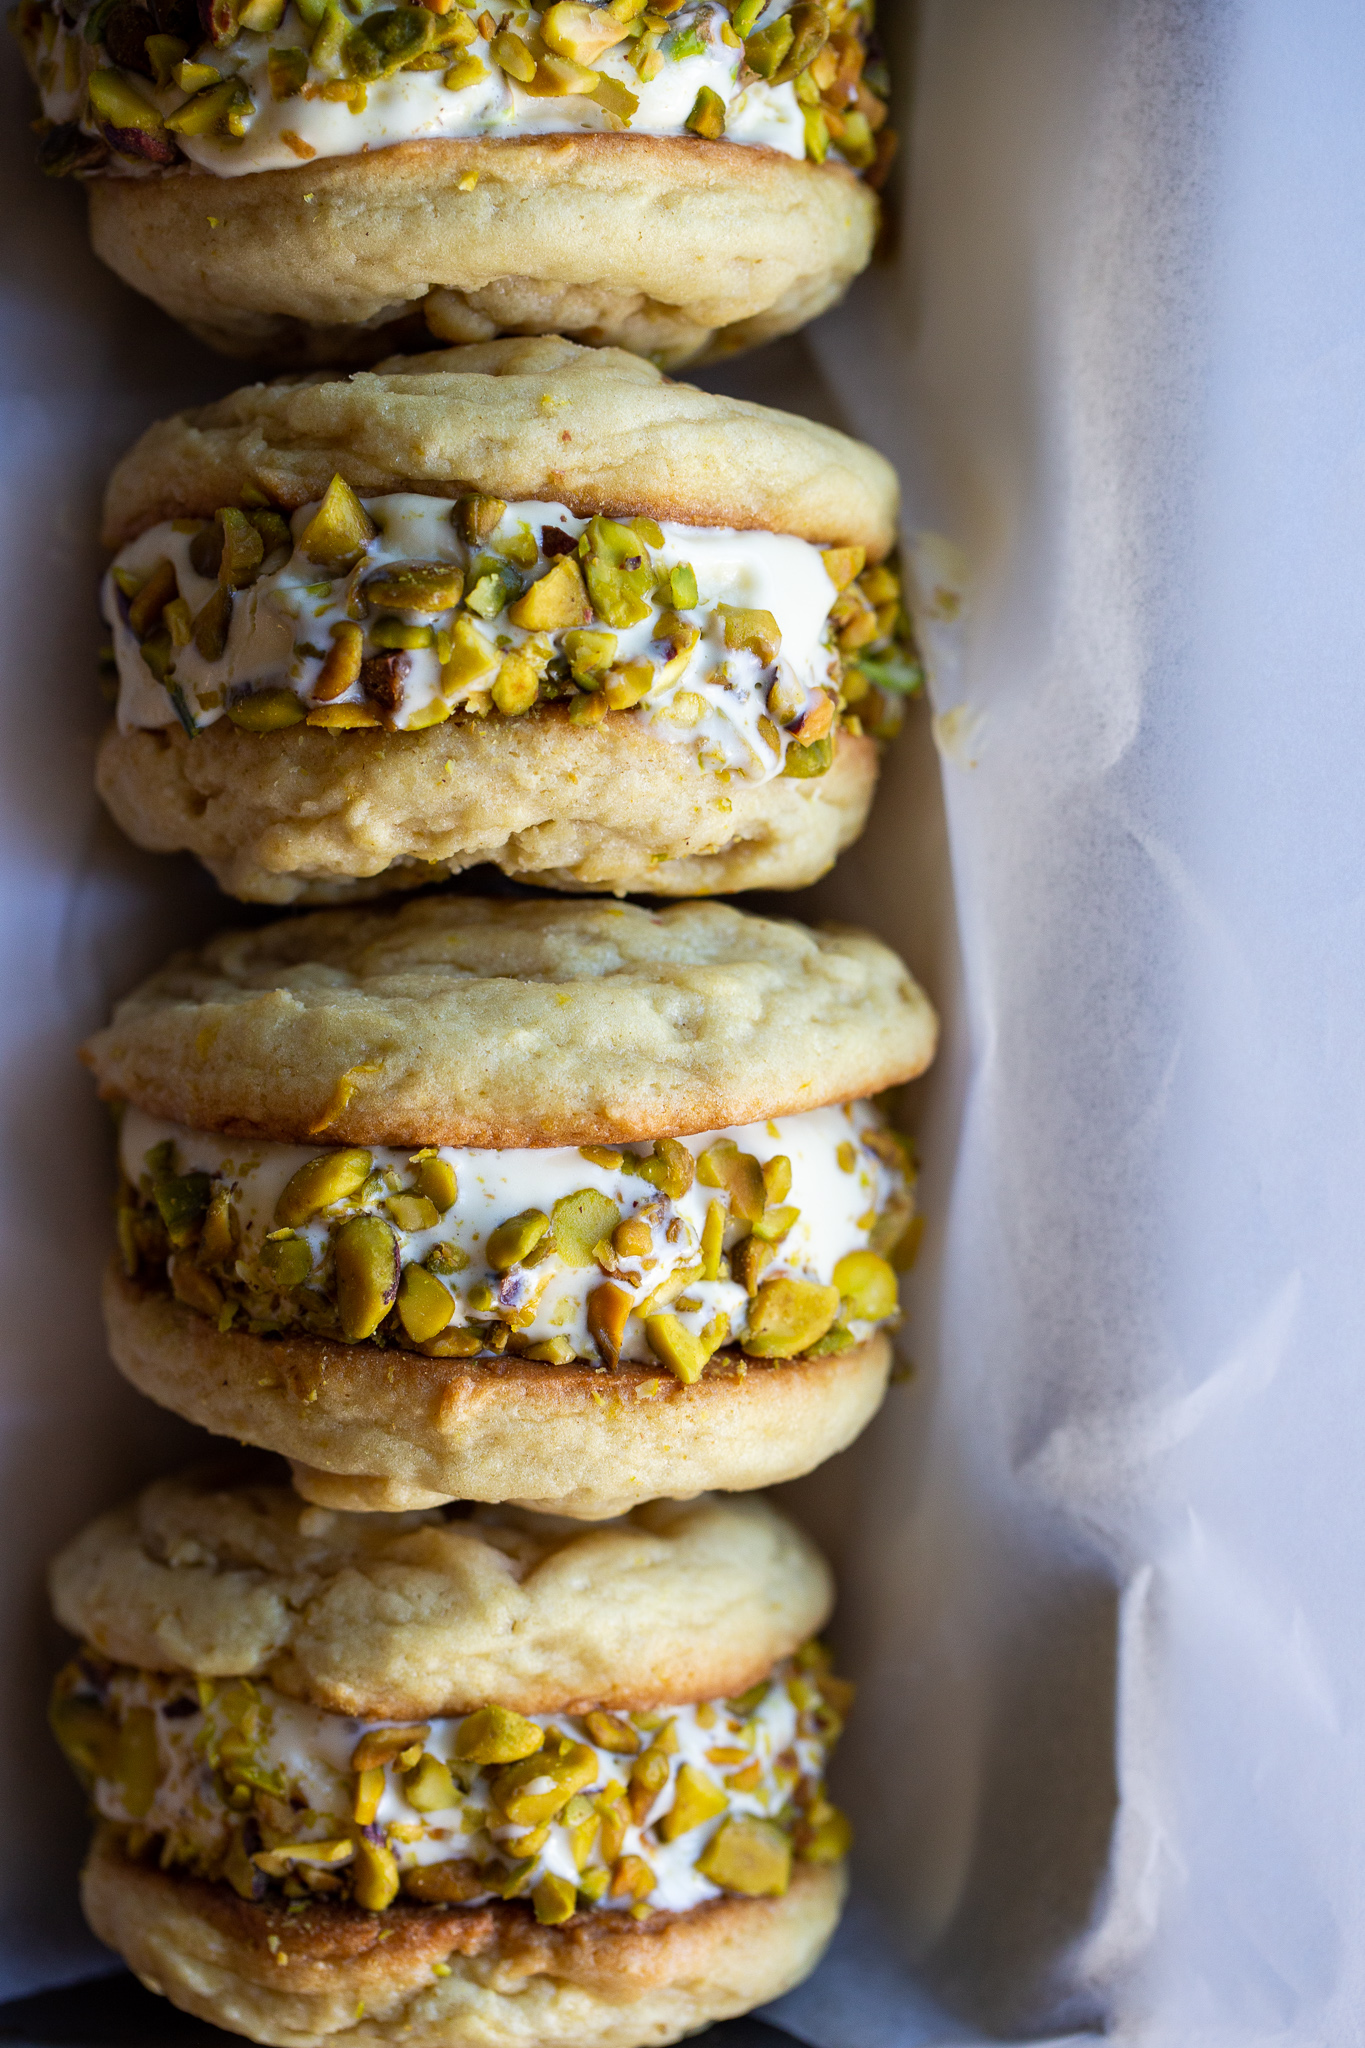
I love ice cream sandwiches because of the endless amount of combinations that you can create. You can essentially bake any type of cookie flavor that you love (plain old chocolate chip, brownie, snickerdoodle, white chocolate macadamia nut, etc.) and sandwich it between any ice cream flavor you can get your hands on (rocky road, cookie dough, mint chip, etc.). Today, I turned to a classic flavor combination that I turn to time and time again (Exhibit A and Exhibit B): citrus and pistachios. In today’s case, we’ll be working with soft and chewy lemon cookies and creamy pistachio ice cream. It’s perfect.

The lemon cookies get their flavor from three additions to the dough: lemon juice, lemon zest and lemon extract. We really want the lemon flavor to stand up against the rich, custard-y ice cream, so these three components are vital to achieving that bright citrus taste. I chose a cookie that was a bit softer and chewier, a texture that after being placed in the freezer (this is of course how you will need to store ice cream sandwiches) will not yield a hard and crunchy cookie when biting into it. Much like my funfetti cookies, this dough has cornstarch added to it to achieve that softer and chewier texture, and it’s also important to not over bake the cookies! The moment you see that the edges are set, quickly take them out of the oven (this should be right before the 10-minute mark).

IMG_3506.jpg

As for the ice cream, it will require you to use quite a bit of pistachios (1 1/2 cups plus more if you roll the ice cream sandwiches through chopped pistachios after they’re assembled). I suggest using raw, unsalted shelled pistachios, which you can find at a Trader Joe’s for a good price. I personally prefer roasting the nuts myself before adding them to the food processor to finely chop them, but if you can’t find them raw at your grocery store, buying them unsalted and roasted would be the next best thing. The only problem with this option is that they are usually still in the shell aka you’ll be cracking a bunch of nuts open which can take a while.

But here’s the thing: if you want to only make the lemon cookies and go out and buy your favorite store bought pistachio ice cream or gelato, that’s totally fine! Or if you just want to make the pistachio ice cream to enjoy on a warm summer night, that’s okay too! Making both components of this recipe is time consuming so I understand if you’d rather just do half of the recipe. But, I will say it’s a very rewarding feeling when you bite into your first ice cream sandwich knowing that you made every component of it from start to finish. And if you do plan on making both the cookies and ice cream, I suggest making the ice cream first since it’s a longer process but can also stay in the freezer for days.

IMG_3447.jpg

The cookie recipe yields 10-12 large cookies and the ice cream yields about 1 quart, which will give you 5 or 6 very large ice cream sandwiches. And if you plan on serving this to more than 6 people, you can easily make the cookies smaller or cut the ice cream sandwiches in half (just wait until they are completely frozen). I store my ice cream sandwiches in the freezer by putting them in tupperware, but you can also wrap them in plastic wrap individually.

Happy Fourth of July!

Pistachio Ice Cream

Yields about 1 quart

Recipe adapted from David Lebovitz

Ingredients

  • 1 1/2 cups unsalted shelled pistachios

  • 1 cup whole milk

  • 2 cups heavy cream, divided

  • 1/4 tsp. kosher salt

  • 5 large egg yolks

  • 1/8 tsp. vanilla extract

Directions

  1. Preheat the oven to 350°F. Toast the pistachios for about 6-8 minutes, keeping a careful eye on them. Transfer the pistachios to the food processor fitted with the S-blade and finely chop them.

  2. In a small saucepan, warm up the milk, 1 cup of the heavy cream, granulated sugar and salt over medium heat. Do not let it come to a simmer. Turn off the stove, remove the pan from the heat, and add the chopped pistachios. Stir until they are all fully submerged, cover the pan with a lid, and allow the mixture to steep for one hour at room temperature.

  3. After an hour, pour the pistachio-infused mixture through a strainer over a medium saucepan. Press down on the nuts in order to extract as much flavor from them as you can. Discard the pistachios and begin to rewarm the pistachio-mixture over medium-low heat. Meanwhile, pour the remaining 1 cup of heavy cream into a large bowl and set a strainer over the top (use a bowl that will be able to fit over an ice bath for later).

  4. In a medium bowl, whisk the egg yolks together. Just as the pistachio mixture is beginning to simmer, gradually add some of it to the bowl of egg yolks, whisking constantly as to not scramble the eggs. Once the egg yolk mixture temperature has raised, pour the mixture back into the saucepan. Stir constantly until the mixture thickens and coats the back of your spatula or spoon.

  5. Pour the mixture over the strainer and into the bowl with the remaining 1 cup of heavy cream. Stir in the vanilla extract. Let the ice cream base sit over an ice bath for about an hour before moving to the refrigerator. Chill for at least 4 hours, or overnight.

  6. Churn the ice cream in your maker according to the manufacturer's instructions and allow it to harden in the freezer for about 2 hours before enjoying.

Soft and Chewy Lemon Cookies

Yields 10-12 large cookies

Recipe adapted from Averie Cooks

Ingredients

  • 1/2 cup (1 stick) unsalted butter, room temperature

  • 3/4 cup granulated sugar

  • 2 tbsp. brown sugar, light or dark works

  • 1 large egg, room temperature

  • 1 tbsp. honey

  • 1 tbsp. lemon extract

  • 2 tbsp. lemon zest

  • 2 tbsp. fresh lemon juice

  • 2 cups all-purpose flour

  • 1 tsp. baking soda

  • 2 tsp. cornstarch

  • 1/2 tsp. kosher salt

Directions

  1. In the bowl of a stand mixer fitted with the paddle attachment (or in a large bowl if using a hand mixer) cream the butter and sugars together until the mixture is light and fluffy, about 3 minutes. Add the egg, honey, lemon extract, zest and juice and mix again for a couple more minutes. Scrape down the sides of the bowl.

  2. Add all the dry ingredients (flour, baking soda, cornstarch and salt) to the bowl and mix until just combined. Cover the bowl with plastic wrap and refrigerate for at least one hour. (Tip: you can scoop out the dough before or after chilling).

  3. Preheat the oven to 350°F and line a baking sheet with parchment paper. Using a large cookie or ice cream, scoop out the dough and place them on the sheet. If you don’t have an ice cream scoop, each cookie will be about 1/4 cup of dough. Do to the size of the cookie, do not bake more than 6 on a given tray.

  4. Bake in the oven for about 10 minutes. The cookies will be a light golden brown on the edges and just set when they are ready - they may look underbaked, but they won’t be since these are a softer texture of cookie. Allow the cookies to cool on the baking sheet for 5 minutes before transferring to a cooling rack.

To assemble the cookies;

  1. Make sure the cookies are completely cooled and the ice cream is frozen solid before assembling the sandwiches.

  2. Try to find two cookies that match exactly in shape and size. Using a ice cream scoop, scoop out about a 1/4 cup of ice cream onto one of the cookies, add the other on top, and gently press down until the ice cream spreads to the width of the cookie.

  3. Roll the ice cream sandwiches through chopped pistachios (optional).

  4. Place the ice cream sandwiches onto a large plate and put it in the freezer for about an hour. Then, either store them in Tupperware or wrap each one individually in plastic wrap.

FUNFETTI SPRINKLE SUGAR COOKIES

IMG_2509.jpg

Now that Memorial Day has come and gone, it is now - unofficially - summertime. My Memorial Day weekend ended up being pretty laidback and filled with dinners with family (both mine and Alex’s) and staying in to watch really random movies (Girl, Interrupted and Children of Men, if you’re curious) due to the rainy weather. As I had mentioned in my previous post, we were planning on attending our first Cinespia screening of the season but because of the crappy weather, the event was unfortunately cancelled. BUT we luckily were able to exchange our tickets and will be seeing The Goonies this weekend!

Today marks my 8th cookie recipe post on The Vivid Kitchen. Among those recipes, there have been a couple variations of the beloved chocolate chip cookie, a seasonal ginger molasses cookie that I wish I could eat year-round, and my personal favorite non-chocolate cookie: salted brown sugar toffee cookies. But for today, I’m giving you one of the most traditional cookie recipes around: a version of a sugar cookie. Unlike the ones you roll out and cut into shapes around Christmas time, these are baked just like normal cookies (the dough is scooped out with a cookie scoop).

IMG_2160.jpg

The texture on these sugar cookies is probably as close as it can get to my idea of cookie perfection. The cookie interior is very soft and chewy, while the exterior is more crisp. We get all of these ideal cookie textures from the addition of corn starch. I’ve made a handful of sugar cookies over the years, and without a doubt, I believe that it’s the corn starch that sets this recipe apart from the others.

If you can’t tell from the pictures, I made these cookies “bakery style” aka large-sized and, therefore, was only able to yield 9 cookies. I personally think these sugar cookies are better the larger they are because it makes them thicker and chewier overall, but I have made them regular-sized as well and they were a huge hit. So the choice is yours, but just make sure to adjust the baking time by a few minutes and keep on eye on them in the oven. These cookies are best when they are underbaked - you’ll only want a light golden browning on the edges - so definitely try not to overbake them.

IMG_2165.jpg

To jazz these plain sugar cookies up a bit, a good amount of colorful sprinkles are mixed into the dough. Normally, I’m not a sprinkles girl (I would rather add flaky sea salt to finish a baked good) but sprinkles honestly just work so well with these cookies. They add a subtle crunch in every bite, and of course, add color to an otherwise pale cookie. I suggest that you buy sprinkles that will not dye or stain the batter, so steer clear of nonpareils, the little sprinkle balls. The rainbow jimmies, the sprinkles that you see in my cookies, are a little bit more expensive than nonpareils but definitely will not bleed into the cookies. And if you don’t feel like spending extra money on sprinkles or just are not a fan of them, leave ‘em out and all will be fine.

IMG_2235.jpg

Making these cookies is super easy in that it’s a one-bowl recipe (less cleaning to do, which is always a plus), but there are a few things that need to be done to achieve sugar cookie perfection. The butter and egg need to be at room temperature when making the dough, and the finished dough needs to chill in the fridge for at least one hour. I feel like these are givens when it comes to most cookie recipes but I just wanted to clarify that these minor steps are actually vital to the finished product. As a reminder, using room temperature ingredients allows the dough to bind more easily, thus creating a more smooth and even texture, and chilling the dough yields a chewier texture and a more concentrated flavor. There’s a lot more to say about these two components of baking, but I’ll spare you and just say it’s important, so don’t skip it!

IMG_2490.jpg

Funfetti Sprinkle Sugar Cookies

Yields 9 LARGE cookies, or about 20 regular-sized cookies

Recipe slightly adapted from Posie Harwood of 600 Acres

Ingredients

  • 1/2 cup (1 stick) unsalted butter, room temperature

  • 3/4 cup granulated sugar

  • 1 egg, room temperature

  • 1 tbsp. vanilla extract

  • 1 1/2 cups all-purpose flour

  • 3/4 tsp. baking soda

  • 1 tbsp. cornstarch

  • 1/2 tsp. kosher salt

  • 2/3 cup sprinkles (preferably NOT nonpareils)

Directions

  1. In the bowl of a stand mixer fitted with the paddle attachment (or in a large bowl if using a hand mixer) cream the butter and sugar together until the mixture is light and fluffy, about 3 minutes. Add the egg and vanilla extract and mix again for a few more minutes.

  2. In a medium-sized bowl, add the flour, baking soda, cornstarch and salt and mix until just combined. Add this mixture all at once to the stand mixer and mix on low for about 10 seconds. Increase the speed to medium and mix until just combined - do not over mix. Using a spatula, fold in the sprinkles until evenly distributed. Refrigerate the dough for at least one hour. (Tip: you can scoop out the dough before or after chilling)

  3. Preheat the oven to 350°F and line a baking sheet with parchment paper. Using a cookie or ice cream scoop (depending on how big you want the cookies to be), scoop out the dough and place them on the sheet. If you’re making large cookies, do not put more than 6 cookies on a sheet.

  4. Bake in the oven for 10-12 minutes (8-10 if making smaller cookies). The cookies will be a light golden brown on the edges and just set when they are ready - they may look underbaked, but they won’t be since these are a softer texture of cookie. Allow the cookies to cool on the baking sheet for 5 minutes before transferring to a cooling rack.

JUMBO SALTED TAHINI CHOCOLATE CHIP COOKIES

IMG_8330-4.jpg

Since last Monday, I’ve been out of commission due to pulling my lower back while I was working out. I was in the middle of a fitness class and pushed myself a little too hard and wound up severely hurting my back. I left the gym so upset with myself for allowing that to happen and the worst part is that I didn’t even feel like going to class that day! You know those inspirational posters in gyms that say something along the lines that no one ever regrets a work out after they’re done… that’s a lie! I should have listened to my body and stayed home and went for a walk instead.

IMG_7938.jpg

Anyway, I took healing my back seriously and spent the next couple of days icing it properly and relied on Aleve to alleviate the pain. Simply walking was just about the hardest task to accomplish and every step I took was painful. BUT here I am 9 days later, and I’m just about good as new. I haven’t gone back to my normal routine of exercises, but I instead have been doing low-impact cardio (walking, elliptical, recumbent bike) and I’ve actually been enjoying the low intensity.

I’m telling you guys all of this because I didn’t mean to take a week off from the blog! I attempted baking and photographing these cookies last week when I could finally walk around with less pain, but the act of hunching over to take pictures was not helping out my situation in any way. This led to all of my photos coming out subpar and there was no way I was going to post them without liking them. I waited til Monday when I was feeling much better, baked and reshot the cookies, and now I’m much happier with the outcome.

IMG_8325-4.jpg

Recently, it had occurred to me that I haven’t posted a “standard” chocolate chip cookie recipe yet. And I’ve given much thought as to why I haven’t done this and it could be because all of my personal favorite cookies are a step-up from the original cookie that everyone loves. Whether it’s adding toasted pistachios, or a big sprinkling of flaky sea salt, or using olive oil in place of butter, my taste for cookies aren’t what’s usually found at a local bakery. Of the six total cookie recipes that The Vivid Kitchen has to offer - including olive oil brownie cookies, toffee brown sugar cookies, and ginger molasses cookies - it apears that I’ve been focusing on giving cookie recipes that are not only amazingly delicious, but a little unique.

So once again, I’m giving another cookie recipe that has one aspect to it that sets it apart from other chocolate chip cookies. This comes from the addition of tahini: a paste made from ground sesame seeds that is a staple in Middle Eastern cuisine. In America, we’re mostly accustomed to eating tahini via hummus, where tahini is a vital ingredient. Because of this, the idea of putting tahini in sweets is a bit mind-boggling to most, but tahini is actually a very popular component in an array of desserts like tarts, ice cream, and cookies.

IMG_8224.jpg

When I first tried tahini on its own, I wasn’t in love with the taste or texture and of course, this made me hesitant to add it to my cookie dough. The texture is akin to a natural nut butter in that you have to stir it well before eating it in order to incorporate the oils. As for the taste, it’s pretty unique with a roasted and bitter flavor, and just something you wouldn’t think would work well in desserts. BUT IT TOTALLY DOES. The tahini isn’t exactly prominent in the cookies but gives it a bit of a nutty flavor and even accentuates the chocolate. Seriously, these are up there as one of my favorite chocolate chip cookies. Ever.

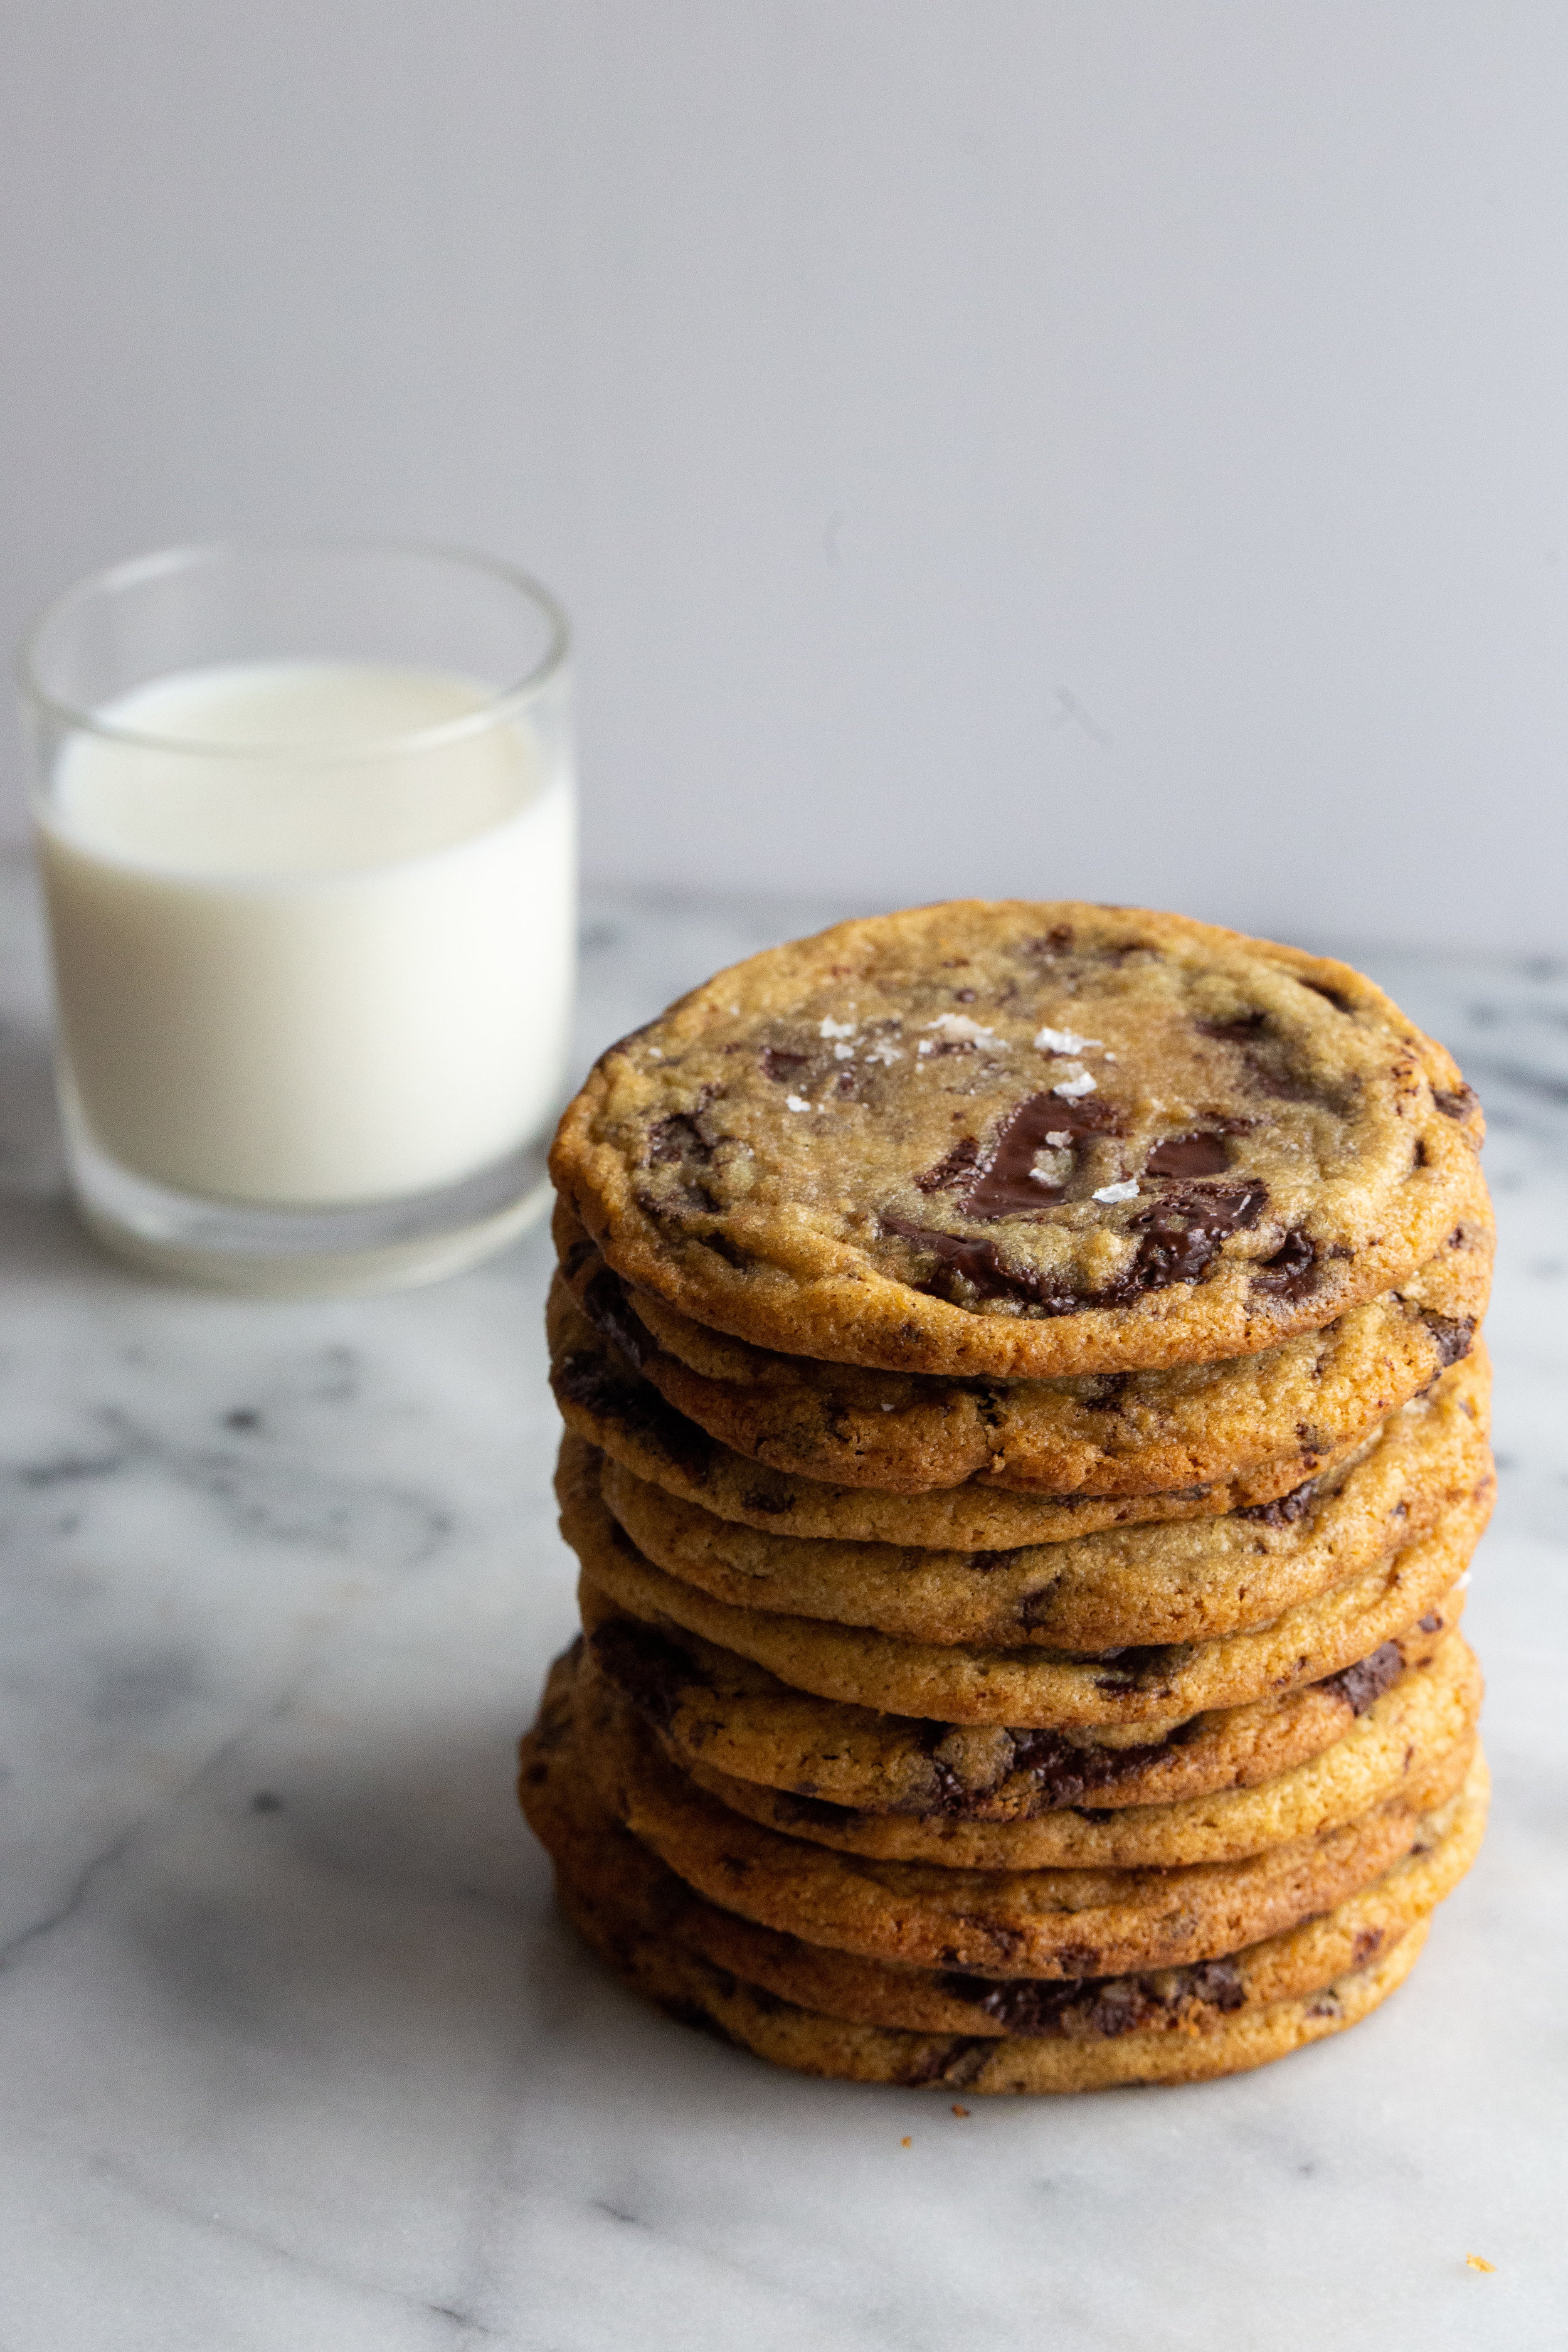
If you want your cookies to have pools of chocolate much like the ones you see in my photos, this is done by roughly chopping up bars of chocolate and then sifting the chocolate in order to discard the powder that is created from chopping. You’ll be left with a variety of chocolate chunk sizes, which is key to getting those pockets of chocolate-y goodness. And to further the savory/sweet relationship that we have going on with adding tahini to the cookie dough, finishing the baked cookies with a healthy sprinkling of flaky sea salt is a must.

One last thing: I decided to make these cookies huuuuge, which is something I normally opt not to do. I wanted them to be bakery-style aka big, and in the end I was super happy with the results. If you want to make normal-sized cookies, just make sure to adjust the baking time by about 5 minutes, or keep a good eye on them around the 8 minute mark.

IMG_8275.jpg

Jumbo Salted Tahini Chocolate Chip Cookies

Yields about a dozen large cookies

Recipe slightly adapted from David Lebovitz

Ingredients

IMG_8297-4.jpg
  • 1 cup plus 2 tbsp. all-purpose flour

  • 3/4 tsp. baking soda

  • 1 tsp. kosher salt

  • 4 oz. (8 tbsp., 1 stick) unsalted butter, room temperature

  • 1/2 cup tahini, well stirred

  • 1/2 cup light brown sugar, packed

  • 1/2 cup granulated sugar

  • 1 large egg, room temperature

  • 1 large egg yolk, room temperature

  • 1 1/2 tsp. vanilla extract

  • 10 oz. (about 2 cups) bittersweet/dark or semisweet chocolate chunks or chips

  • flaky sea salt

Directions

  1. In a medium bowl, whisk together the flour, baking soda, and salt. Set aside.

  2. In the bowl of a stand mixer fitted with the paddle attachment, or in a bowl large enough for a hand mixer, beat the butter, tahini and both sugars on medium speed until light and fluffy, about 2-3 minutes.

  3. Add in the egg, egg yolk, and vanilla extract. Mix until well incorporated. Scrape down the sides of the bowl.

  4. All at once, add in the flour mixture and carefully mix on low speed for about 10 seconds before turning the speed up to medium until everything is just combined. Do not over mix. Using a spatula, fold in the chocolate chunks or chips. Cover the bowl with plastic wrap and refrigerate for 12 hours. Note: if you cannot simply wait that long, wait at least 1 hour before baking off the cookies.

  5. Preheat the oven to 325°F. Line a baking tray with parchment paper, and using a spoon or an ice cream scoop, scoop out 4-5 tablespoons of dough for each cookie (about 2.5oz each). Bake 6 cookies at a time because they will spread significantly. Allow the cookies to bake for 14-15 minutes or until the cookies are golden brown on the edges and slightly pale in the center.

  6. Once out of the oven, immediately sprinkle each cookie with flaky sea salt. Allow the cookies to sit on the baking sheet for 5 minutes before transferring to a cooling rack. Enjoy!