
It feels kind of insane to sit here and give you a cheesecake recipe with everything that is going on in my home state of California. With a mass shooting and 3 deadly fires that are far from being contained, California has been through a lot this week. I grew up in Oak Park and Agoura Hills (where the Woolsey fire is wreaking havoc) and my grandma and dad both still live in the area. Although my family members are okay, I’ve been sick to my stomach thinking about those who were less fortunate and what they had to endure this past week. It’s devastating to think how many people will not have a home to celebrate Thanksgiving and other holidays this year. When natural disasters happen like this, I feel absolutely powerless to make the situation better; I wish I could put an end to the pain that they’ve all suffered. If you’re wanting to help out in any way, there is always the option to donate to organizations that will support those who lost their homes, businesses, etc. and of course aid those who are risking their lives to end these fires. The New York Times has a great article that outlines how you can help out; it should lead you in the right direction. And please just be thankful for what you have every.single.day and not just on Thanksgiving.

Ok, back to the blog.
With Thanksgiving right around the corner, the upcoming recipes I’ll be giving you will not only be perfect for the big day, but also for the rest of the holiday season. These desserts are actually what I plan on making for either the Friendsgiving party I’ll be attending this weekend, or for Thanksgiving itself next week. So since I’m making these myself, I can promise you that they are all tried-and-true recipes that I firmly stand behind and have made countless times.
Growing up, cheesecake was never really my thing. I liked it just fine, but always felt like it was too rich and I could never eat more than one or two bites. My sister on the other hand could probably polish off an entire cake to herself if she was in the right mood. Her cheesecake obsession is what led me to making pumpkin cheesecake for Thanksgiving about 3 or 4 years ago when she texted me asking (aka demanding) that I make it. I obliged and in the end, I was left with an incredible dessert that not only made my sister happy, but led me to finally become a huge cheesecake fan.

The thing with cheesecakes is that they can be a bit intimidating to make due to the time and patience that goes into baking each one, especially if you don’t want to end up with the dreaded cheesecake cracks. Below are my tips for cheesecake success.
The ingredients - cream cheese, sour cream, eggs - all need to be at room temperature, which I suggest pulling out of the fridge 4-5 hours before you plan on baking.
When making the batter, more attention is needed in order not to over mix it. This is a given for most recipes like cakes and cookies, but especially important with cheesecakes because if you over mix and add too much air, the cheesecake will rise too quickly in the oven and then fall… and crack. Not good!
A water bath needs to be prepared - this is optional, but I strongly recommend it. The first time I made cheesecake with a water bath was also the first time I didn’t have a crack in my cheesecake. That alone was enough for me to convert to this method, but it offers much more than making your cheesecake more attractive. A water bath ensures even baking and gives the cheesecake the creamiest, most amazing texture. Essentially, the cheesecake is enjoying a day at the spa and comes out of the oven smooth and moist.
And lastly, the baked cheesecake needs to cool properly, which in this case means gradually. This entails having the cheesecake sit in the oven with the door cracked and the heat turned off for one hour, then sitting at room temperature until completely cooled, and then finally, refrigerated for at least 4 hours before even cutting into it.
Pretty much, if someone shows up to Thanksgiving or any party for that matter, with a homemade cheesecake, please give them a big hug and say “thank you”. The good news is that cheesecakes can be made days in advance (4-5 days) and can be left, covered, in the refrigerator. This is why it’s perfect for Thanksgiving, because you can check off dessert days before worrying about the turkey or sides.
Let’s go back to the water bath method for a minute. If you’re having trouble visualizing exactly what it’s supposed to look like, here’s a video that should give you some clarity. And if you’re like me and worried about water getting into your springform pan despite having the foil wrapped around it, there’s the option of using slow cooker liners. You simply wrap the liner around the springform pan, tie the excess bag in a knot, and then wrap foil around it. I got this idea from the blog, Life, Love and Sugar, and if you click here, you’ll see step-by-step photos on how to do it.
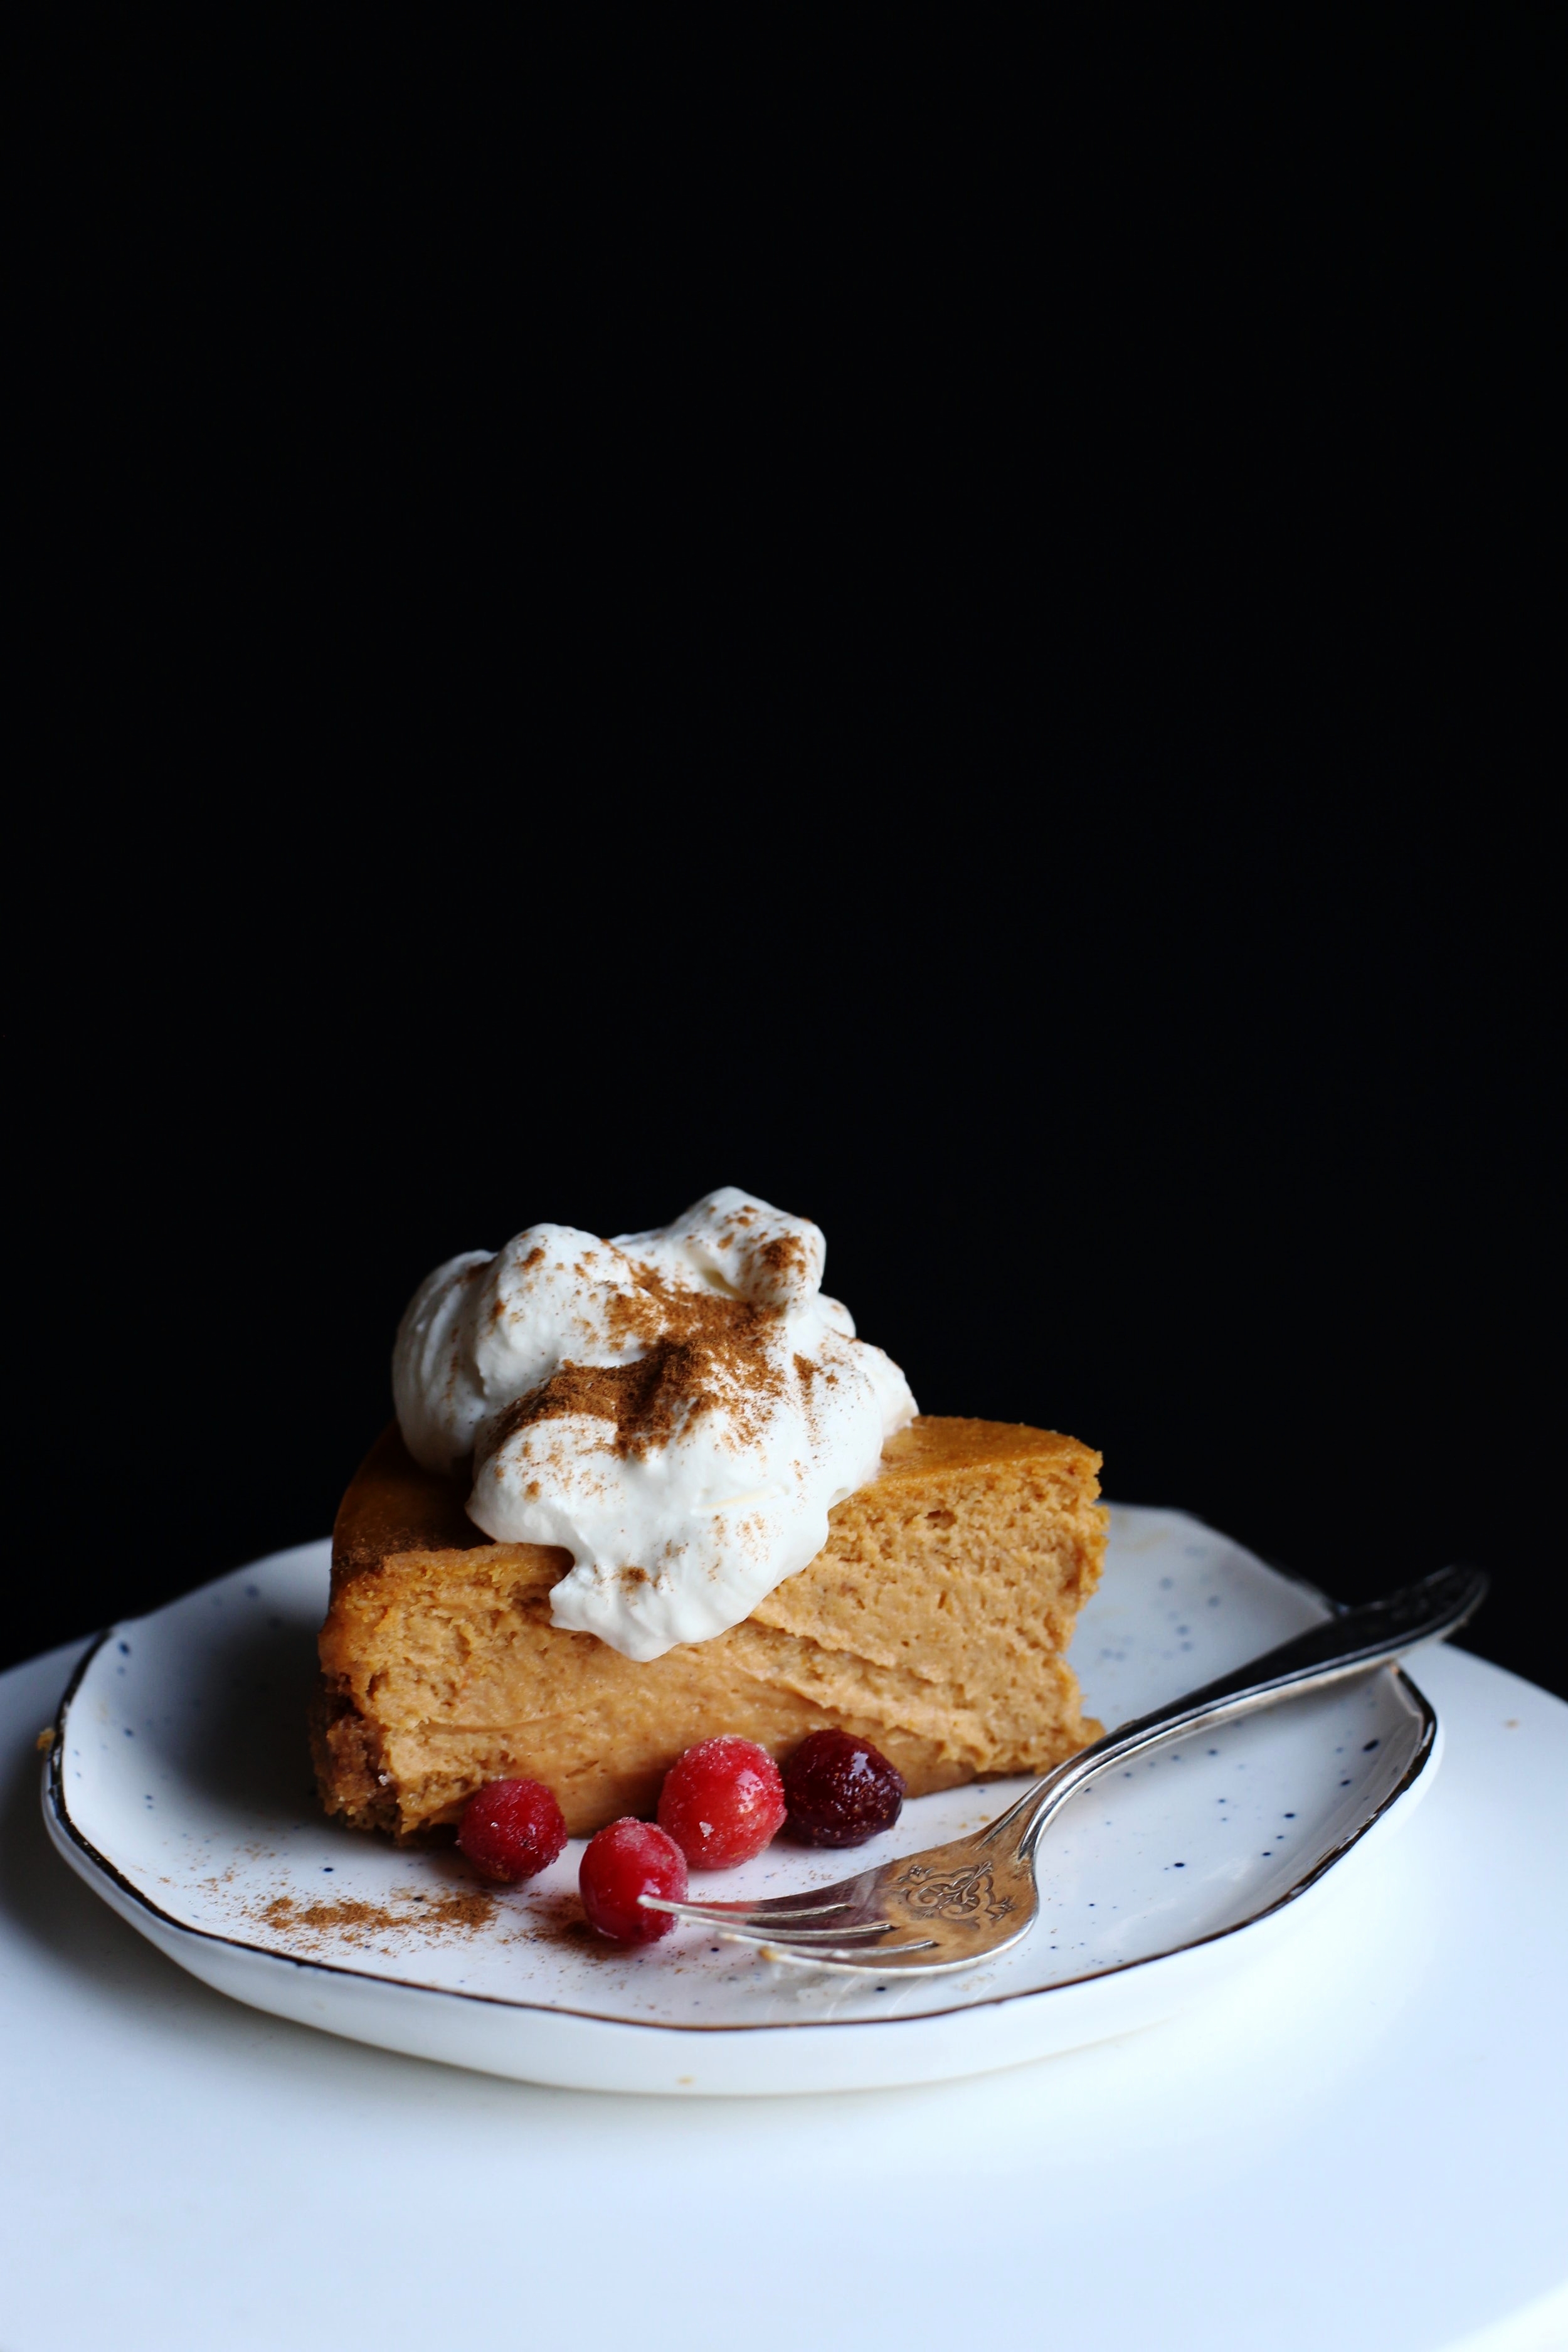
I know this all sounds stressful, and believe me, I get it, but if you follow the tips and steps I provided, baking a cheesecake isn’t all that bad. And if you do get a massive crack in your cheesecake, just cover the dang thing with a ton of whipped cream and no one will care, I promise.
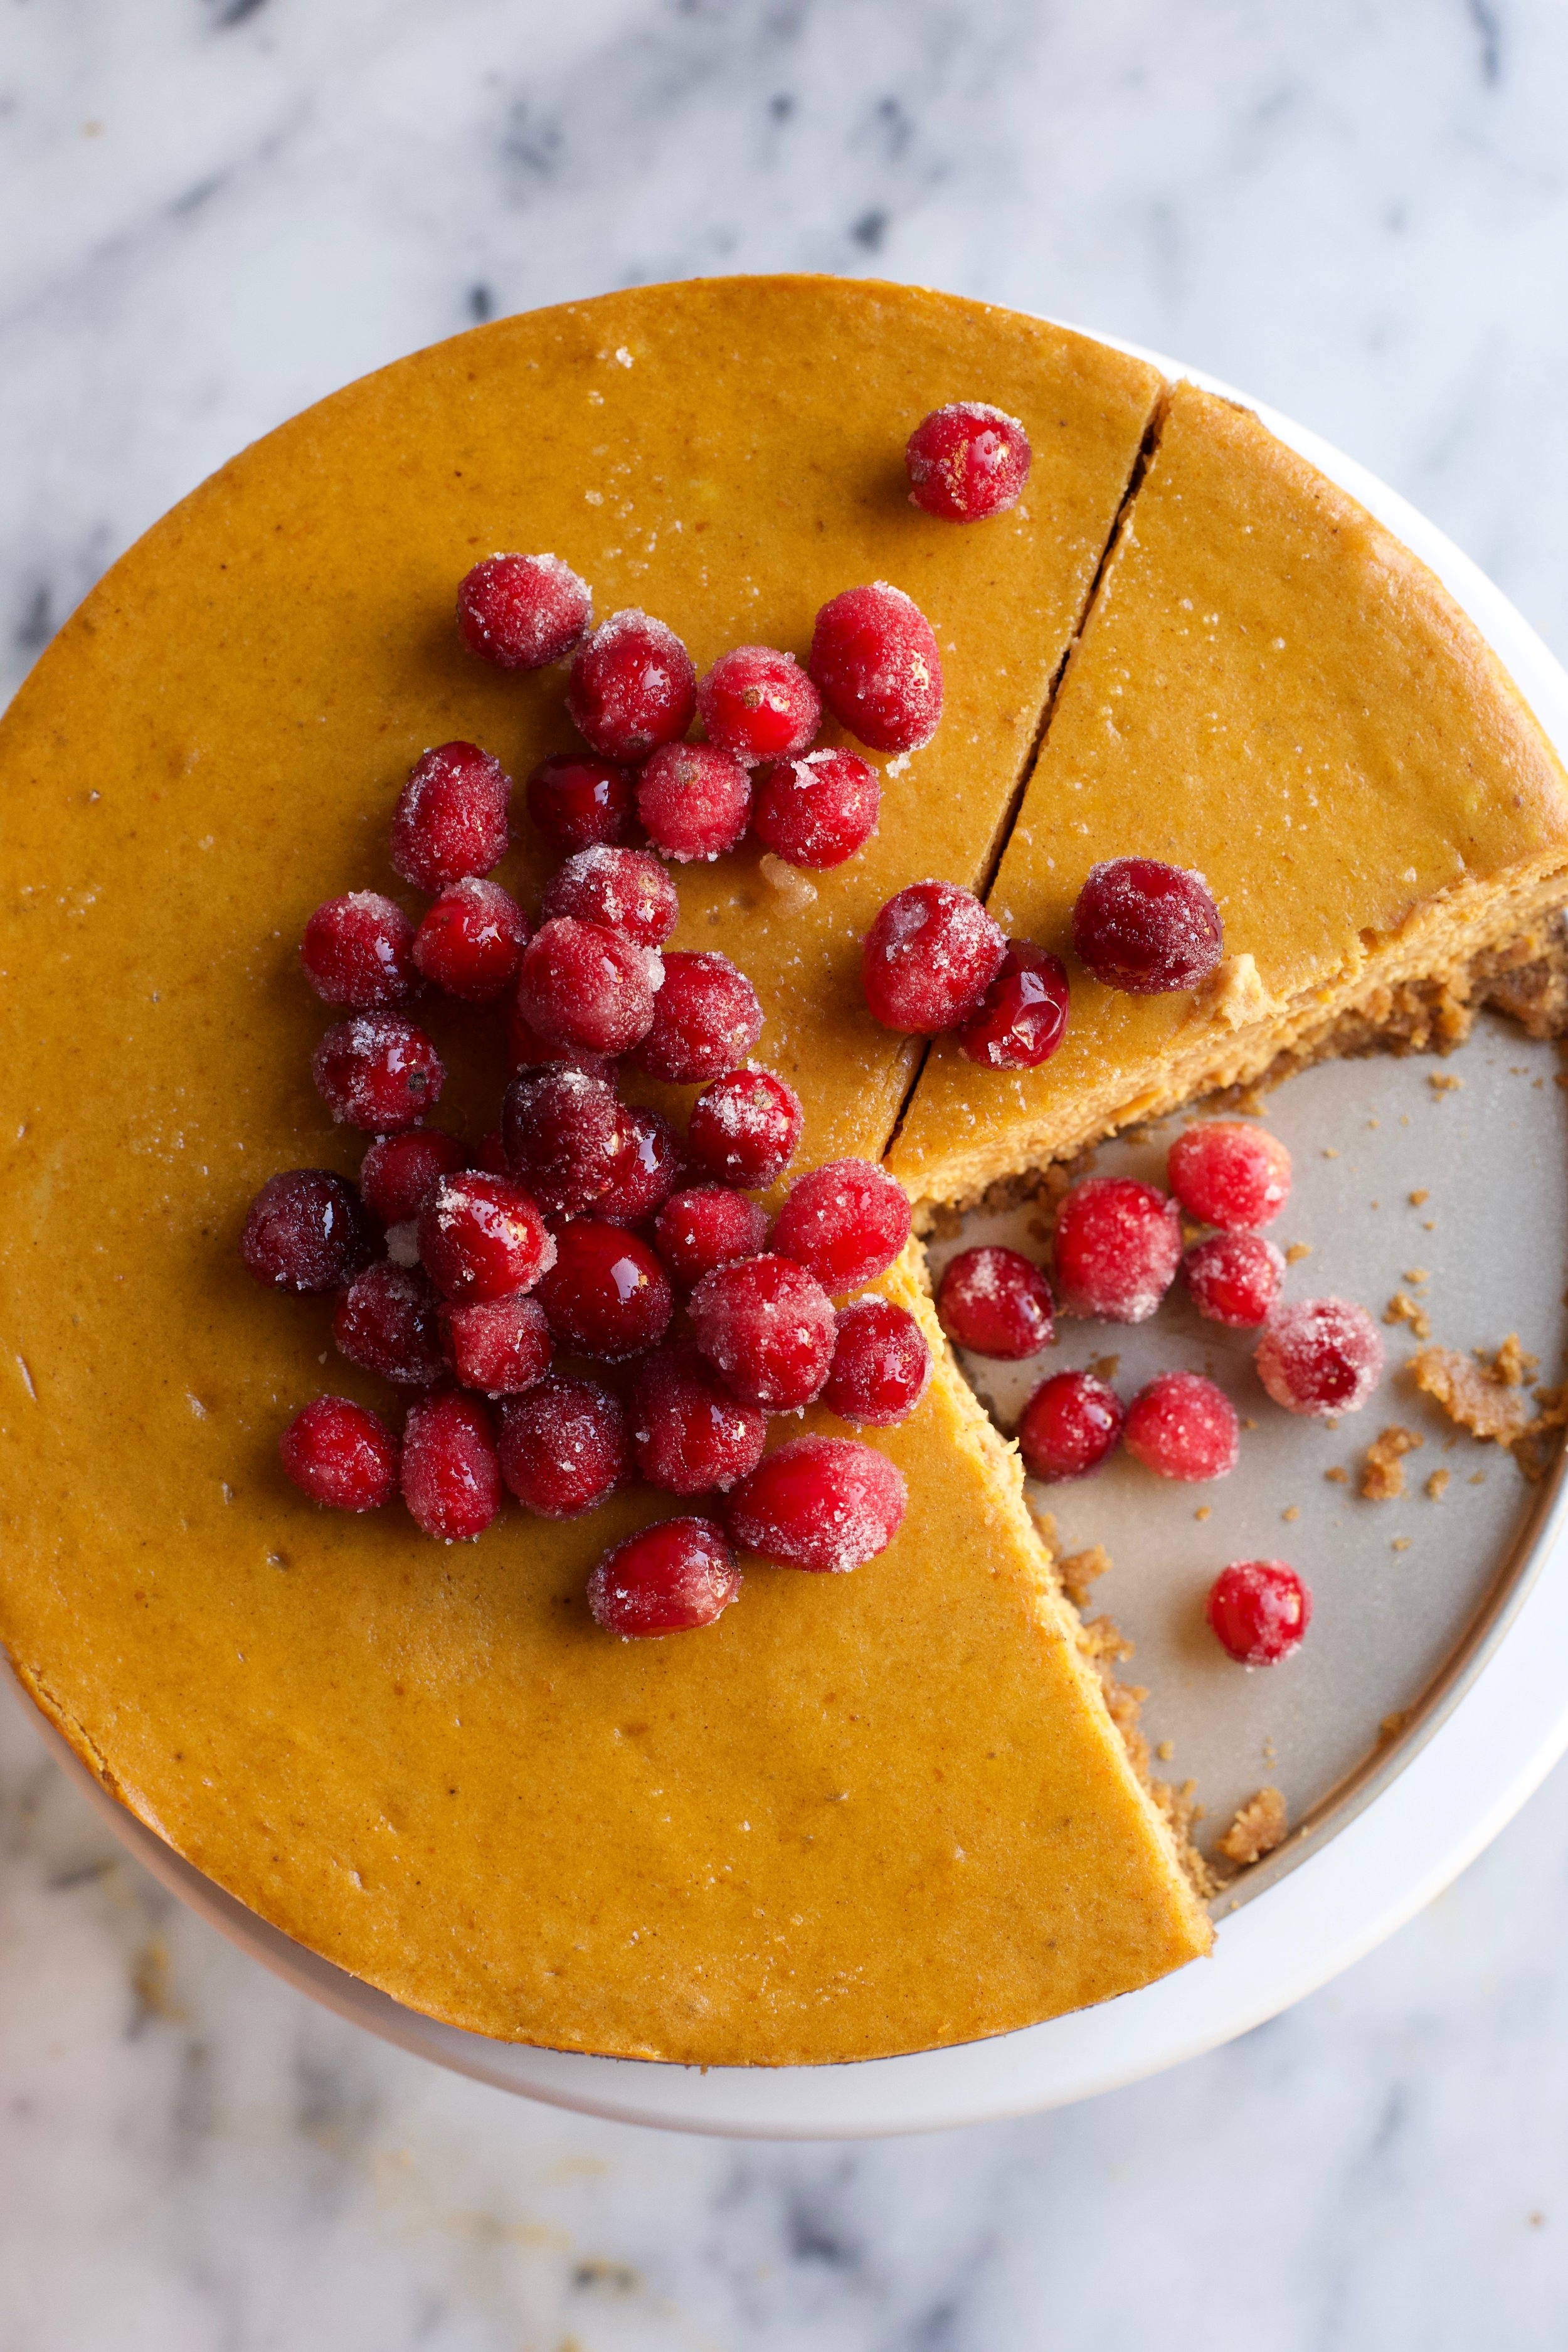
P.S. If you also want to decorate your cheesecake with sugared cranberries like I did, simply dip the cranberries in egg whites (pasteurized if you’re nervous about raw egg) and then gently roll them in granulated sugar. Try to get one even coating of sugar so that you can still see the color of the cranberries. It’s easiest to do one at a time.
Pumpkin Cheesecake
Recipe adapted from Paula Deen
Yields (1) 9 or 10 inch cheesecake
Ingredients
For the crust:

1 3/4 cups graham cracker crumbs
3 tbsp. light brown sugar
1/2 tsp. ground cinnamon
6 tbsp. (3/4 stick) unsalted butter, melted
For the filling:
3 (8 oz.) packages of full-fat cream cheese, room temperature
1 1/2 cups granulated sugar
1 (15 oz.) can of pumpkin puree, I prefer Libby’s brand
1/4 cup full-fat sour cream, room temperature
1 tsp. vanilla extract
1 tsp. ground cinnamon
2 tsp. pumpkin pie spice (sold at grocery stores, or you can make your own)
2 tbsp. all-purpose flour
3 large eggs + 1 large egg yolk, room temperature
Directions
Make the crust:
Move the oven rack to the lower-middle position and preheat the oven to 350°F. Grease the bottom of a 9” or 10” springform pan and line with parchment paper.
In a bowl, mix the graham cracker crumbs, brown sugar, cinnamon, and melted butter and transfer to the pan. Using the back of a measuring cup, firmly press the crust mixture into the bottom of the pan as well as the sides. Try to get the crust as evenly spread as possible. If the sides aren’t perfect, no worries.
Bake in the oven for 9-10 minutes. Remove from oven and let cool while preparing the filling.
Make the filling:
In the bowl of a stand mixer fitted with the paddle attachment (or in a large bowl if using a hand mixer) beat the cream cheese on medium speed for 2 minutes, and then add in the sugar and cream together until no lumps remain. Scrape down the sides of the bowl.
Add the pumpkin puree, sour cream, vanilla extract, cinnamon, pumpkin pie spice, and flour. Slowly mix together on low, and begin to gradually add the eggs, one at a time. Once the eggs are incorporated, turn the stand mixer/hand mixer off. Finish mixing the filling using a spatula, making sure to get anything that may be down at the bottom of the bowl (this area usually gets left untouched when using a mixer). Pour the cheesecake filling into the pan and spread it evenly.
Prepare the springform/water bath
Boil a full kettle of water for the water bath. While the water is heating up, carefully place the springform pan in the slow cooker liner (this is an optional step, but if partaking, I provided a link above that has a visual for this), and then finally, tightly wrap the pan in 1-2 pieces of foil. Place the wrapped springform pan inside of a roasting pan. Once the water is boiled, you can either 1) pour in the water while the roasting pan is in the oven or 2) pour in the water with the roasting pan out of the oven. Either works, just try not to have the oven door open for too long if you choose option 1.
Bake the cheesecake for 55-70 minutes. The center of the cheesecake will still have a wiggle to it, but the outer edges will be set. Turn off the oven, crack the door slightly, and leave the cheesecake in there for one hour.
Remove the cheesecake from the oven and allow it to cool completely on a cooling rack before transferring it to the refrigerator. Chill the cheesecake for at least 4 hours before eating it. When ready to serve, run a knife around the edge of the pan and remove the springform pan piece. Serve with whipped cream, ice cream, or a drizzle of caramel. Cheesecake will last up to 5 days in the refrigerator - just cover it with plastic wrap.