PUMPKIN SPICE ICE CREAM W/ CANDIED PUMPKIN SEEDS

IMG_4102.jpeg

A full year has gone by since my last ice cream post (hello, brown sugar + chocolate chip cookie dough) so I’d say it’s about time we revisited my favorite frozen treat. Being a sucker for seasonal flavors -peppermint ice cream and graham cracker frozen yogurt being some of my favorites - I wanted to do another ice cream that would be perfect for the autumn season: something that could be enjoyed while watching scary movies during Halloween time or as a dessert option for Thanksgiving. So, of course, I landed on pumpkin, an ingredient that is synonymous with the season and one that I truly love incorporating into desserts. If you’re looking for other pumpkin recipes, check out my pumpkin cheesecake, which I make every Thanksgiving, or my pumpkin and brown butter breakfast puffs, which are essentially doughnut holes baked in a muffin tin.

IMG_4007.jpeg

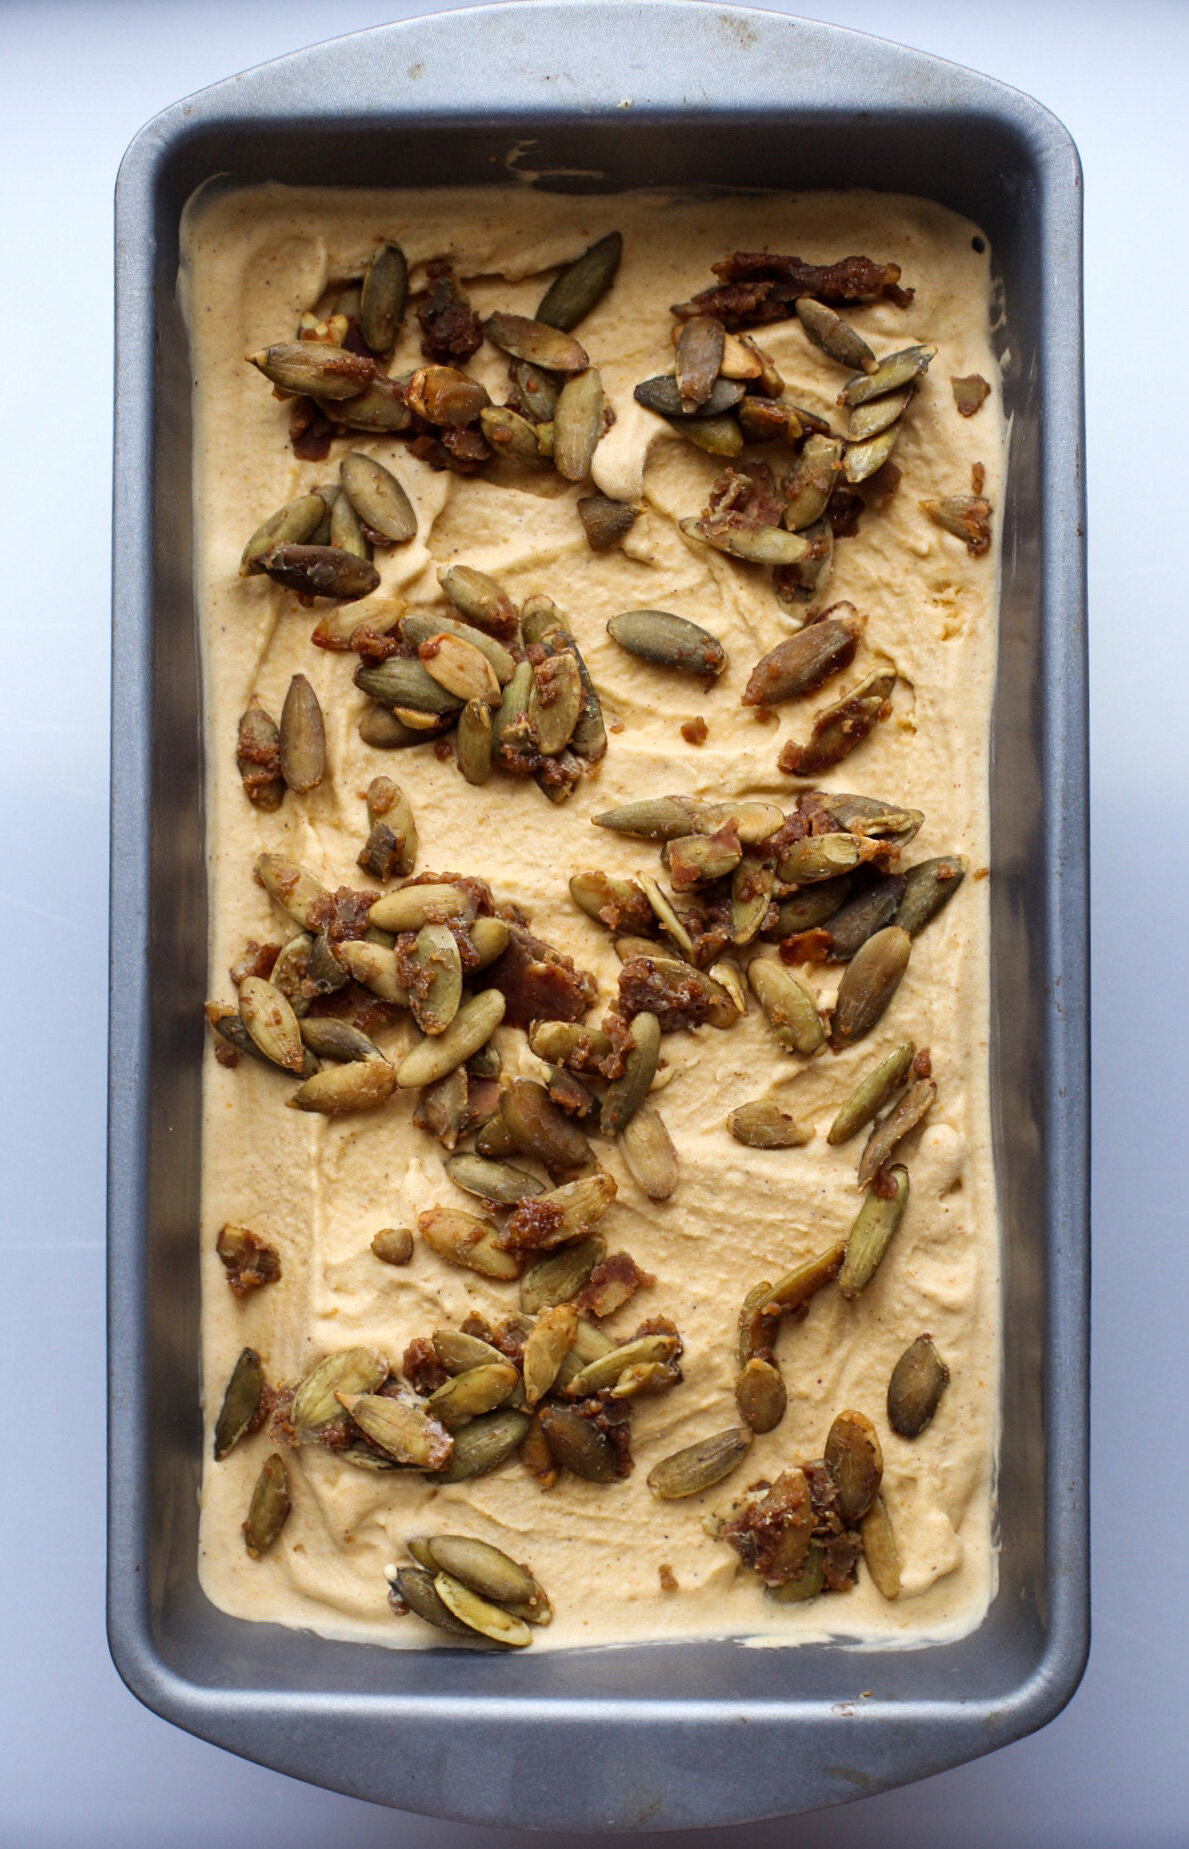
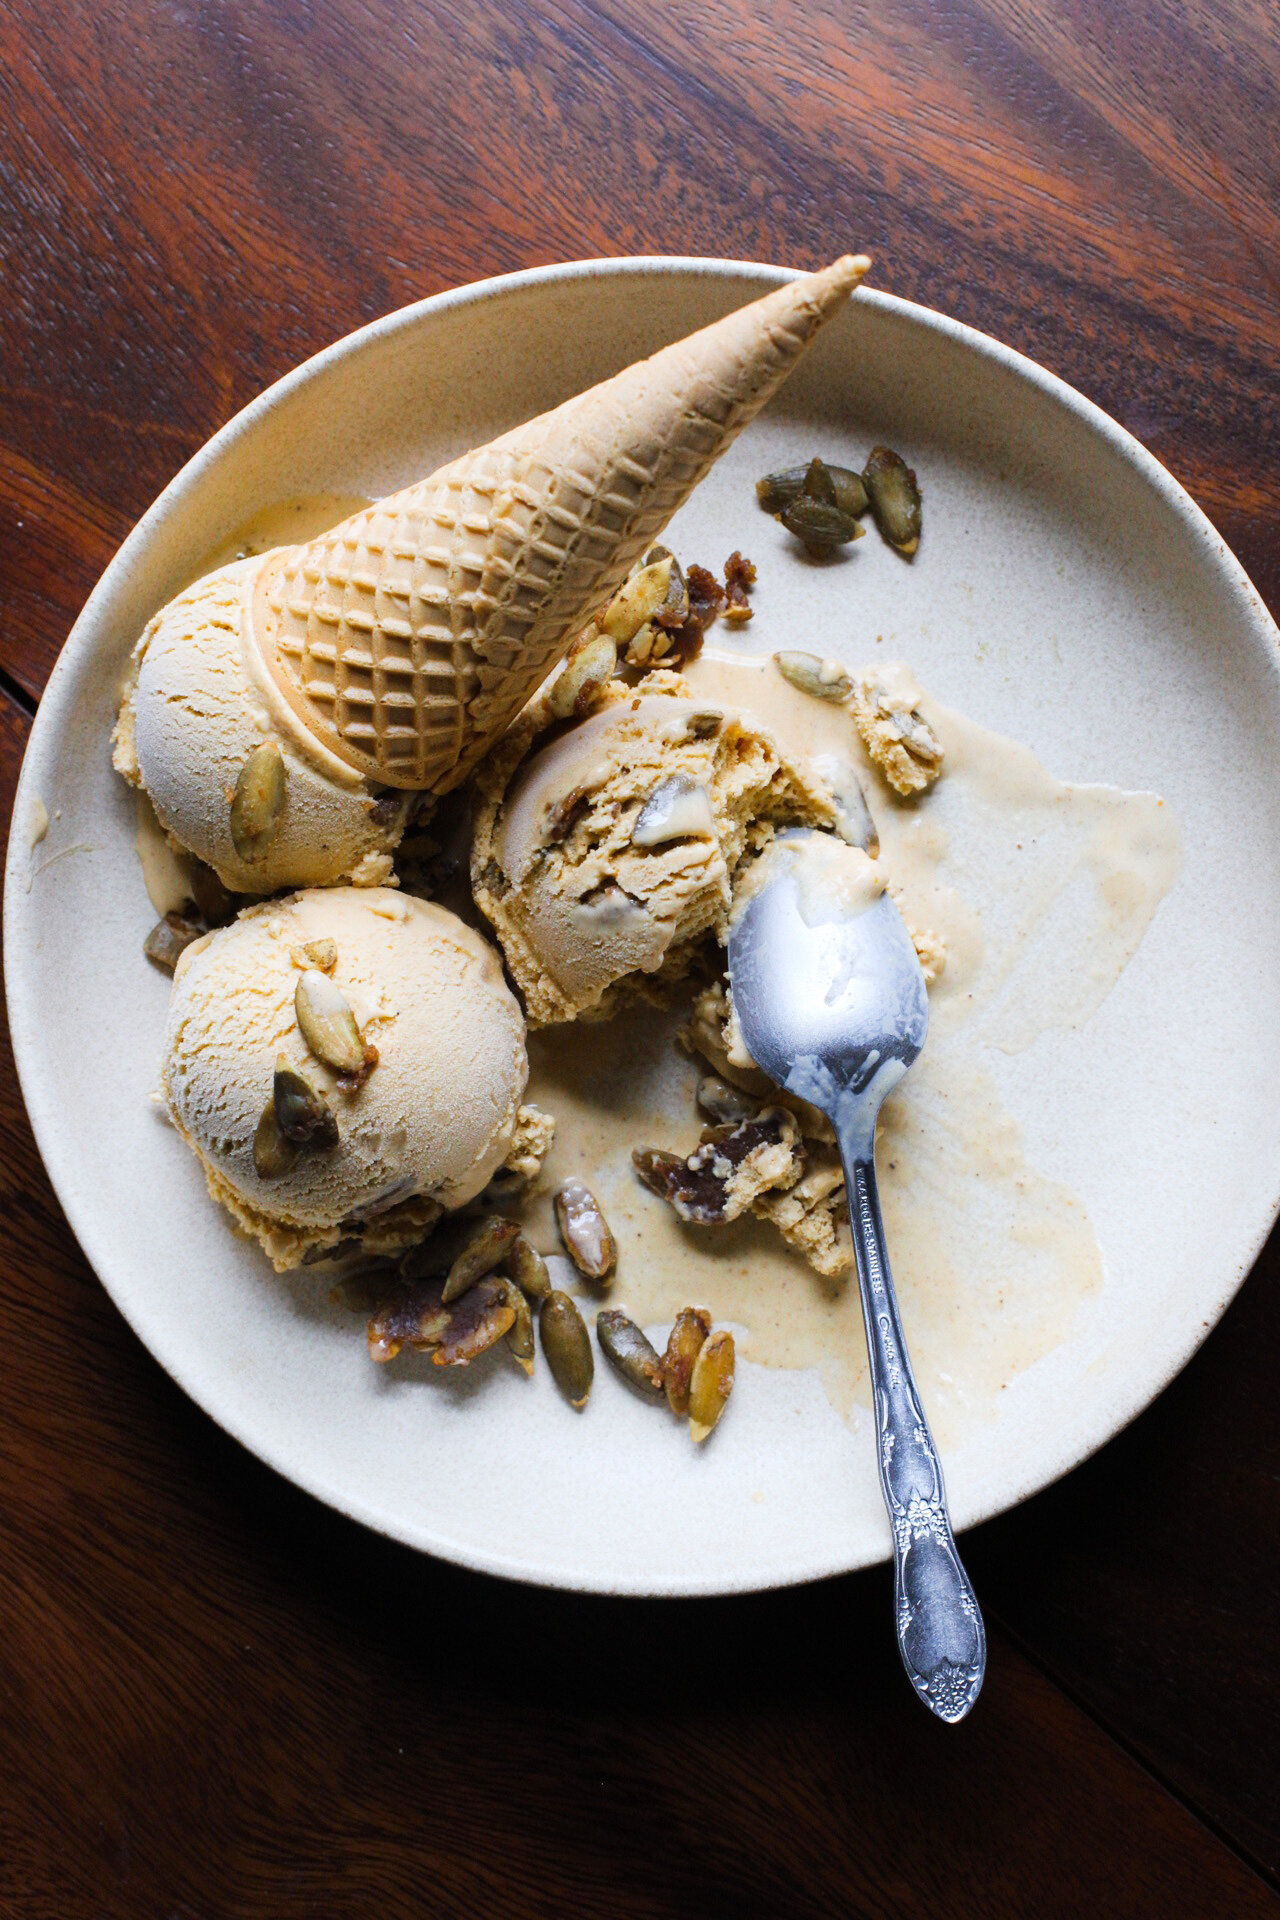
Now let’s talk about today’s ice cream. My pumpkin spice ice cream is custard based, meaning egg yolks are added to the milk/sugar mixture in order to yield a creamier flavor and a smoother texture. I always make my ice cream this way because although it requires a bit more skill while making it, the end result is far superior and comparable to what you’d find at artisanal ice cream shops. As for the pumpkin component, you’ll be adding store bought canned pumpkin purée (my favorite brand being Libby’s) or you can go above and beyond and make your own in case you just so happen to have unused pumpkins lying around. As you can tell from my pictures, my pumpkin ice cream will not give you a vibrant orange color like some other recipes do, and this is mostly due to the amount of milk, heavy cream and egg yolks added in relation to the pumpkin purée. I actually think the end result looks more natural with its faint hint of orange, but if you’re concerned that there isn’t enough pumpkin flavor, I assure you, it’s the perfect ratio.

The “spice” component of this ice cream comes from adding typical spices that you would find when baking a pumpkin pie: ground cinnamon, ginger and clove. You can definitely add nutmeg, allspice, cardamom or even black pepper if you want, or even make it easier on yourself and simply use store bought pumpkin pie spice, which is essentially a blend of all the aforementioned spices. I get mine from Trader Joe’s and actually used it for the candied pumpkin seeds component of this recipe.

Speaking of the candied pumpkin seeds, I got the idea for this from another seasonal ice cream recipe of mine: my maple pecan ice cream. I’m the kind of person who loves a crunchy/textural element in my ice cream, whether from chocolate chunks, toffee bits, or mini marshmallows, so I thought adding a bit more pumpkin flavor via the seeds would be a great addition. Because the seeds are candied, it adds little chunks of buttery, sweetness to just about every bite and really makes the ice cream that much more addicting.

IMG_4097.jpeg

Pumpkin Spice Ice Cream w/ Candied Pumpkin Seeds

Yields about 1 quart
Recipe adapted from David Lebovitz

Ingredients

For the candied pumpkin seeds:

IMG_4036.jpeg
  • 1 tbsp. unsalted butter

  • 1/2 cup raw pumpkin seeds

  • 1 tbsp. brown sugar (light or dark)

  • 1/2 tsp. pumpkin pie spice

For the ice cream:

  • 1 cup heavy cream

  • 1 1/2 cups whole milk

  • 1/3 cup granulated sugar

  • Pinch of kosher salt

  • 5 large egg yolks

  • 3/4 cup pumpkin purée

  • 1 tsp. vanilla extract

  • 1 tsp. ground cinnamon

  • 1 tsp. ground ginger

  • 1/4 tsp, cloves

Directions

Make the candied pumpkin seeds:

  1. Melt the butter in a large skillet over medium heat. Add the pumpkin seeds and toss to coat with butter. Sprinkle in the brown sugar and pumpkin pie spice, and cook for 3-4 minutes, or until the seeds are candied. Transfer to a bowl and allow to cool completely.

Make the ice cream:

  1. Pour the heavy cream into a medium-sized bowl and set a strainer over the top. Place this bowl into an ice bath and set aside.

  2. Warm the milk, sugar, and salt in a saucepan over medium-low heat. In a medium bowl, whisk the egg yolks together. Just as the milk mixture is beginning to simmer, gradually add some of it to the bowl of egg yolks, whisking constantly as to not scramble the eggs (this is called tempering). Once the egg yolk mixture temperature has raised, pour the mixture back into the saucepan. Stir constantly over medium-low heat until the mixture thickens and coats the back of your spatula or spoon.

  3. Pour the custard mixture over the strainer-lined bowl. Stir the custard in with the heavy cream that is already in the bowl for a couple of minutes in order to bring the temperature down a bit. Pour this and all other ice cream ingredients (pumpkin purée, vanilla extract, and spices) into a blender and blend for about 30 seconds. Transfer the mixture back to the bowl that held the custard base, cover with plastic wrap, and chill in the refrigerator for at least 4 hours or overnight.

  4. Churn the ice cream in your maker according to the manufacturer's instructions. Transfer the finished ice cream to an airtight container and stir in the candied pumpkin seeds. Freeze until solid. Enjoy!

APPLE BUTTER SPICE CAKE W/ MASCARPONE FROSTING

IMG_3904.jpg

It’s been about a month since my last post (sorry!) but I guess you can say that I’ve been busy with a good amount of traveling as well as exploring more areas in the state of Maine. At the beginning of September, Alex and I flew back to California for two full weeks to see family and friends for the first time since May, which I felt very lucky to do. It was a first for both of us flying during the pandemic and it was exactly what you think it would be like: stressful, and I have no intention of doing that again anytime soon. I also got to experience another pandemic first: getting tested for Covid, and not only once, but a total of three times (twice in CA and once when we were back in ME). Fortunately, every test came back negative and I’m actually impressed by how easy the whole experience was in both states. If you’re still worried about getting a test since it can be kind of daunting, don’t worry about it, I seriously thought it wasn't a big deal. But if you’re being smart and continuing to wear a mask, you need not worry about that!

Fall foliage on full display at Grafton Notch State Park

Fall foliage on full display at Grafton Notch State Park

Adidas: sponsor me.

Adidas: sponsor me.

In other news, fall foliage is here in Maine and it’s been equal parts exciting and nerve-wracking planning trips to see all the beautiful colors. This is my first time experiencing the changing of the leaves to this extent so I want to see as much of it as possible before it’s over, hence the worrying on my part. This past Sunday, we drove two hours to western Maine to Grafton Notch State Park and hiked in one of the most stunning places I’ve ever visited (Sedona is up there for me as well). We chose a pretty challenging trail, Table Rock, but the moment we made it to the top, we were rewarded with a sea of colorful trees ranging from red to yellow to orange and in between; it was so beautiful that I actually started to tear up a bit. If you’re able to see the fall foliage this season, definitely don’t miss out on it… it makes you forget about all the crap we’re going through right now, even if it’s just for an hour.

IMG_3569.jpg

One fall activity that I have yet to accomplish is apple picking but I did do the next best thing: shopped at a farm stand filled to the brim with dozens of local apple varieties. I kind of went crazy and bought 5lbs. worth of apples including an heirloom variety called Frostbite (aka the cute baby ones featured in the pictures), along with fresh apple butter and of course, a couple of apple cider doughnuts. It was at this farm stand where I found inspiration for today’s recipe which led me to the super cozy and fall-friendly apple butter spice cake. I actually posted a similar recipe last year with my pear spice cake with mascarpone, but the two recipes differ in a couple of ways. In today’s recipe, there is no fresh fruit utilized, only the apple butter component; I added a frosting on top to really drive home the decadence that we start to see when the weather gets cooler; and the mascarpone cheese is not found within the cake ingredients, but actually only in the frosting. I’d been wanting to make mascarpone frosting for a while now and I knew it would pair perfectly with the intense apple flavor from the apple butter and the array of spices. Luckily for me (and you), the cake and frosting complemented one another perfectly.

IMG_3635.jpg

Let’s talk about the main component of today’s cake: the apple butter. Do you have to make it yourself? Of course not! I obviously didn’t make it for this recipe, but I did go out of my way to purchase one that was made locally here in Maine that also wasn’t loaded with high fructose corn syrup, which is what you’ll usually get stuck with when shopping at regular grocery stores. So if you can’t make your own (here’s the link to my apple butter recipe, along with a recipe for apple cider doughnuts), then maybe try to buy it at your local farmers market. If either options are out of the picture for you (hello, Covid, I know you’re still around), then go ahead and buy the store bought version. But promise me you’ll make your own apple butter this season!

IMG_3672.jpeg

Moving on to the mascarpone frosting, I’m going to be honest and say that you actually don’t need to have it with the cake; that’s just how delicious I think the cake is on its own. Like I mentioned earlier, I had been wanting to make a mascarpone frosting for a while now and felt a spice cake would be perfect with it (which it is!), but if you’re wanting to have this cake with a little less sugar and/or intend on making this for breakfast to enjoy with a hot cup of coffee, then by all means, leave the frosting off! In turn, I would simply do a light dusting of confectioners’ sugar with fresh apple slices which makes the presentation a bit more exciting, even though you might just be making the cake for yourself.

IMG_3822.jpeg

Apple Butter Spice Cake with Mascarpone Frosting

Yields (1) 8-inch round or square cake

Recipe adapted from Life as a Strawberry

Ingredients

For the cake:

IMG_3859.jpg
  • 1 3/4 cups all-purpose flour

  • 1 tsp. ground cinnamon

  • 3/4 tsp. ground ginger

  • 1/2 tsp. ground nutmeg (or freshly grated)

  • 1/2 tsp. ground cloves

  • 1/4 tsp. allspice

  • 2 tsp. baking soda

  • 1/2 tsp. kosher salt

  • 1/2 cup (1 stick, 4oz.) unsalted butter, melted

  • 3/4 cup apple butter, store bought or homemade

  • 1 cup granulated sugar

  • 2 large eggs

  • 1/2 tsp. vanilla extract

For the frosting

  • 3 oz. (3/4 a stick) unsalted butter, room temperature

  • 6 oz. mascarpone cheese, room temperature

  • 1/2 tsp. vanilla extract

  • Pinch of kosher salt

  • 1 1/2 cup confectioners’ sugar

    Directions

For the cake:

  1. Preheat the oven to 375°F and grease an 8-inch round or square cake pan with either cooking spray or butter, then line it with parchment paper with some overhang.

  2. In a medium-sized bowl, whisk the flour, spices, baking soda and salt together until combined. Set aside.

  3. Using a stand mixer fitted with the paddle attachment (or in a large bowl if using a hand mixer), mix the melted butter, apple butter and sugar together for a couple of minutes on medium speed. Add the eggs and vanilla extract and mix again. Add the dry ingredients and mix until just combined. Try not to over mix the batter.

  4. Transfer the batter to the prepared cake pan and spread it evenly using a spatula (an offset spatula is best). Bake in the oven for 35-40 minutes or until a toothpick inserted in the center comes out cleans. Allow the cake to cool in the pan for 5 minutes before removing it and transferring to a cooling rack. Let the cake cool completely before frosting it.

For the frosting:

  1. In a stand mixer fitted with the paddle attachment (or in a large bowl if using a hand mixer), combine the butter, mascarpone, vanilla extract and salt until smooth. Add the powdered sugar and mix on low for about 10 seconds before increasing the speed. Beat until everything is incorporated and smooth.

  2. Spread the frosting in an even layer on top of the cooled cake (you may not use all of the frosting). Finish the cake with a dusting of ground cinnamon (or whatever spice of your choice) and thinly slicked apples. Enjoy!

OATMEAL PEANUT BUTTER CHOCOLATE CHIP COOKIES

IMG_3428.jpg

Before we get into today’s recipe, I wanted to share with you an article that I was lucky enough to be a part of recently. The wonderful people at Redfin, a top real estate brokerage, reached out to me last week for my top kitchen organization tip and I, of course, was glad to add my two cents. The article is entitled “Kitchen Hacks: Expert Tips for an Organized and Functional Kitchen” and I strongly suggest that all of you give it a read. There are tons of helpful kitchen suggestions from the most practical kitchen tools that every cook should own to various simple organizational hacks like storing your spices in clear containers that are labeled. My tip falls under the category “Game-Changing Kitchen Hacks” and although it’s very simple, it is legitimately something that helps me out greatly while cooking. I won’t spoil it for you here, so click on this link to find my tip and hopefully you’ll learn a few new things. I certainly did.


September is here and although it’s not officially autumn yet, Maine has been showing signs that summer is a thing of the past. The weather has been chillier, with crisp mornings leading into sun-soaked afternoons that turn into cooler nights where I’ve found myself needing to wear a sweater on our after-dinner walks. After months of dealing with my enemy, humidity, I’ve never been happier (and neither has my hair). I haven’t experienced a quintessential autumn season since I lived in Chicago 8 years ago, but instead of feeling the dread of studying and midterms, I have apple picking and fall foliage to look forward to. Honestly, I can’t wait.

With the changing of the seasons, I had to bid adieu to the plethora of recipes that I had been posting that highlighted all things summer fruit. As much as I love fresh berries, sweet watermelon, and juicy peaches, my love for autumn-centric dishes runs deep. Apple and pumpkin-focused baked goods will always be a standby in my kitchen from September to December, but I also notice an increase in chocolate (hello, Halloween). Today’s cookie recipe is one that not only features chocolate but one that combines oatmeal and peanut butter cookies, other cozy ingredients. It’s the best of all worlds and yet another cookie recipe that I can’t get enough of.

067E8A20-962B-4A8C-B97C-74E60AB88472-057690C1-273B-46A1-9397-0FFF7F18B9A6.jpg

I feel like I’ve touched on this topic before, but in case this is your first time reading my blog, I love peanut butter. I literally eat the stuff every single day whether its slathered on toast for a preworkout snack or when eating my favorite peanut butter and date bars from Trader Joe’s. Like any other normal kid, Jif and Skippy reigned supreme in my household growing up, but today, I buy the natural variety where the only ingredient listed is roasted peanuts. I don’t even need the salt.

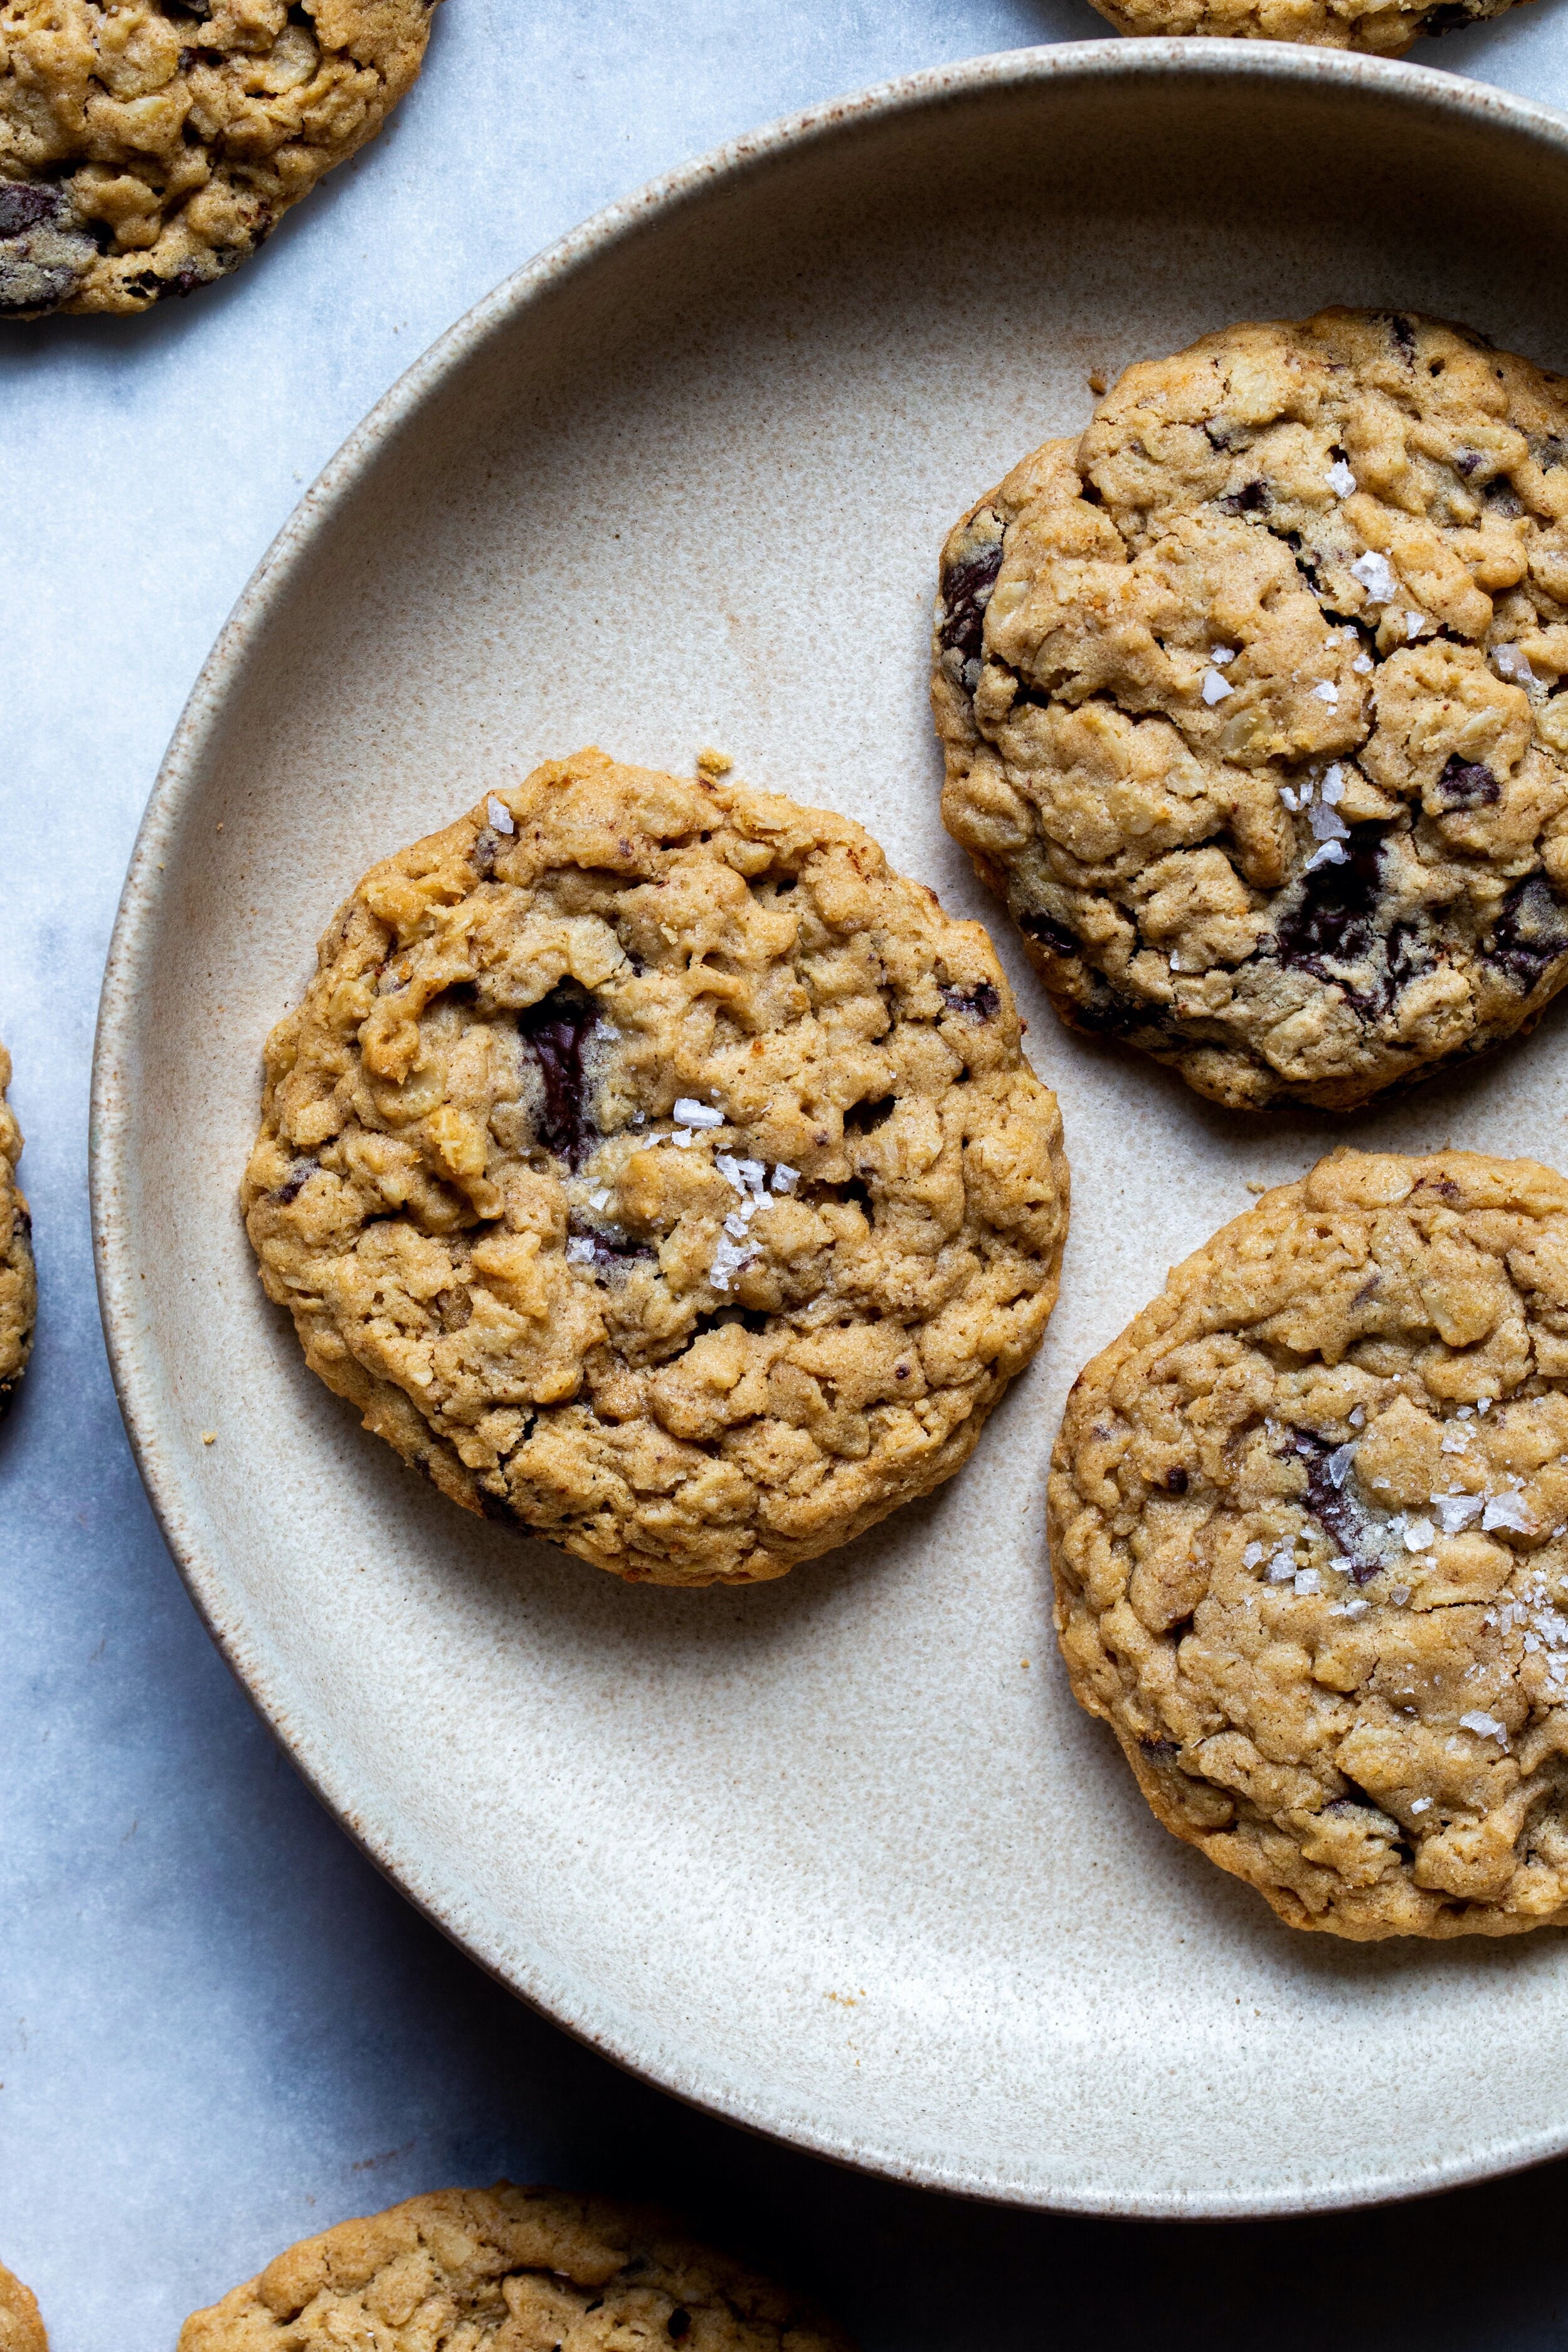
Despite this love for the popular spread, I have never been fond of peanut butter cookies: you know, the ones with indentations on the top that tend to be dry (in my opinion!). But the cookie recipe I’m sharing with you today gives you that roasted peanut flavor but with a perfect chewy texture, which comes from the addition of old fashioned oats. The recipe only calls for 1/2 cup of peanut butter but it’s definitely the ideal ratio when paired with oats and chocolate; the three flavors work in harmony together without one overpowering the other. They’re not just “oatmeal cookies” or “peanut butter cookies” or “chocolate chip cookies”… it really is an amalgamation of all three and unlike any other cookie I’ve had before.

Although I only eat natural peanut butter these days, I strongly advise using standard peanut butters from Jif or Skippy - the ones with added sugar and oil (usually rapeseed or soybean). If you were to use a natural variety, it would actually lead to a more dry and crumbly cookie which is the last thing we want. So, although I’m not a fan of eating nut butters with any additives, all bets are off when it comes to baking. After making today’s cookies, you can use up the rest of the peanut jar by baking my peanut butter swirl brownies or homemade dark chocolate peanut butter cups.

IMG_3468-3.jpg

Oatmeal Peanut Butter Chocolate Chip Cookies

Yields about 15 large cookies

Recipe adapted slightly from Two Peas & Their Pod

Ingredients

AE2B211F-EBB9-480D-9E73-D6BB62DDAA00-F2044EEB-206D-43E0-A5A2-4835DF388116.jpeg
  • 1/2 cup all-purpose flour

  • 1 1/2 cups old fashioned oats

  • 1/2 tsp. cinnamon

  • 1/2 tsp. baking soda

  • 1/4 tsp. kosher salt

  • 1/2 cup (120 grams) creamy peanut butter (any n0n-natural variety)

  • 1/2 cup (1 stick, 4oz.) unsalted butter, room temperature

  • 1/2 cup granulated sugar

  • 1/2 cup brown sugar, lightly packed (light or dark)

  • 1 large egg, room temperature

  • 1 tsp. vanilla extract

  • 4 oz. dark chocolate bar, roughly chopped

  • Flaky sea salt, to finish (optional)

Directions

  1. In a medium sized bowl, whisk the flour, oats, cinnamon, baking soda and salt together. Set aside.

  2. To the bowl of stand mixer fitted with the paddle attachment (or in a large bowl if using a hand mixer), cream the peanut butter, butter and both sugars on medium speed until the mixture is light and fluffy, about 2-3 minutes. Add the egg and vanilla extract and mix until incorporated. Scrape down the sides of the bowl.

  3. With the mixer turned off, add the oats/flour mixture all at once and turn the mixer on low for about 10 seconds before turning up the speed to medium. Mix for about 30 seconds. Using a spatula, fold in the chopped dark chocolate and make sure to not over mix the dough. Cover the bowl with plastic wrap and refrigerate for one hour.

  4. Preheat the oven to 350degreesF and line a baking sheet with parchment paper.

  5. Using a large cookie scoop or a spoon, scoop our 3 tbsp. portions of dough per cookie and place on the prepared baking sheet. Bake only 6 at a time since they will be larger.

  6. Bake the cookies for about 12-13 minutes. The cookies will look soft in the middle, but the edges will be set and golden brown. Sprinkle immediately with flaky sea salt. Allow the cookies to sit on the baking sheet for about 5 minutes before transferring to a cooling rack.