STRAWBERRY CREAM SCONES

IMG_4916.jpg

When I was working on this post earlier this week, I was worried that sharing another scone recipe so quickly after my first one wouldn’t make for ideal content, and that you guys would be bored. Little did I know that it’s been almost an entire YEAR since my cranberry-orange scones recipe went live, so apparently I don’t have the best sense of time! With that said, it’s a new year and it’s high time that I grace you all with another scone recipe.

IMG_4503.jpg

Unlike my previous scone post, these strawberry cream scones are different in a few ways: both visually and ingredient-wise (and I don’t mean the obvious central flavor components). For as long as I’ve been baking scones, I’d always formed them into the standard triangular shape that we are all accustomed with. But over the past year or so, I kept finding myself saving Instagram posts that featured scones baked in a round shape since I found them to look so appealing and different. So I finally gave it a shot using my 3” round cookie cutter and I couldn’t be happier with the results. I found the whole process very simple (think of it like cutting out sugar cookies), and I’ll most likely continue to shape my scones like this for the foreseeable future.

IMG_4724.jpg

As for the difference in flavor, I had always made my scones with butter, whether it was incorporated into the dough via tiny cubes or grated using a box grater, but these strawberry cream scones actually don’t have any butter in them! As I’m sure you’ve already guessed from the name of these scones, the fat in this recipe comes from the addition of heavy cream. I didn’t even know that butter-less scones existed (I guess I’m not so well-versed in the world of scones), so I was pretty hesitant of what the outcome would be like, both texture and taste wise, but they came out so incredibly tender and soft. And I found that making these scones is actually much easier because you don’t have to worry whether you properly incorporated the butter into the dough or not, or obsess over keeping the dough as cold as possible so that the butter in the dough doesn’t melt. Although I love my cranberry orange scones, these cream scones are reigning supreme in my kitchen at the moment.

IMG_4718.jpg

As always when making scones, you have to stick to the usual rule of avoiding over mixing the dough which could lead to tough scones. And if you ask anyone what a scone’s texture should be, the word “tough” hopefully should never leave their mouths. So when making the dough, work mindfully, especially when it comes to the step of adding the heavy cream. Although you may use a wooden spoon or a fork for this step, I actually believe that your own two hands are the best tools. This way, you can actually feel for the dry pockets in the dough and therefore will know if you need to add more heavy cream or not. It’s definitely messier using your hands but can make it more fun. Please just try not to have nail polish or jewelry on!

To finish the scones before popping them in the oven, you’ll give each one a brush of heavy cream and a generous sprinkling of raw/turbinado sugar. The scone dough by itself isn’t that sweet, as it shouldn’t be, and so the turbinado sugar on top not only provides an amazing crunchy texture, but a little welcomed sweetness that you’ll get with each bite. If you don’t have turbinado sugar, you can substitute with regular granulated sugar.

IMG_4770.jpg

Strawberry Cream Scones

Yields about 8 large scones

Recipe adapted from King Arthur Flour

Ingredients

  • 3 cups all-purpose flour

  • 1/3 cup granulated sugar

  • 1 tbsp. baking powder

  • 1/2 tsp. kosher salt

  • 1 tbsp. lemon zest

  • 1 1/3 to 1 1/2 cups heavy cream, plus more for brushing

  • 1 tsp. vanilla extract

  • 1 cup chopped fresh strawberries

  • Turbinado sugar, for topping

Directions

  1. In a large bowl, whisk together the flour, sugar, baking soda, salt and lemon zest.

  2. Pour 1 1/3 cups of the heavy cream into a measuring cup and mix in the vanilla extract. Drizzle this mixture slowly over the dry ingredients while using wooden spoon to gently mix it together (I actually use my hands so I can get a good feel for the dough). The goal is to have no dry spots left in the dough, so you may need to add more heavy cream. Add in a tablespoon at a time until no more flour bits remain, but try to avoid making the dough too sticky. Carefully fold in the strawberries.

  3. Transfer the dough to a lightly floured surface and knead it a couple of times with your hands. Mold the dough into a disk and press it until the dough is about 3/4” thick. Using a 3” cookie/biscuit cutter dipped in flour, cut out the scones - you will have to re-roll the dough once more in order to get 8-10 scones. Place the scones onto a plate and place them in the freezer for about 15 minutes.

  4. Preheat the oven to 425°F and line a baking sheet with parchment paper. Take the scones out of the freezer and place them on the baking sheet. Brush each scone with heavy cream and sprinkle generously with turbinado sugar. Bake in the oven for 14-17 minutes, or until the scones are a light golden brown and baked through.

  5. Scones are best if they are eaten right out of the oven, but will keep for a couple of days when stored in an airtight container at room temperature.

COCONUT + MACADAMIA NUT GRANOLA CLUSTERS

IMG_9794.jpg

Today I’m giving you a healthier breakfast recipe, because let’s be honest, we need to have some variety in the morning other than muffins and scones from time to time! And after watching my brother-in-law run his first marathon in LA this past weekend (he did amazingly well btw!) I’m feeling a bit inspired to fuel my body with more nourishing foods and just be a bit more mindful of what I eat! Don’t worry… we will go back to our regularly scheduled programming next week (aka there will be cake).

A couple of weeks ago, my sister and I were sharing our recent Trader Joe’s finds with each other and it was then that I learned about a new-to-me granola. Lately, I’ve been eating more and more Greek yogurt to get some more protein in and I had been eating it with an almond butter granola (also from Trader Joe’s of course). But my sister said that I just had to try this coconut one because it wasn’t that sweet and just had an amazing flavor. So, the next day I bought myself a package and after a bite or two (or 10), deemed it my new favorite granola.

IMG_9410.jpg

My next thought was to make my own version of it at home, using “healthier” sweeteners and less unwanted ingredients than the Trader Joe’s version, and then share it on the blog. And I’m thrilled to report that the outcome was amazing, and that I successfully made a better version than the store bought.

Roughly following the guidelines to my other granola recipe, I wanted to make the granola as coconut-y as possible and achieved this by including 4 types of coconut: 1) unsweetened shredded coconut flakes, 2) unsweetened coconut chips, 3) coconut sugar and 4) coconut oil. If you don’t like coconut, I think it’s safe to say that this recipe isn’t for you.

And because coconut is a tropical fruit, I chose a nut that reflects that sentiment: macadamia nuts. Whenever I think of macadamia nuts, my mind immediately goes to images of Hawaii and therefore I figured coconut would work so well with it. Luckily, I was right and the buttery nuts pair exceptionally well with the sweet coconut. I do want to add though that macadamia are fairly expensive - they’re actually the most expensive nuts in the world - so if this is out of your budget, I would swap in almonds (slivered or sliced).

IMG_9624.jpg

One aspect of the coconut granola from Trader Joe’s that I added to mine was the addition of corn flakes. It was one of the main reasons why I enjoyed their version so much and it was an ingredient I would have never thought to add to granola. The corn flakes (not to be confused with sugary frosted flakes!) make the granola suuuuuper crunchy and also add a nice flavor. This addition is probably my favorite part to the granola.

IMG_9483.jpg

Unlike my last granola, I wanted to make today’s much more chunky and cluster-like. This can be achieved by not touching the granola when it’s baking in the oven nor when it’s taken out. The trick is to wait until the granola is completely cooled; at that point, you'll be able to break up the granola into an assortment of shapes and sizes. If you try to break it up hot out of the oven, the granola will easily break up and you’ll lose any chance of clusters.

Please give this granola a chance! The smell alone is insane and the crunchiness and flavor makes it so addicting. If you’re not a coconut fan, maybe plan on making a batch and gifting it to a friend or family member… I’m actually making another batch of this tomorrow to bring to my sister this weekend

IMG_9748.jpg

Coconut + Macadamia Nut Granola Clusters

Yields about 8 cups

Ingredients

  • 3 cups old-fashioned oats

  • 2 cups cornflakes, crushed

  • 1 cup unsweetened shredded coconut flakes

  • 1 cup unsweetened coconut chips

  • 1 cup unsalted macadamia nuts, whole or roughly chopped

  • 2 tsp. coconut sugar (or brown sugar)

  • 1/2 tsp. coarse salt

  • 1/2 cup coconut oil, melted

  • 1/2 cup pure maple syrup

  • 2 tsp. vanilla extract

Directions

  1. Preheat the oven to 300°F and line a rimmed baking sheet with parchment paper.

  2. In a large bowl, combine all ingredients and stir well using with a spoon or spatula.

  3. Bake in the oven for 30-40 minutes, rotating the pan about halfway through. The granola will be a deep golden brown color.

  4. Place the baking sheet on a cooling rack and allow the granola to cool completely (this can be hastened by placing the baking sheet in your fridge). Carefully break the granola into bite size clusters. Enjoy plain or with yogurt and fruit. Store leftovers in an airtight container at room temperature.

BLUEBERRY LEMON MUFFINS

IMG_8860.jpg

Since this past Sunday, aka Daylight saving time, I’ve been craving summer-y dishes like strawberry ice cream and peach pie. Yes, we’re only in the middle of March, but the moment it stays lighter later and we get to enjoy sunshine for a couple more hours, my mind immediately goes into summer mode. I know that I don’t live in an area where there will be winter-y weather for about 1-2 more months, but after record low temperatures and rainfall in Southern California, I’ve never been more excited for warmer weather.

On top of beautiful weather, we’ve been enjoying wildflower super blooms as well as the annual migration of butterflies from Mexico to the Pacific Northwest (the painted ladies). Walking outside and seeing hundreds upon hundreds of butterflies is quite honestly one of the most beautiful sights and it’s amazing to see how it’s positively affecting everyone’s mood. I sometimes forget how lucky I am to live in such a awe-inspiring area and I’m trying to take full advantage of my surroundings. More hikes are in my future!

IMG_8623-2.jpg

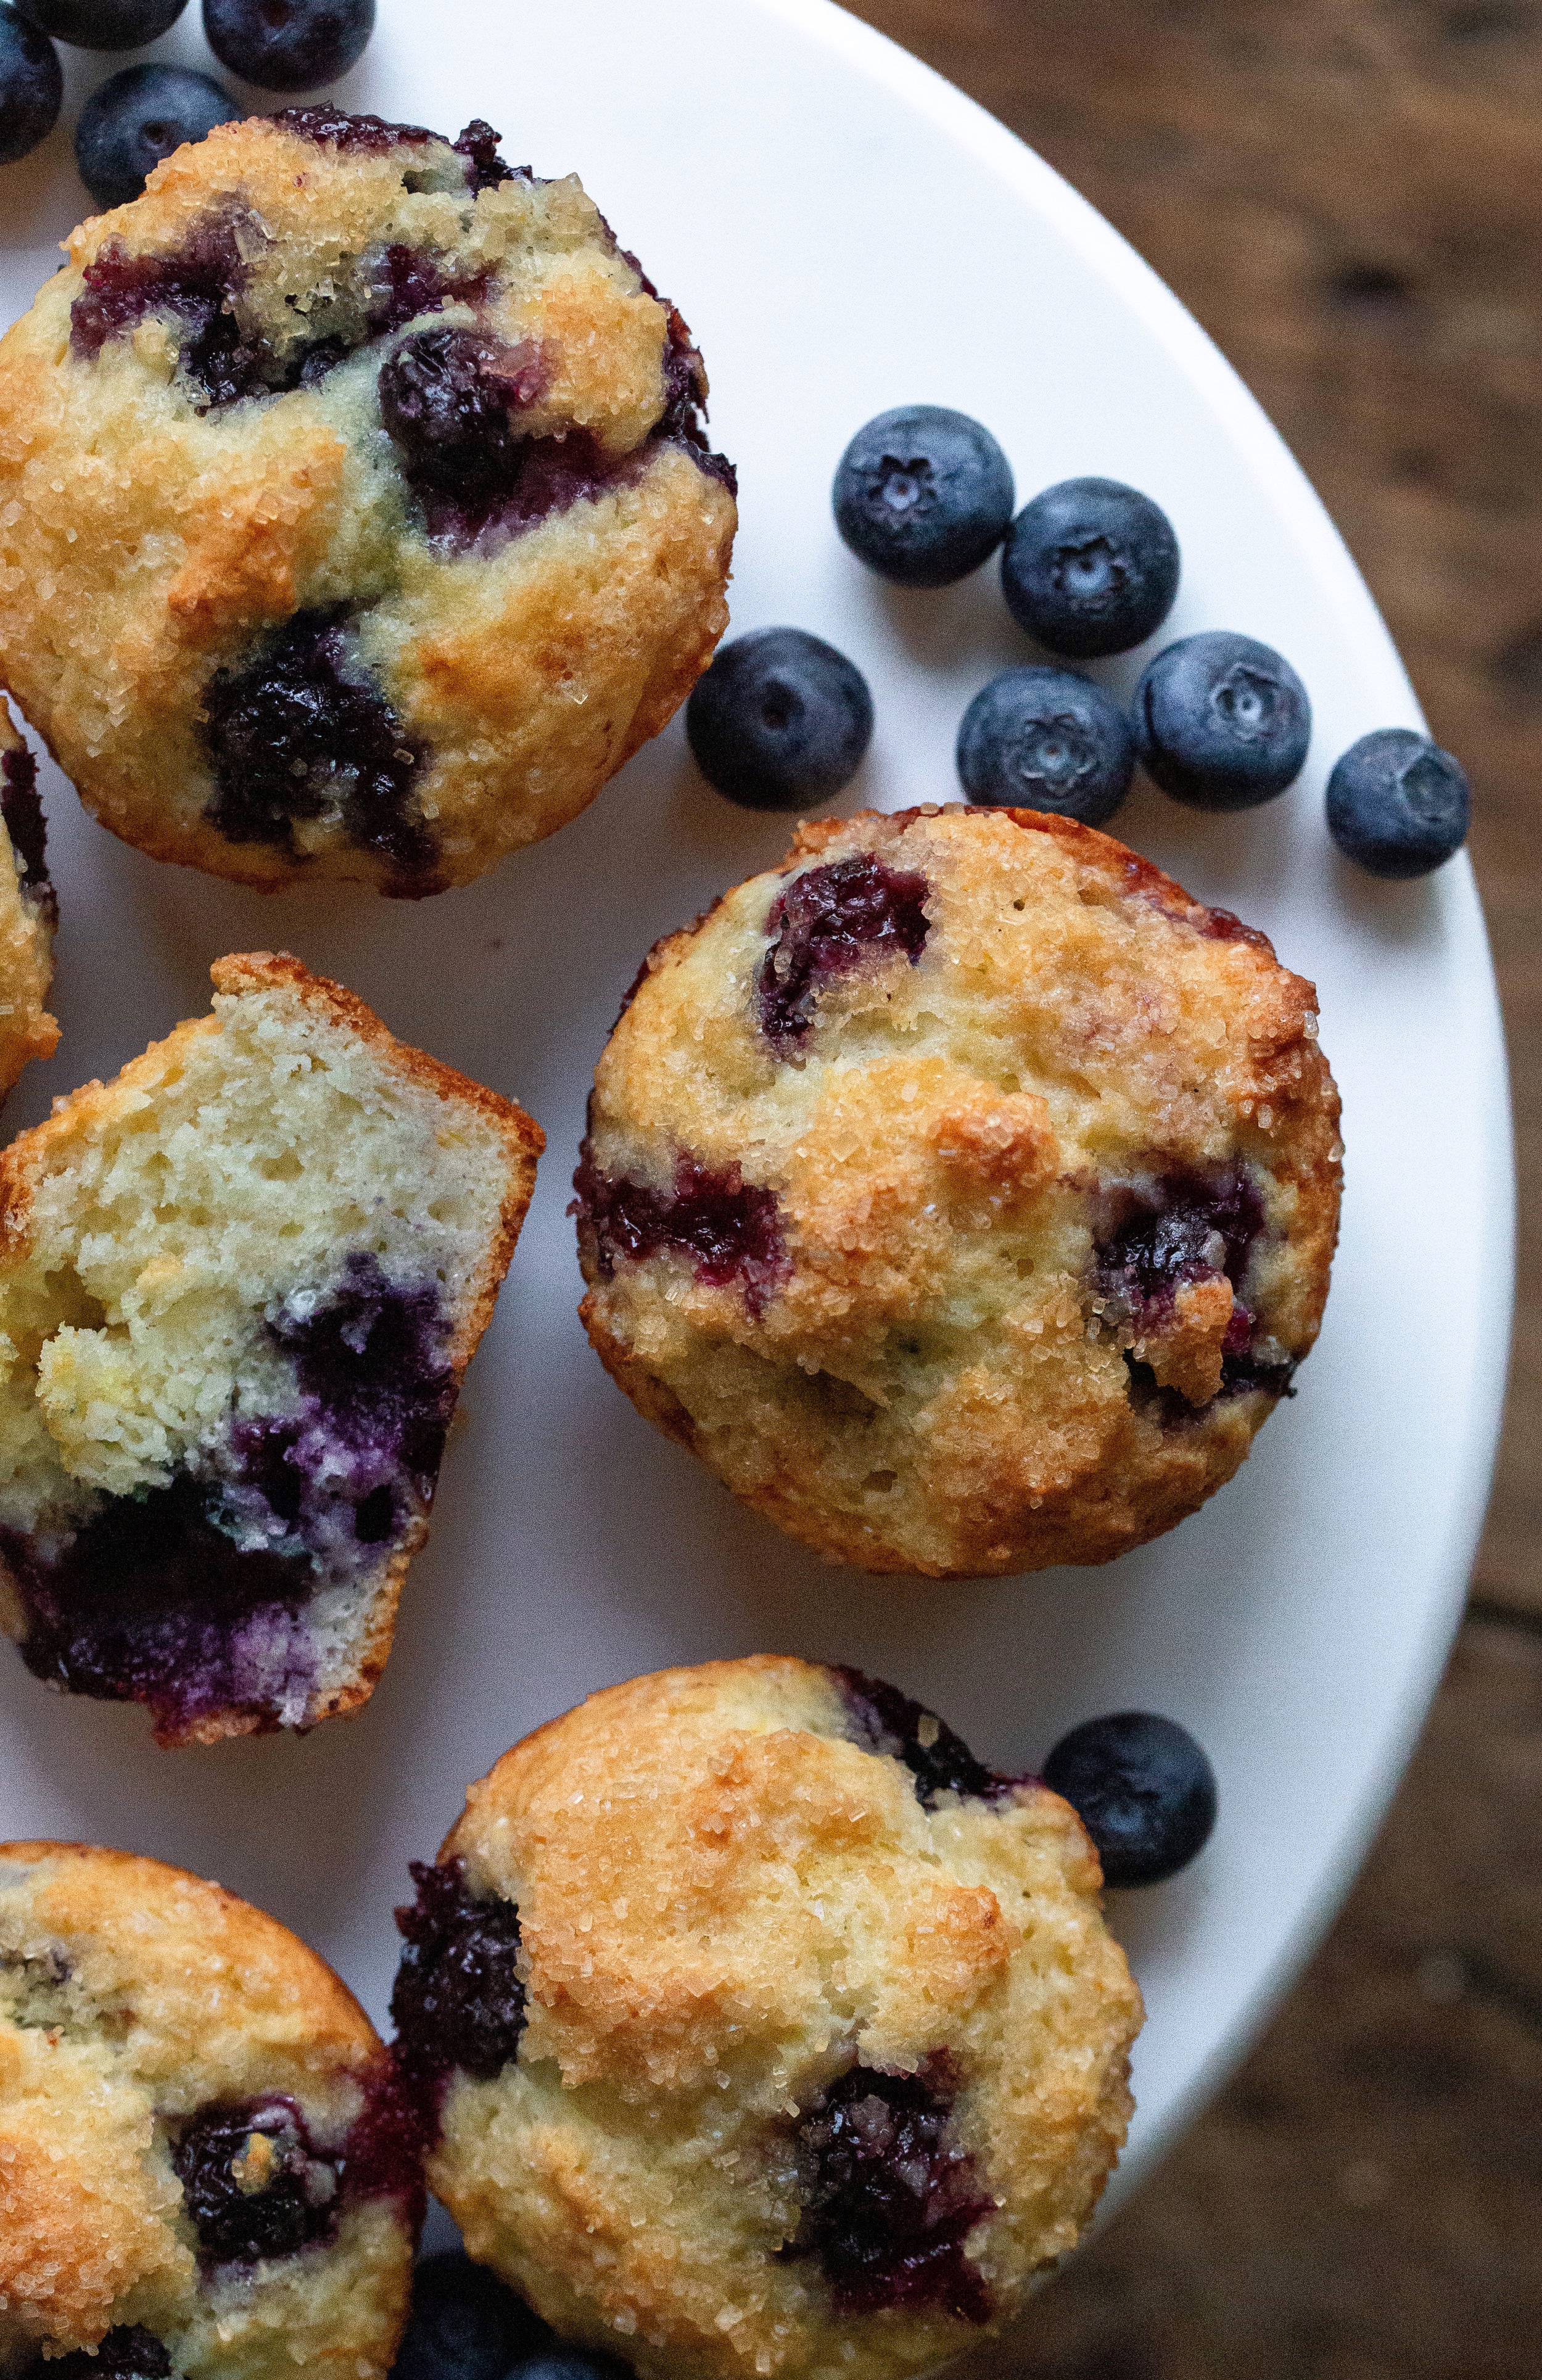
So, today I wanted to work with a produce that is best in the summertime, but can actually be utilized all year long. Blueberries. Even though blueberries are at their peak in California from May to July/August, I eat them every single day with my breakfast. Blueberry is the one fruit that I just can’t seem to enjoy for a limited amount of months; I’d rather have a mediocre blueberry than no blueberry at all. When it comes to blueberries in dishes, I’ve always been a major fan of perfectly simple blueberry muffins. The recipe I’m giving you today is that and so much more.

I really wanted to use wild blueberries for this recipe because I find that they’re SO delicious and bursting with flavor, but since it’s still wintertime, the only wild blueberries available are frozen. I attempted to use the frozen wild blueberries that I found at Trader Joe’s but they completely stained my dough - literally, I was left with blue muffins. Although the flavor was still there, I couldn’t accept the color and decided to go with plain fresh blueberries. My advice is using fresh berries is much easier even though berries aren’t at their peak of ripeness at the moment. I promise that the berries that I bought at the grocery store still made the muffins amazing, and just think how much better it’ll turn out when you make these again in the summertime.

IMG_8822.jpg

Below in the recipe, I give the optional step to make an easy glaze for the muffins. The glaze, which is simply confectioners’ sugar and fresh lemon juice whisked together, is optional because I personally think the muffins are perfect as is, especially since there’s the crunchy topping, thanks to a heavy sprinkling of turbinado sugar. But, I did make a couple of batches with the glaze and the few people I gave them to went crazy over it and thought it was mandatory that I include it in this post. So whether you’re a muffin purist like me or if you fall into the category of “more is more”, you have the option to glaze or not. Glaze half of the batch if you want!

IMG_8851.jpg

Blueberry Lemon Muffins

Yields 12 standard muffins

Recipe adapted from Smitten Kitchen

Ingredients

  • 1/2 cup granulated sugar

  • Zest of 1 large lemon

  • 5 tbsp. unsalted butter, melted and slightly cooled

  • 3/4 cup sour cream or yogurt (plain or Greek)

  • 1 large egg

  • 1 1/2 tsp. baking powder

  • 1/4 tsp. baking soda

  • 1/4 tsp. salt

  • 1 1/2 cups all-purpose flour

  • 1 1/4 cups fresh blueberries (see my note above regarding frozen)

  • 1 1/2 - 2 tbsp. turbinado sugar

    Optional: Lemon Glaze

  • 1 1/2 cups confectioners’ sugar

  • 3-4 tbsp. fresh lemon juice

Directions

  1. Preheat the oven to 425°F. Grease a 12-count muffin tin with cooking spray or butter, or line with cupcake wrappers.

  2. In a large bowl, using your hands or a whisk, massage/mix the granulated sugar and lemon zest together until fragrant (this helps release the oils in the zest). Add the melted butter, sour cream/yogurt and egg, and whisk until well incorporated. Stir in the baking powder, baking soda and salt.

  3. Using a spatula, carefully fold in the flour and blueberries until you can no longer see any dry ingredients. Do not over mix!

  4. Using a spoon or an ice cream scoop, fill each muffin cavity 3/4 full with batter. Evenly sprinkle a heaping 1/2 tsp. of turbinado sugar over each muffin.

  5. Bake for 5 minutes at 425°F, and then turn the oven down to 350°F and bake for another 18-20 minutes, or until a toothpick inserted in the center comes out clean. The blast of initial heat helps the muffins get their height.

  6. Allow the muffins to cool in the pan for a couple of minutes before taking them out. Drizzle each muffin with the lemon glaze (optional, recipe below). Muffins are best eaten on the day they are baked, but can be enjoyed for 1-2 days after if covered and left at room temperature.

Lemon Glaze

  1. In a small bowl, combine the confectioners’ sugar and the fresh lemon juice with a whisk. Start with 3 tbsp. of fresh lemon juice, and add more only to reach your desired consistency.