APPLE CRUMB MUFFINS

IMG_1715.jpg

I've gotta be honest and say that these weren't the muffins I was intending on giving you today. My plan was to make my favorite muffins but silly me forgot that the main ingredient of that kind is only available in grocery stores from about October to December. Any idea as to what I could be hinting at? CRANBERRIES!  

I really wanted to share my cranberry orange muffins (or scones!) with you, but I forgot that fresh cranberries come and go so quickly. Smart people very wisely save and freeze cranberries for when a craving occurs in the middle of the year, but I am not one of those people apparently! Also, even though fresh cranberries are obviously the way to go, I just realized that Sprouts, a grocery store with an amazing bakery and home to some delicious cranberry muffins, actually uses dried cranberries in their recipe. So maybe I'll try using dried next time and see if they are just as good as muffins with fresh cranberries.

IMG_1613.jpg
IMG_1614.jpg

But I digress. Today I offer you another great muffin option: apple crumb muffins. And yes I know that apples are usually favored in autumn when the leaves are falling and Thanksgiving is right around the corner, but I like to enjoy apples all year round. Don't we all?

These muffins are perfectly moist from the addition of any yogurt of your choosing (Greek, plain, flavored - I used nonfat plain Greek yogurt) or can be substituted with sour cream. And everyone knows that the best part of any muffin is the top, and this recipe in particular takes it up a notch with a crumb/streusel topping. I won't judge you if you make a batch of these and just eat the muffin tops... it's your life, and I may or may not do the exact same thing. 

Enjoy these muffins with your coffee first thing in the morning, and know that within time, I will be gifting you with cranberry orange muffins. 

IMG_1703.jpg


Apple Crumb Muffins

Makes 12-14 muffins

Recipe adapted from Sally's Baking Addiction

Ingredients

For the crumb topping:

  • 1/4 cup (half a stick, 60 g) unsalted butter, melted and slightly cooled

  • 1/3 cup (67 g) brown sugar (light, golden, or dark works), packed

  • 1 tbsp. (15 g) granulated sugar

  • 1 tsp. cinnamon

  • 2/3 cup (84 g) all-purpose flour

For the muffins:

IMG_1798.jpg
  • 1/2 cup (one stick, 115 g) unsalted butter, room temperature

  • 1/2 cup (100 g) brown sugar (any kind), packed

  • 1/4 cup (50 g) granulated sugar

  • 2 large eggs, room temperature

  • 1/2 cup (120 g) yogurt or sour cream, room temperature

  • 2 tsp. vanilla extract

  • 1 3/4 cup (220 g) all-purpose flour

  • 1 tsp. baking soda

  • 1 tsp. baking powder

  • 1 tsp. cinnamon

  • 1/2 tsp. salt

  • 1/4 cup milk (any kind), room temperature

  • 1 3/4 cup peeled and chopped apples (any variety you want, I used Honeycrisp) - about 2 small apples

Directions

  1. Make the crumb/streusel topping. In a small bowl, mix together the melted butter, both sugars, and cinnamon. Fold in the flour with a spatula until incorporated. Set bowl aside.

  2. Preheat oven to 425°F. Grease a 12-count muffin tin with cooking spray or butter, or line with cupcakes wrappers. Depending on the size of your muffins, you may need to make the muffins in batches.

  3. With a hand mixer or in the bowl of a stand mixer fixed with the paddle attachment, cream the butter and both sugars until fluffy, a couple of minutes. Scrape down the sides of the bowl. Add the eggs, one at a time, allowing each to incorporate before adding the next. Add the vanilla extract and yogurt (or sour cream), and mix until combined. Scrape sides of bowl again.

  4. In a separate bowl, whisk the flour, baking soda, baking powder, cinnamon, and salt together. Add this mixture to the wet ingredients, along with the milk and mix on low until just incorporated. Fold in the chopped apples.

  5. Using a spoon or an ice cream scoop, fill each muffin cavity to the brim with batter. Sprinkle the crumb mixture over the top of each muffin, making sure to press down on the crumbs so they will stick while baking.

  6. Bake for 5 minutes at 425°F, and then turn the oven down to 350°F and bake for another 15-17 minutes, or until a toothpick inserted in the center comes out clean. The blast of initial heat helps the muffins get their height.

  7. Allow the muffins to cool in the pan for a couple of minutes before taking them out. Muffins are best eaten on the day they are baked, but can be enjoyed for 1-2 days after if covered and left at room temperature.


DUTCH BABY PANCAKE

IMG_0312.jpg

On a Friday afternoon a couple of years ago, I was partaking in one of my favorite weekly traditions: watching a marathon of Diners, Drive-Ins and Dives ("Triple D" for the super fans) on the Food Network. Any fan of the Food Network knows that every Friday starting at 2pm Guy Fieri, the host of Triple D, graces your TV set for about 12 hours straight. Depending on my relationship status, I would watch somewhere between 2 episodes and... 10 (maybe even more, ugh). I've been a huge fan of the show for as long as its been airing and I literally never get sick of watching it, even if I've already seen the episode numerous times. A lot of people don't really take Guy seriously or think that I'm being ironic by saying that I like him, but I genuinely think he's a great guy (pun intended) with an awesome personality. 

IMG_0239.jpg

My point of bringing up Triple D is that it is where I was introduced to the Dutch baby. In one episode, Guy is visiting a diner in Berkeley, California where they specialize in all kinds of pancakes but their signature is a souffle pancake. Guy had never heard of such a thing and asked the diner patrons if they had either.,, they hadn't but one diner said it had reminded her of a Dutch baby. Even though the souffle pancake looked pretty interesting, I immediately looked up what a Dutch baby was and found myself baking it that very same weekend. Thanks, Guy!

IMG_0301.jpg

A Dutch baby, also known as a German pancake, is essentially a big puffed pancake that is cooked in the oven in a skillet. In my opinion, I actually think it is easier to make than a whole batch of pancakes on the stovetop - with a Dutch baby you don't have to keep an eye on it as much. What's also great about it is that you can customize it to your own liking with not only how you finish it (powdered sugar, mixed berries, jam, maple syrup. lemon juice, etc.), but you can also add fruit, nuts, chocolate chips, etc. to the batter just like you would with regular pancakes. I made a peach Dutch baby last summer and it was nothing short of amazing.

IMG_0298.jpg

I wanted to give the recipe for a Dutch baby now because like I said in my previous post, I'm focusing on Mother's Day-friendly dishes this week. A Dutch baby is absolutely perfect if you are planning on throwing a brunch together for the mother figure in you life. Each Dutch baby is enough to serve about 4 people, so it would be a perfect sweet addition to a quiche, eggs Benedict, etc. Much like a pancake, this dish is best eaten immediately so I would only suggest making it if you plan on serving it straight from oven to table. But if you plan on trekking to your mom's house for the holiday, just make your mom go watch an episode of the Real Housewives or Triple D (we've come full circle here) and you'll be surprising her with a beautiful, puffy pancake by the time the show is over.  

Note for the Dutch baby: in order to ensure that your pancake puffs up significantly, have your milk and eggs at room temperature. The best part of a Dutch baby (besides eating it) is pulling it out of the oven to see how much its risen. Each one is unique looks-wise, but always has the same delicious flavor. 

IMG_0345.jpg

Dutch Baby Pancake

Serves about 4

Recipe adapted from NYT Cooking

Ingredients

IMG_0294.jpg
  • 1/2 cup milk (whole or 2%), room temperature

  • 1/2 cup all-purpose flour

  • 3 large eggs, room temperature

  • 1 tablespoon sugar

  • 1/2 tsp. vanilla extract

  • Pinch of nutmeg

  • 2-3 tbsp. unsalted butter

  • Maple syrup, mixed berries, confectioners' sugar, jam, lemon juice, to finish (all good options, choose whatever you want!)

Directions

  1. Preheat oven to 425°F.

  2. In a bowl, whisk together the milk, flour, eggs, sugar, vanilla extract, and nutmeg. Set aside.

  3. Place the butter in a skillet (10-12 inches in size) and put it in the oven until the butter is melted (careful not to let it burn).

  4. Pull the skillet out and immediately pour the pancake batter over the melted butter and put back into the oven. Bake for 15 to 20 minutes, or until the pancake is golden brown.

  5. Finish with your toppings of choice - maple syrup, berries, confectioners' sugar, jam/preserves, lemon juice, etc. Enjoy!


BAKED LEMON GLAZED DOUGHNUTS

IMG_9035.jpg

I have a pretty funny relationship with doughnuts. Growing up, my mom would have these huge garage sales (we're talking hundreds of clothes for sale) and my sister, Tianna, and I would have to get up at the crack of dawn to help my mom put up signs around the neighborhood and drag everything from the garage to the driveway. My sister and I absolutely hated doing it, and so the only way my mom could get us to help was by treating us early on with a box of doughnuts from Yum Yum Donuts or Winchell's. Tianna and I were pretty lazy kids, but when food was promised we happily obliged (somewhat).

IMG_9208.jpg
IMG_8887.jpg

This association of doughnuts with garage sales has remained in my mind ever since and so I never really crave doughnuts unless for *special morning occasions* - getting up early for flea market excursions or before long road trips. I honestly beg my mom all the time to have garage sales solely for the excuse to eat a box of doughnuts. Yes, I know I can go buy a box of doughnuts whenever I please but it just wouldn't be the same!

IMG_9005.jpg

My favorite kind of doughnut has been and always will be a Long John, the yeast risen unfilled doughnut bar with chocolate icing. With that said, I have never attempted to re-create Long Johns at home, or any fried doughnuts for that matter. I guess I've just been a little scared of the hot oil and making a greasy mess in my kitchen. Best to leave the frying to the professionals (for now!).

IMG_9081.jpg

But when it comes to baking doughnuts, I have no problem whipping up a batch whenever Alex has a hankering for a slightly healthier version of doughnuts. What makes baking doughnuts so much easier than frying is 100% due to the invention of the doughnut pan, With this amazing contraption, you don't have to worry about cutting out perfect circles or deal with removing the centers; the hard work is done for you. I will say that baked doughnuts do taste very different than fried doughnuts in the sense that they taste more like cake, but listen to me when I say that they are still very delicious and will satiate your doughnut cravings.

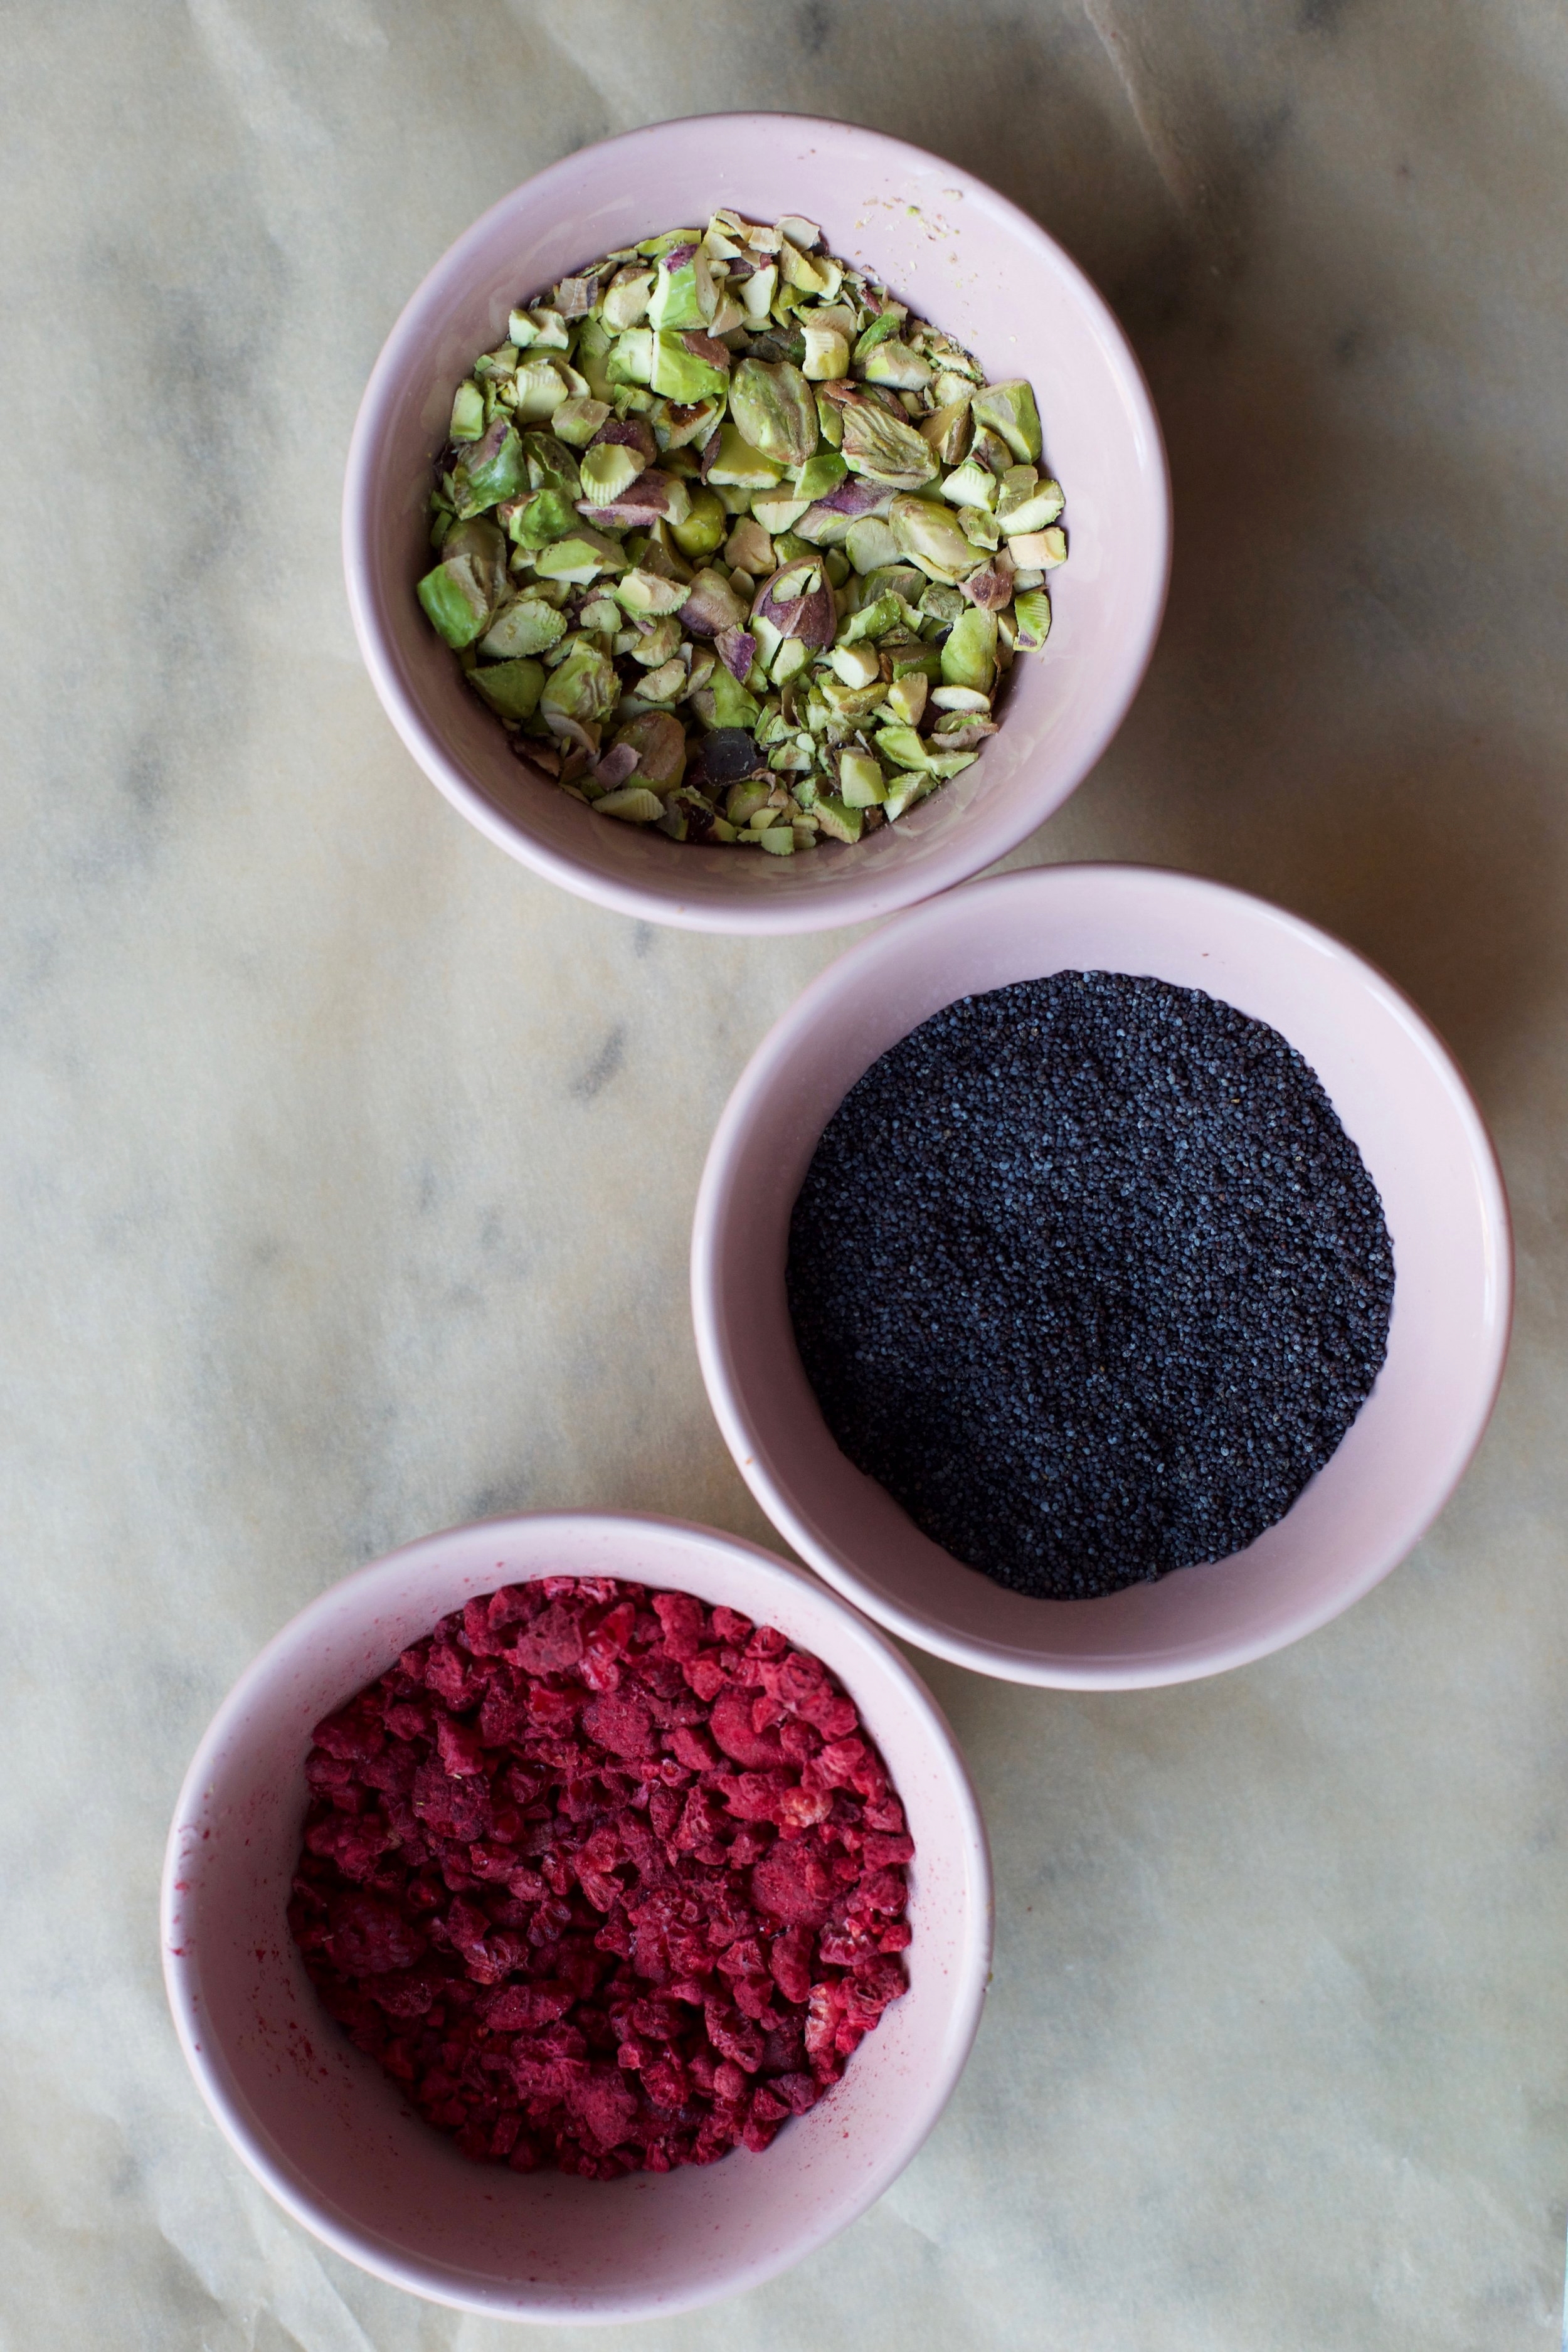
I've made a variety of baked doughnut over the years and one of my favorites was a lemon poppyseed recipe. This time around I decided to simply do a lemon doughnut with a lemon glaze and leave it up to the baker on which topping to add: pistachios, freeze dried raspberries (strawberries will work as well), or poppyseed. All three of these toppings compliment lemon very well and give nice texture to the light and cakey pastries. Feel free to mix it up and use multiple toppings (pistachios and freeze dried raspberries look gorgeous together). 

IMG_9193.jpg

Baked Lemon Glazed Doughnuts

IMG_9037.jpg

Recipe adapted from Williams Sonoma Taste

Yields 14-16 doughnuts

Ingredients

For the doughnuts:

  • Nonstick cooking spray

  • 1 1/2 cups all-purpose flour

  • 1/4 tsp. baking soda

  • 3/4 tsp. baking powder

  • 1/4 tsp. salt

  • 1/3 cup milk (any kind will work)

  • 1/3 cup buttermilk

  • Zest and juice from 1 lemon

  • 1/2 cup sugar

  • 6 tbsp. unsalted butter, room temperature

  • 1 large egg, room temperature

  • 2 tsp. vanilla extract

For the lemon glaze:

  • 2 cups confectioners' sugar

  • 4 tbsp. unsalted butter, melted

  • 2-4 tbsp. milk (any kind)

  • 2 tbsp. lemon juice

  • 1 1/2 tsp. vanilla extract

  • Chopped roasted pistachios, crumbled freeze dried raspberries, and/or poppyseed, to finish (optional)

Directions

  1. Preheat oven to 375°F. Spray doughnuts pan(s) with nonstick cooking spray. In a large bowl, whisk together the flour, baking soda, baking powder and salt.

  2. In a measuring cup, combine milk, buttermilk, and lemon juice.

  3. In the bowl of a stand mixer fitted with a paddle attachment (or in a large bowl that you will use with your hand mixer), mix sugar and lemon zest by hand until combined and very fragrant. Add the butter and beat on medium-low speed until light and fluffy, about 3 minutes. Add the egg and vanilla extract and mix again for about 1 minute. Scrape down the sides of the bowl.

  4. With the stand mixer on low speed, alternate between adding the flour mixture and liquid mixture to the stand mixer bowl in 3 additions, starting and ending with the flour. Mix until well combined.

  5. Spoon the batter (it will be pretty thick) into a large Ziploc bag. Cut off one of the bottom corners of the bag and pipe the batter into the doughnut cavities, filling no more than 2/3 of the pan. This step is crucial because if you just use a spoon to fill the cavities, the doughnuts will come out of the oven looking lumpy! Use this video for guidance on how to pipe with a Ziploc bag.

  6. Bake in the oven for about 10 minutes, rotating halfway through, until the edges are lightly brown. Continue filling doughnut cavities and baking until all batter is used up. Let the doughnuts cool in the pan for a couple of minutes before transferring to a wire rack lined with parchment paper. Allow doughnuts to cool while making the glaze.

  7. Make the glaze: in a large bowl, whisk all glaze ingredients together. For a thicker glaze, use 2-3 tbsp. of milk (this is what I did); add 1-2 tbsp. for a thinner glaze.

  8. Dip one side of the doughnut into the glaze and immediately top with either chopped pistachios, freeze dried raspberries, or poppyseed.